sam.basye
New member
I have decide that its now time to start a thread for my new build!
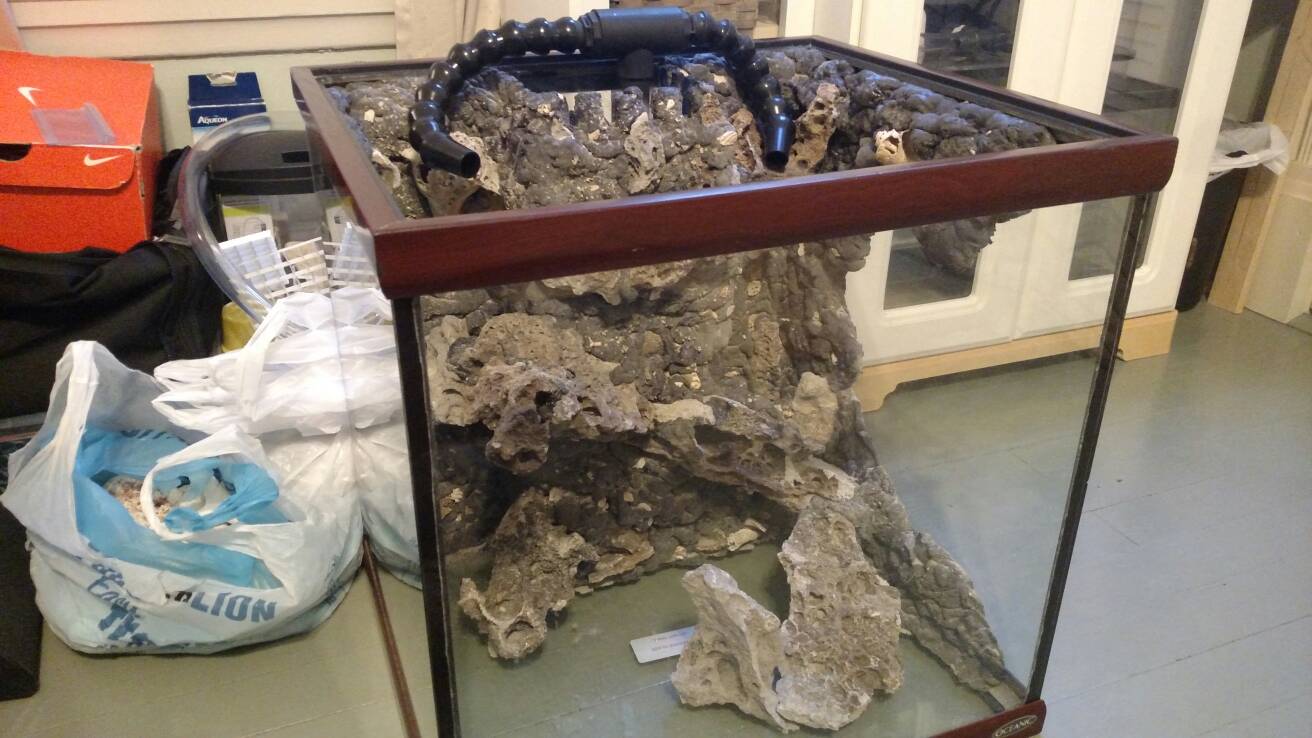
I recently bought a used 30 gallon cube Oceanic glass aquarium to replace my potentially leaky Aqueon 26g bow front aquarium that has been set up for the past 3 years. This was my first attempt at a reef tank and I wanted to do something a little different. I created a foam wall. I saw a thread on a foam wall before I set up the tank and knew that's what direction I wanted to go.*
I have since created a thread detailing and highlighting the do's and don'ts of creating your very own foam wall. So technically, this will be my third foam wall build. I decided not to make this one as in depth as the other two regarding how its made, so I have included both links if you are interested in learning more.
Any all all questions are welcome via any of the three threads!
26g Foam wall build:
http://www.reefcentral.com/forums/showthread.php?t=2457621
Complete How-To:
http://www.reefcentral.com/forums/showthread.php?t=2611894
**Pictures are still viewable on mobile devices using Tapatalk. Thank Photo bucket for bending me over it's knee...
30 cube Build
This tank has a fun story!
I determined the 26g had a slight leak, but I had no idea where it was coming from. Slight as in the bottom plastic rim randomly collecting water. Not sure where it was coming from or if it was the hob skimmer overflowing.. don't know.
This prompted my search for a new tank.
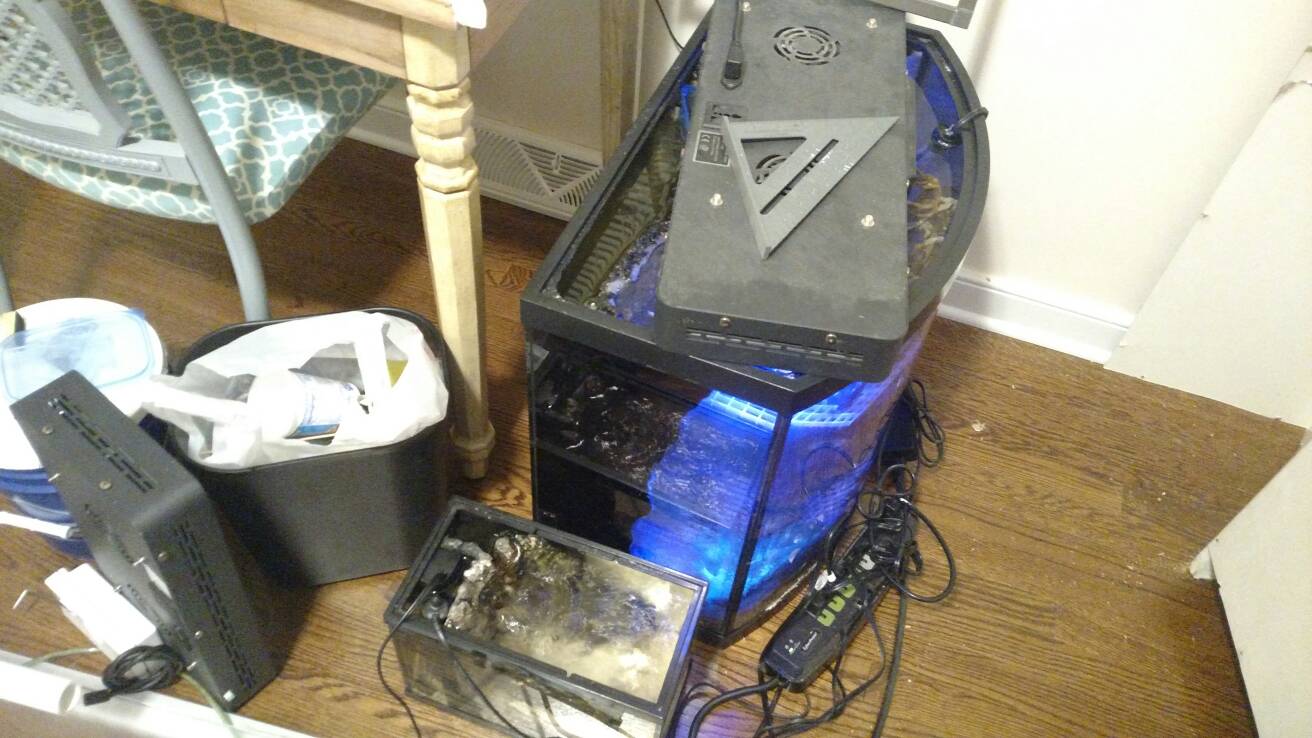
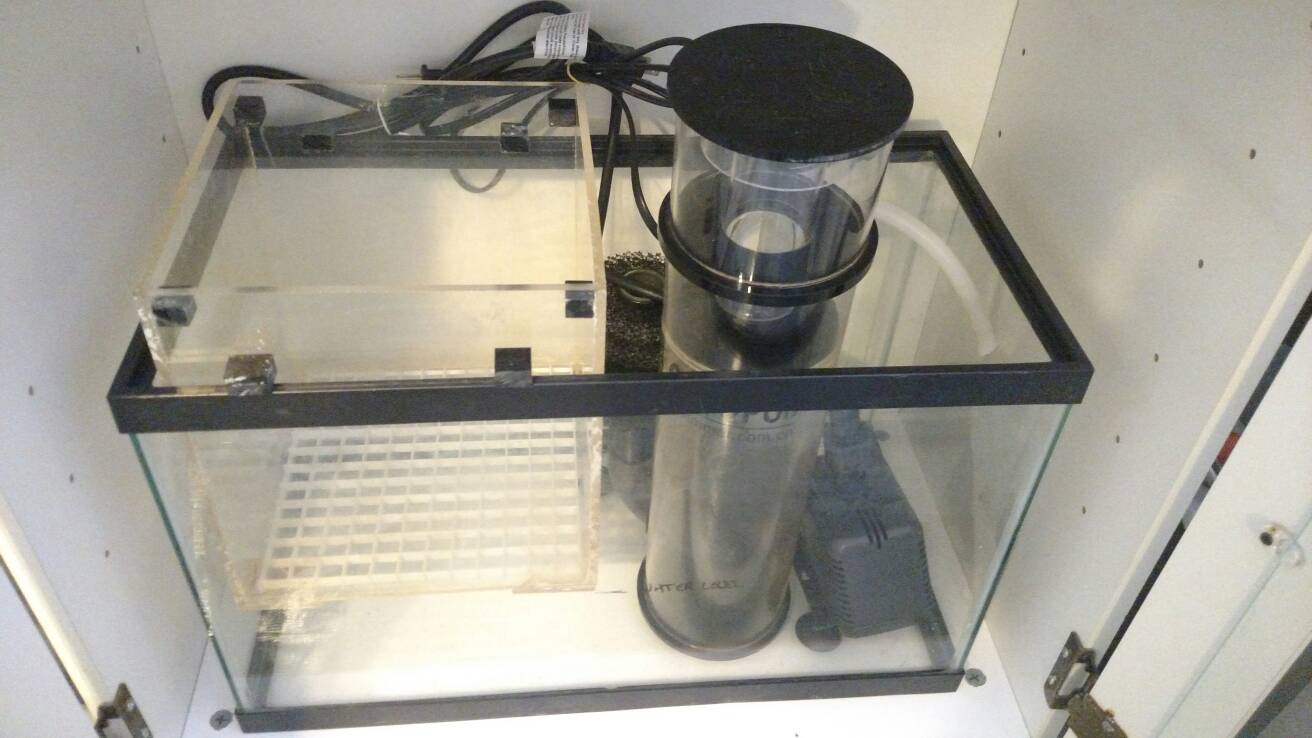
I had been searching the Craigslist for a tank when I stumbled upon a drilled Oceanic 30g cube that came with a 10g sump, return pump, Reef Octopus nw10 skimmer, UV sterilizer, trickle filter and a couple pumps. A stand was also included although in rough shape.
Here's the fun part!
I live in Lynchburg, Va and the tank I found was located in Richmond, Va which is about a 2 hour drive one way. I really didn't want to have to drive 4 hours to get it and bring it back, sooo I flew there to pick it up and bring it back!
For those who don't know, I am a flight instructor and what better way than to have my student fly me, especially since we were going to KRIC anyways. The guy and his son selling the tank were only able to meet the evening we had planned ahead of time and when the time came, a big storm was starting to roll into Lynchburg from the West (Richmond is to the East). There was some heavy precipitation and thunderstorms that were soon to hit and my student and I decided to go for it. We split the tasks during the preflight and got the plane started and ready to go in record time, got our taxi clearance, and we were able to takeoff and head towards Richmond with the big storm behind us!
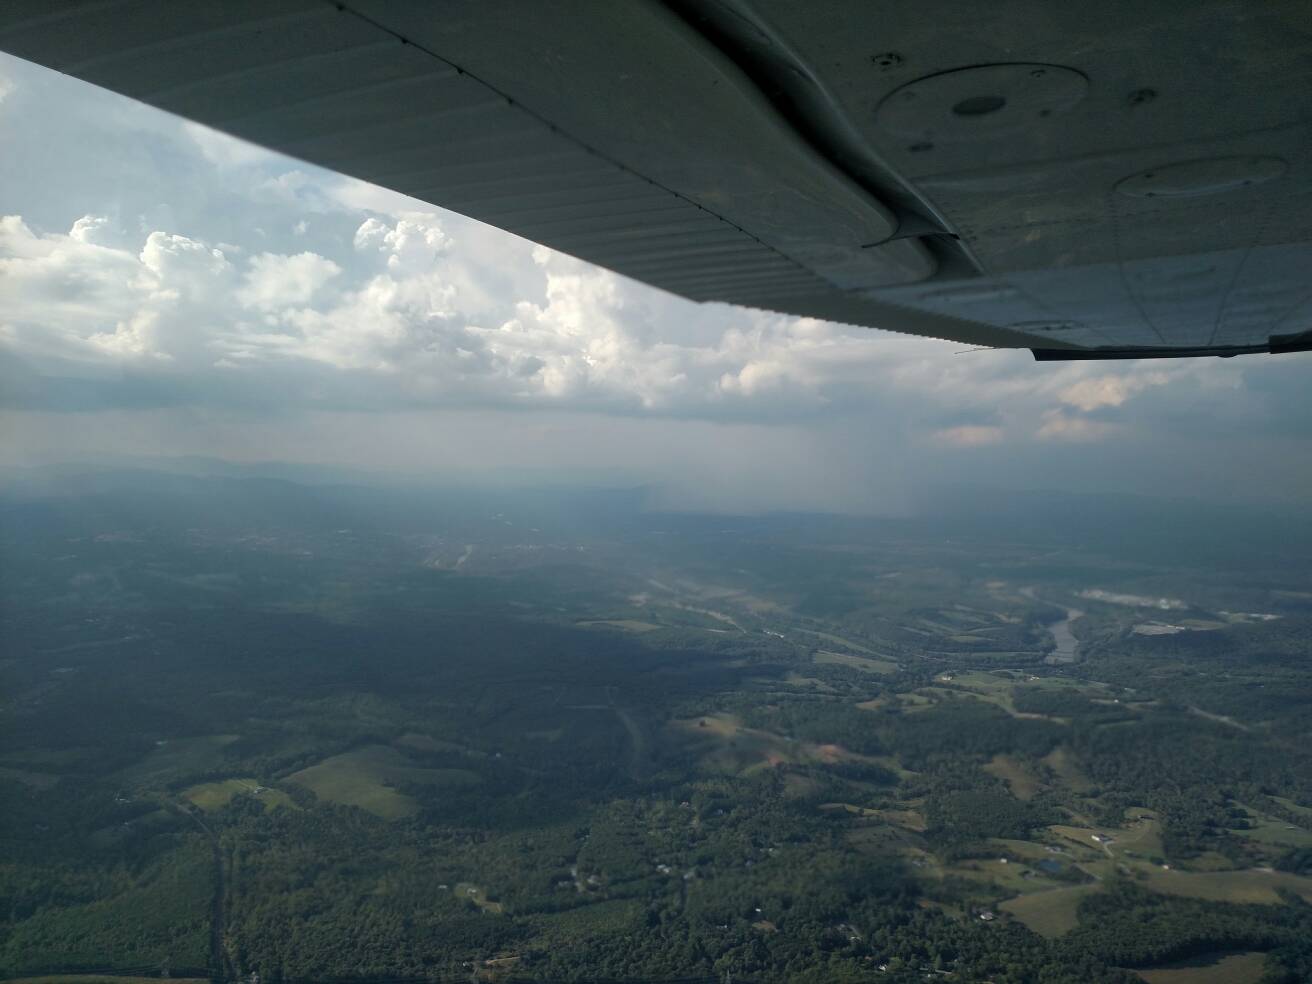
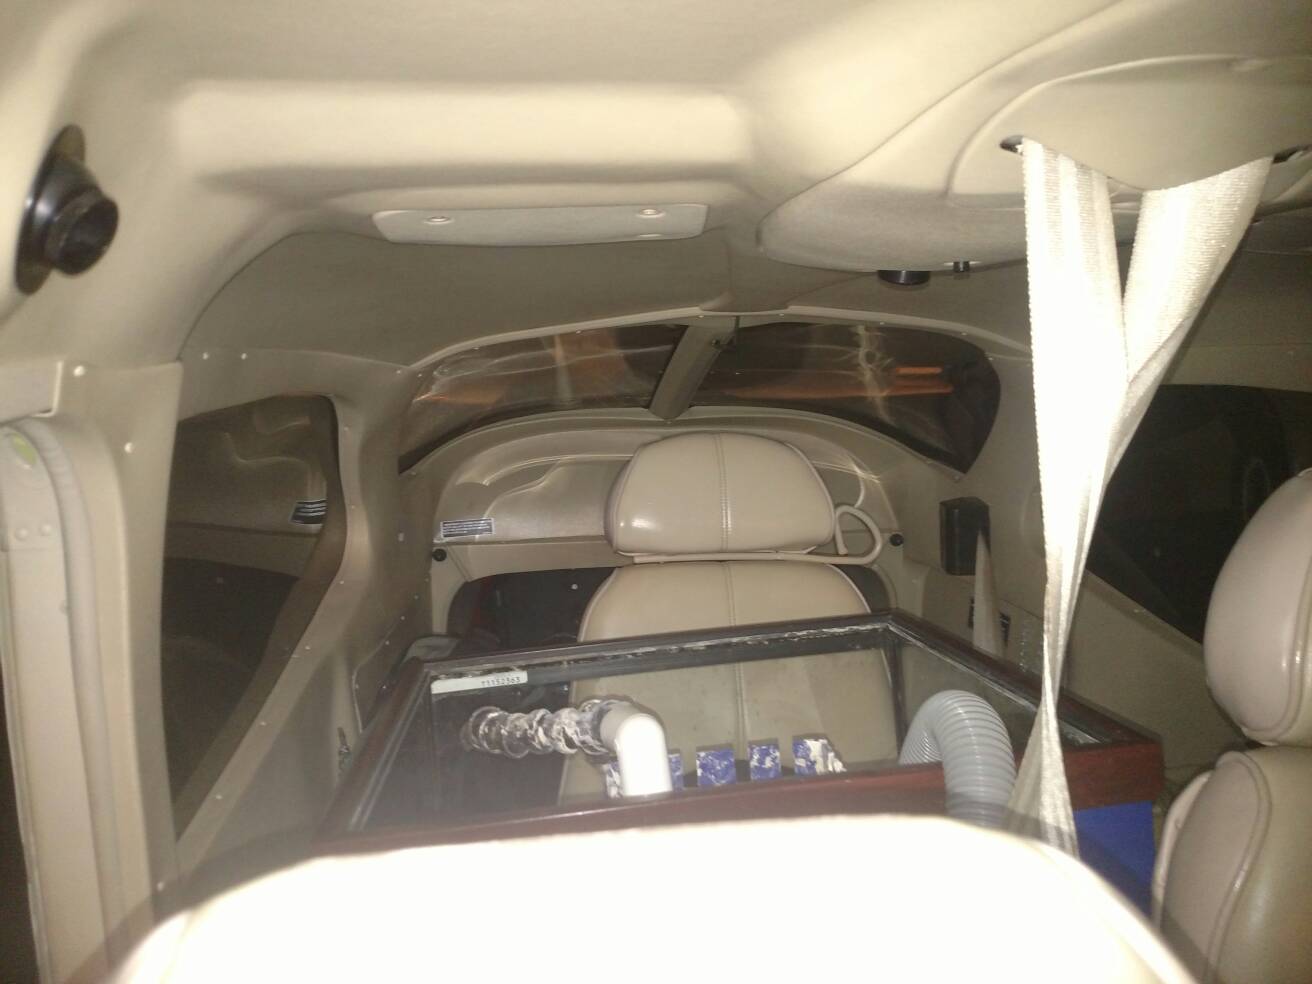
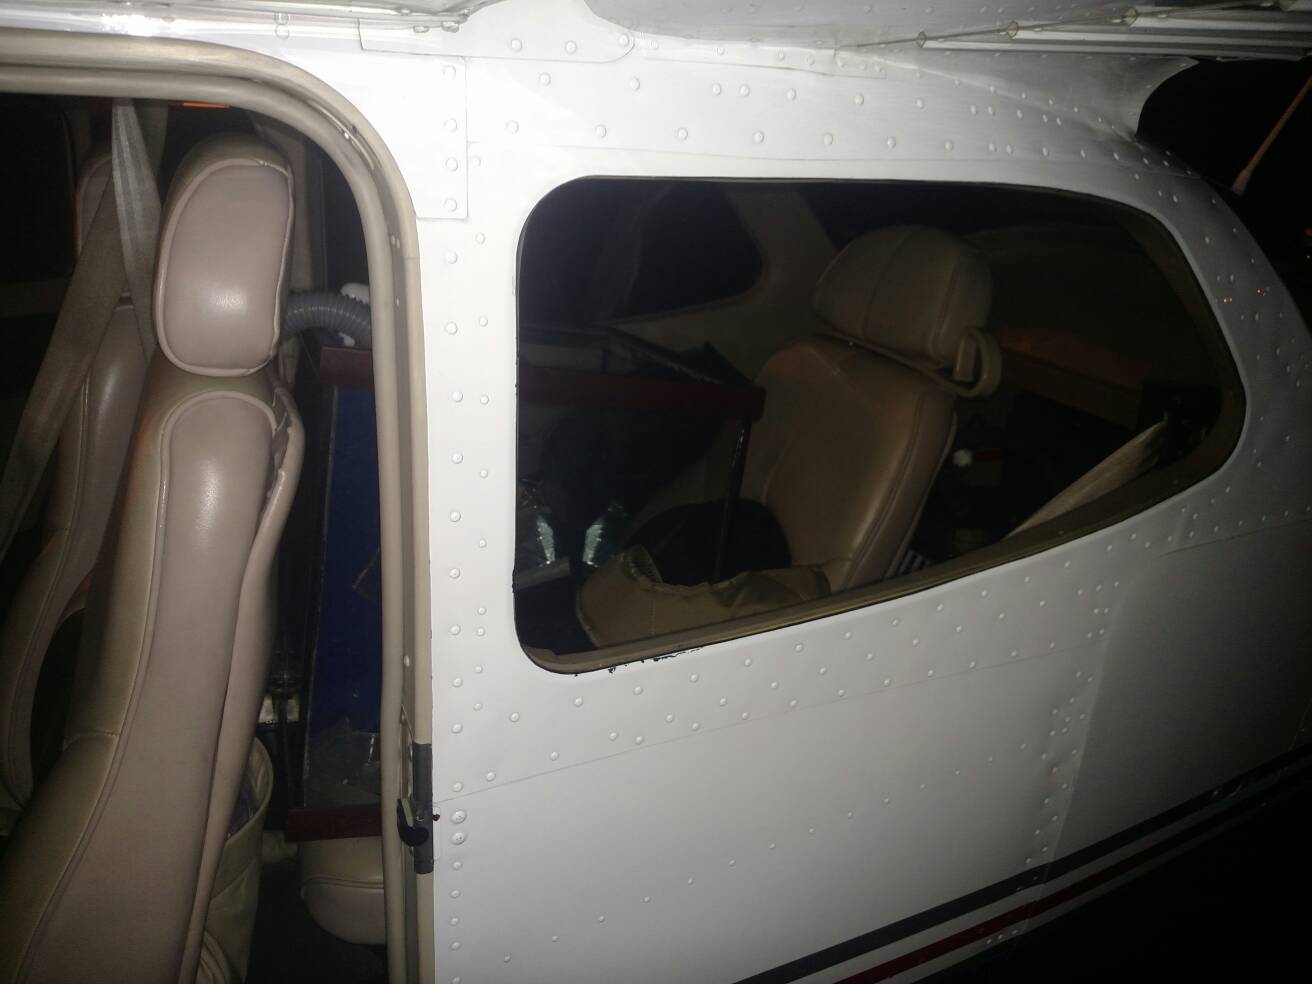
We made it to the airport as planned and we were able to get a crew car (free courtesy car offered by the General Aviation building we parked at). We got the Mercedes instead of the Honda! We then drove to the predetermined parking lot where I met the man and his son, who's tank it was, inspected the tank and equipment, paid, and started loading it into the Mercedes. Then it was time to load the stand into the trunk... It didn't fit! We ended up leaving the stand behind since it didn't fit and we had doubts it would even fit in the plane. We drove off with a smile on my face and got something to eat before returning to the plane. I asked the receptionist when we got back if I could drive out to the plane to load a fish tank and she said yes with a smile. I'm sure that was a first. We managed to cram it through the doorway behind the front seat and set in the rear seat of a Cessna 172 for the flight back. All the other equipment and the sump went in the rear baggage area and off we went!
Fast forward a month with the tank sitting on the floor in my small 450 sq ft house... my wife wanted the accumulating pile of fish stuff to move off the floor. SO what was my solution? MOVE! haha
It was about time for us to move into something bigger anyways. Now we are renting a 2 bedroom house with a full basement! It's going to be nice having a washer/dryer, driveway, and central heat/air. We're almost completely moved in now and the fish room/spare bedroom without a bed, is starting to get organized, well.. I still have fish stuff everywhere all over the floor
The move was definitely sketchy... I ended up getting most coral removed from the wall of the 26g and into baggies or directly placed into one of the three 5g buckets for transport. I couldn't get the RBTA's to let go so they ended up dangling for over an hour out of the water. I would try to splash them to keep them wet periodically. Being 30 degrees outside didn't help! I put it into high gear when I started loading all the live critters into the back of the 4Runner. Then the 10 min ride to the new house and the scramble to get everything inside and wet again. The RBTA's were cold and very dry when I sat the tank on the floor of the spare bedroom. I then dumped the 15g in with the bags of coral. I now had to quickly mix 10g of new saltwater for the remainder of the tank (nems still out of water). I finally got everything set up temporarily and everything, including the nems, made it and have bounced right back!
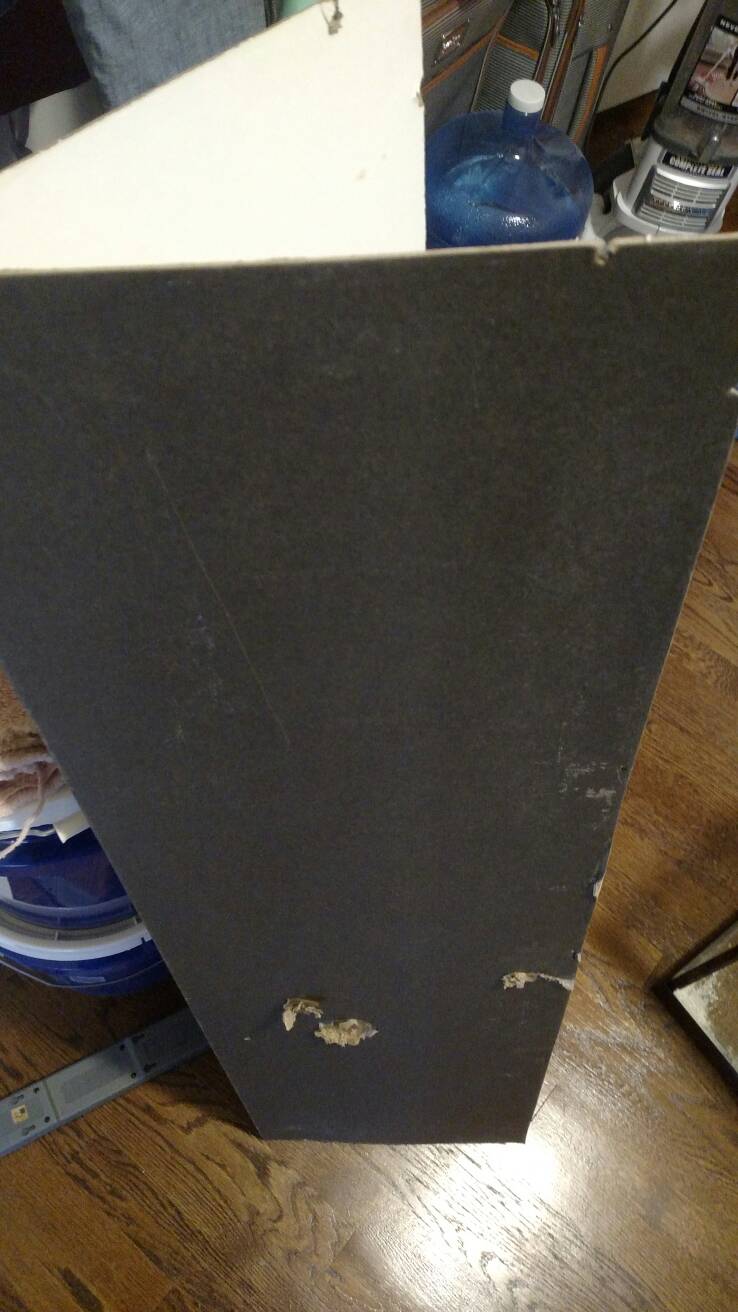
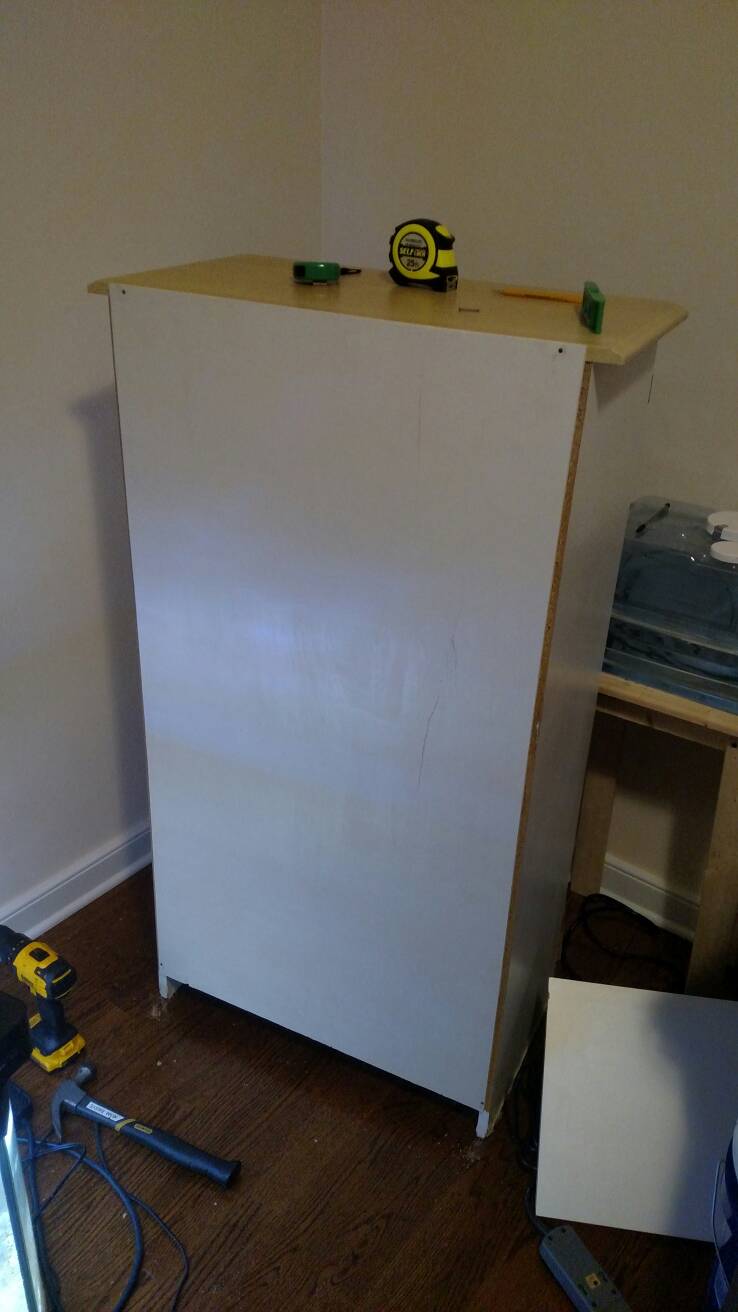
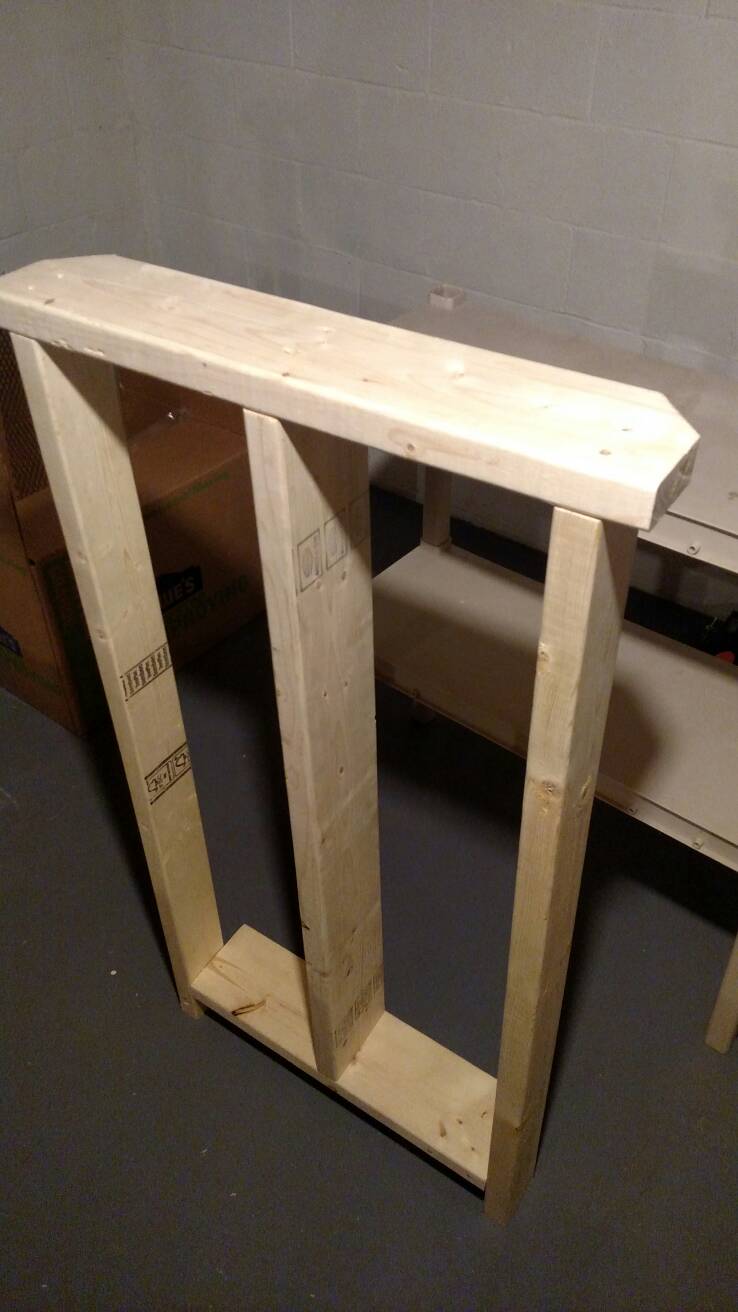
The stand is being redone and upgraded with a plywood backing and a new rear extension fame in the back. I'll need to come up with a new light hanging rig since I bought another 16" ever grow fixture because the 24" is too wide for the 30 cube.
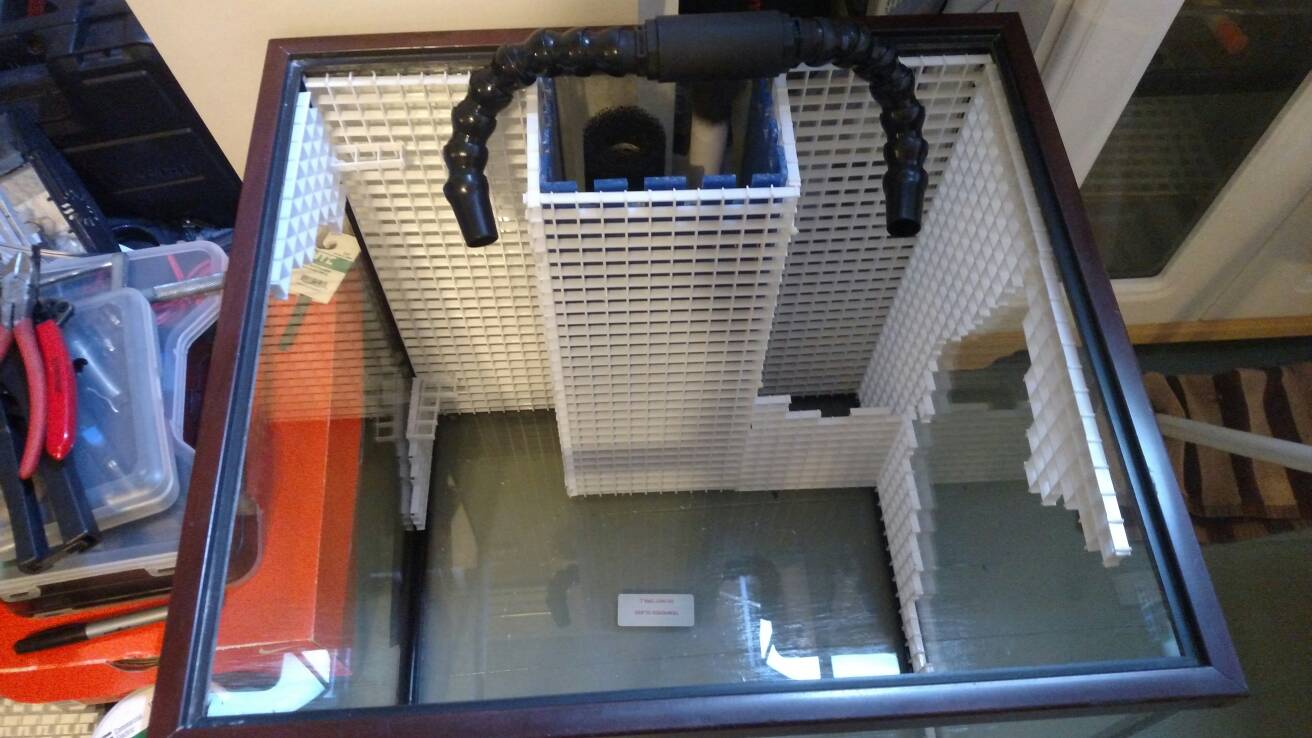
The 30 cube has a custom overflow installed new by an aquarium shop in Richmond that the guy I bought it from, bought brand new along with all the equipment
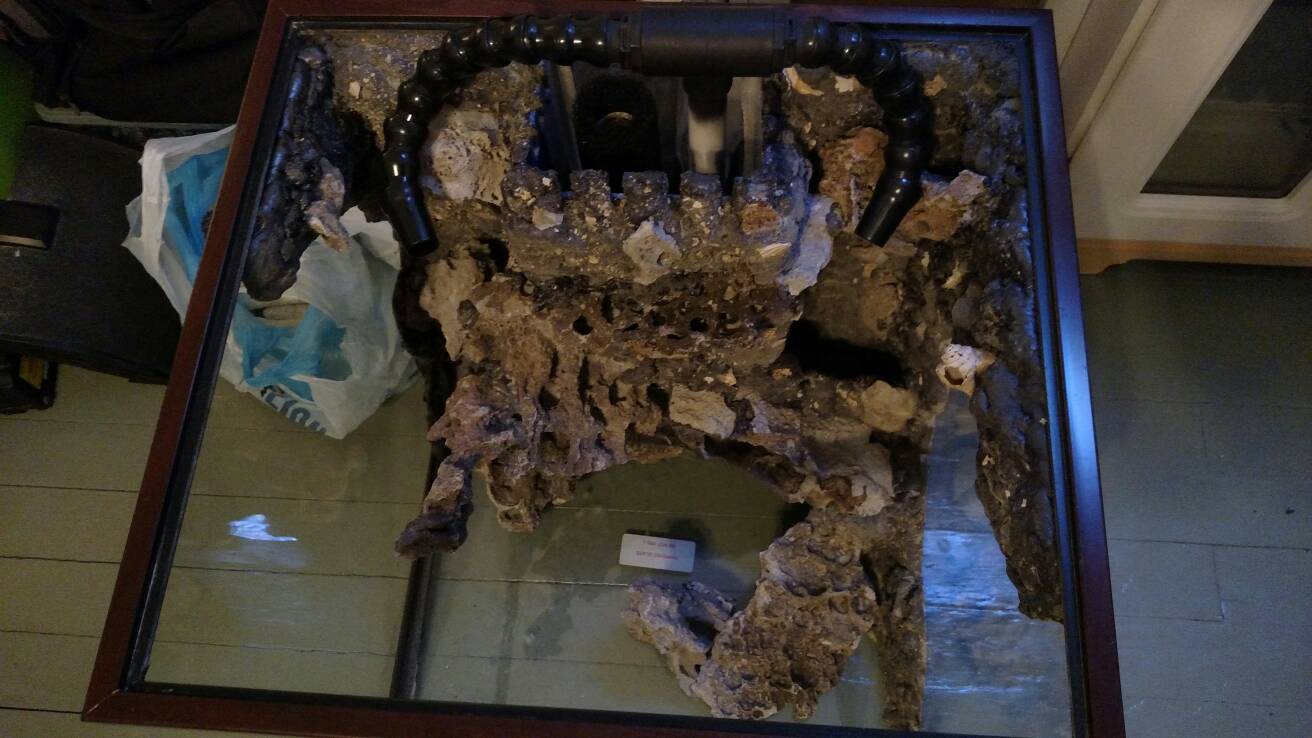
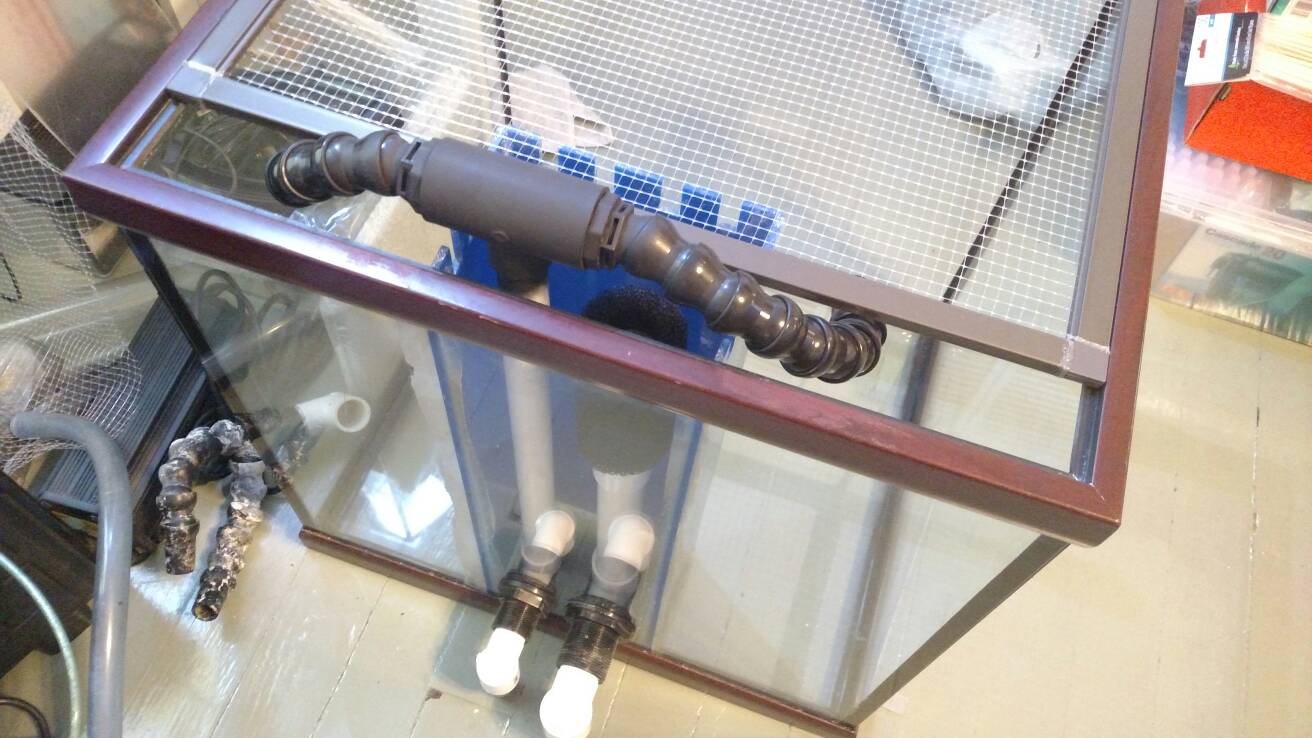
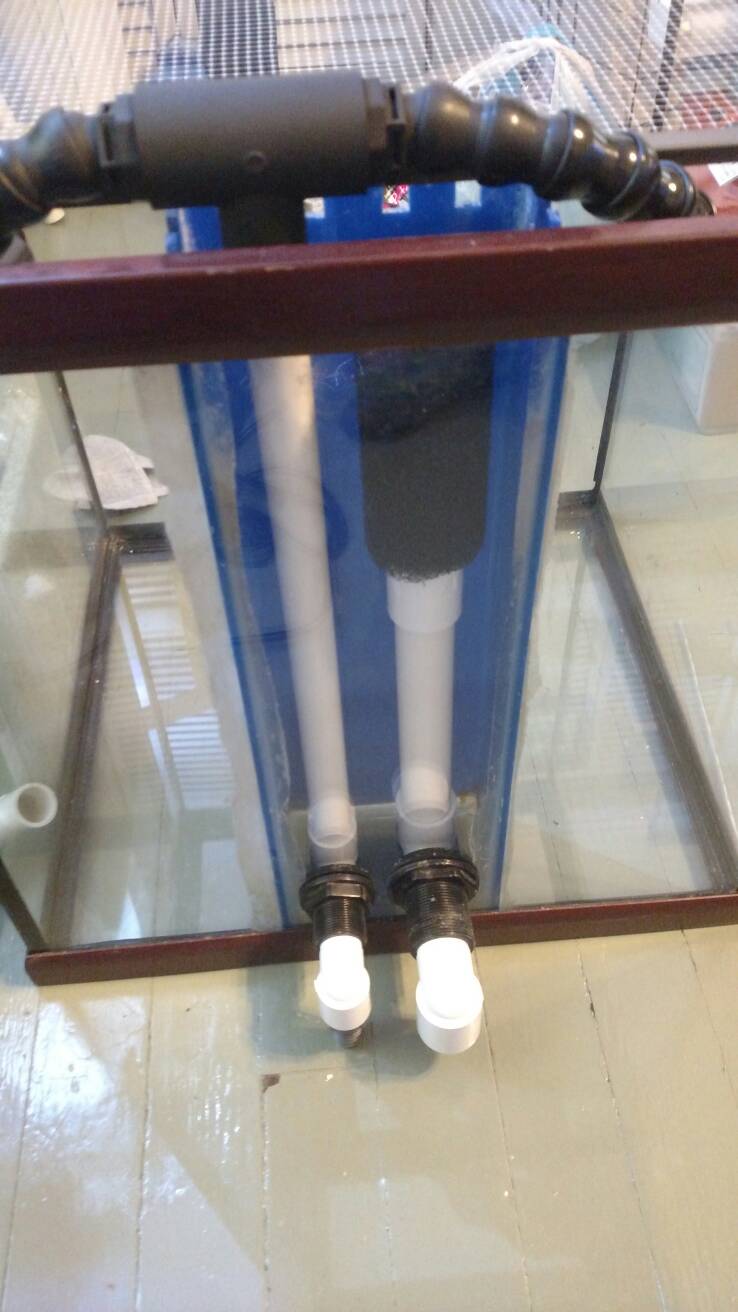
I decided to ditch the trickle filter for a filter sock. I'll be testing the flow with the UV sterilizer to see if I want to keep that on not. I'll be running two 3/4" discharge nozzles up top and my MP10 on the right side.
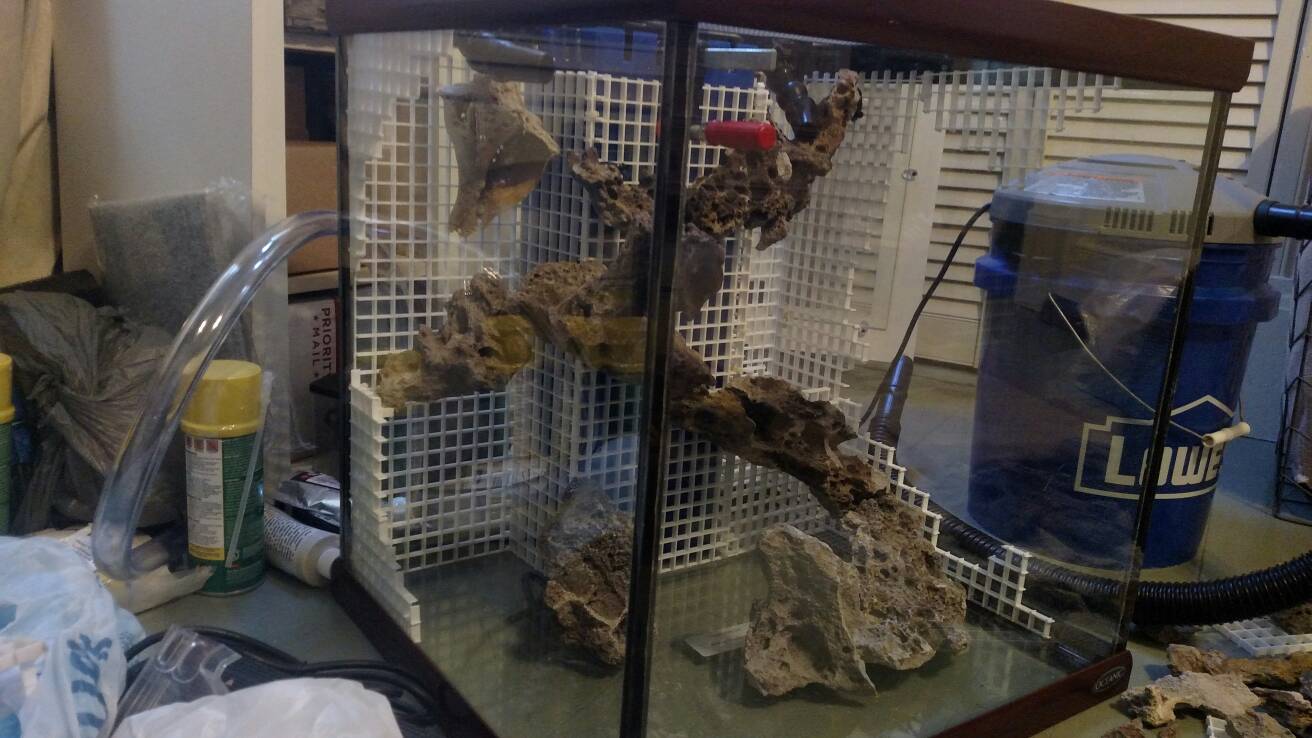
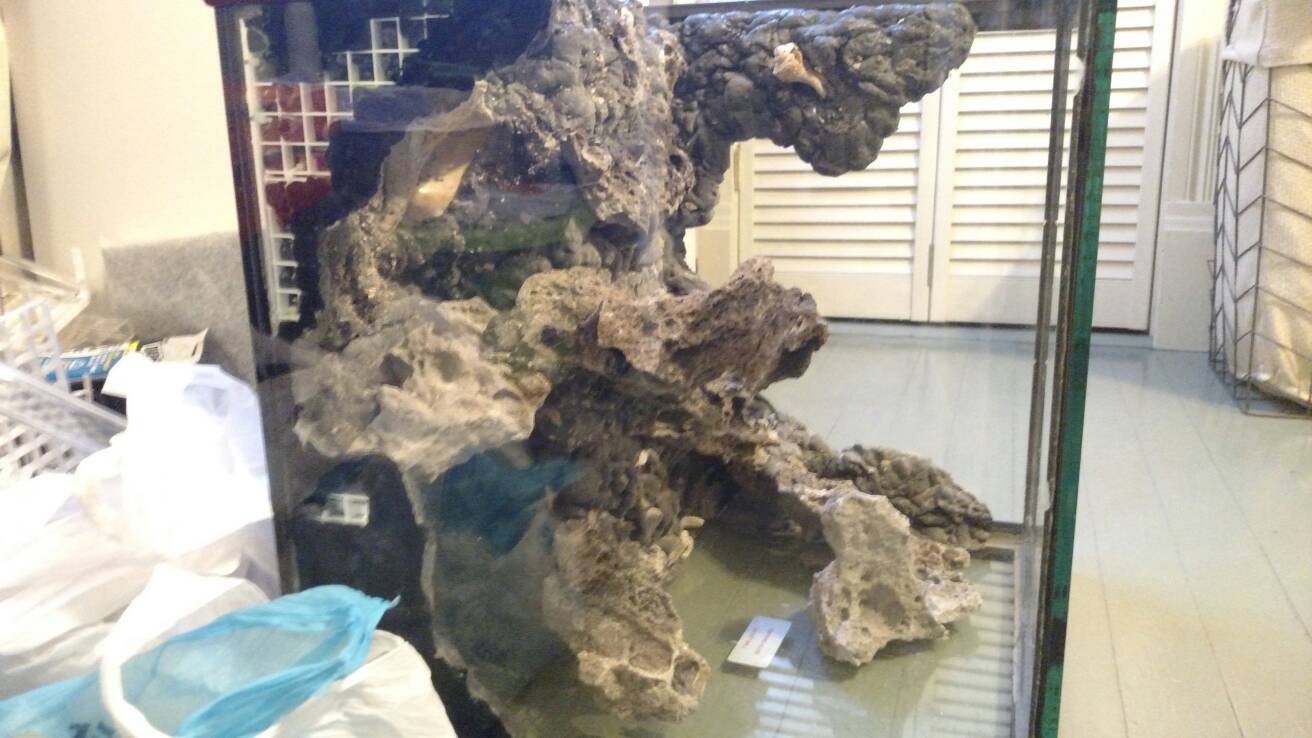
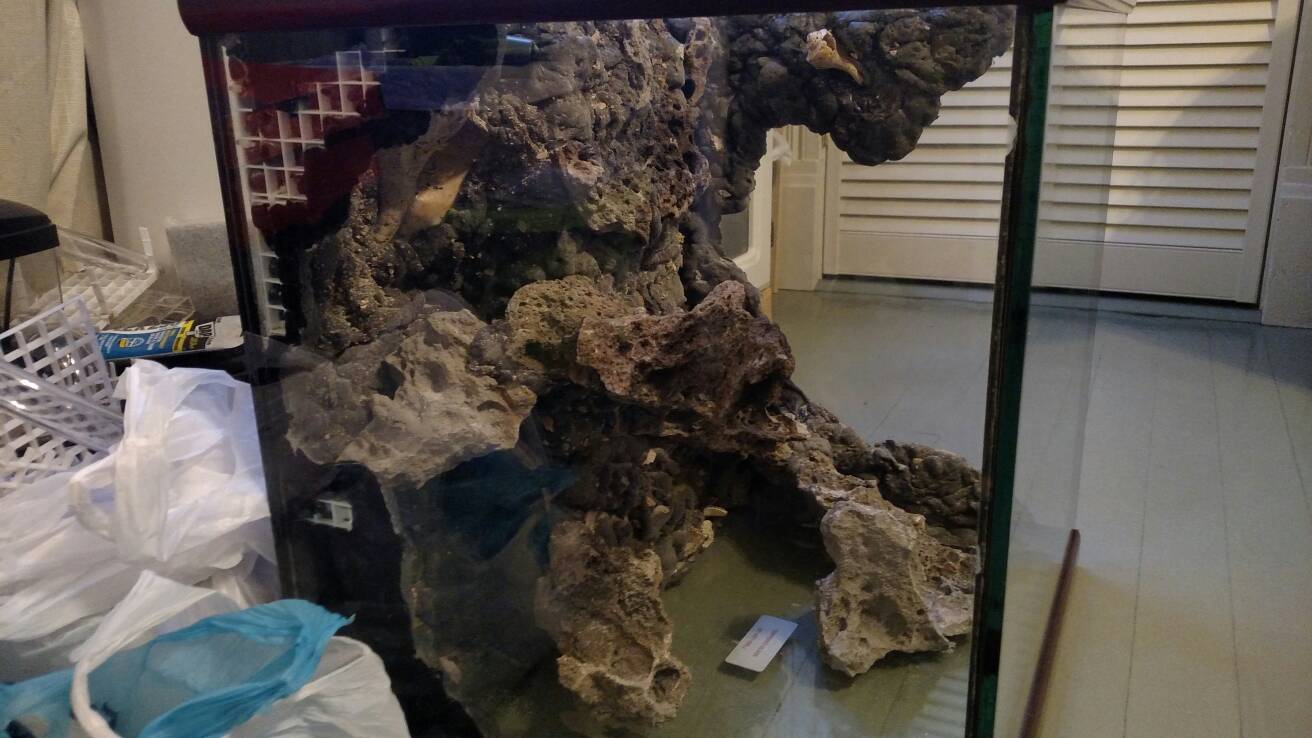
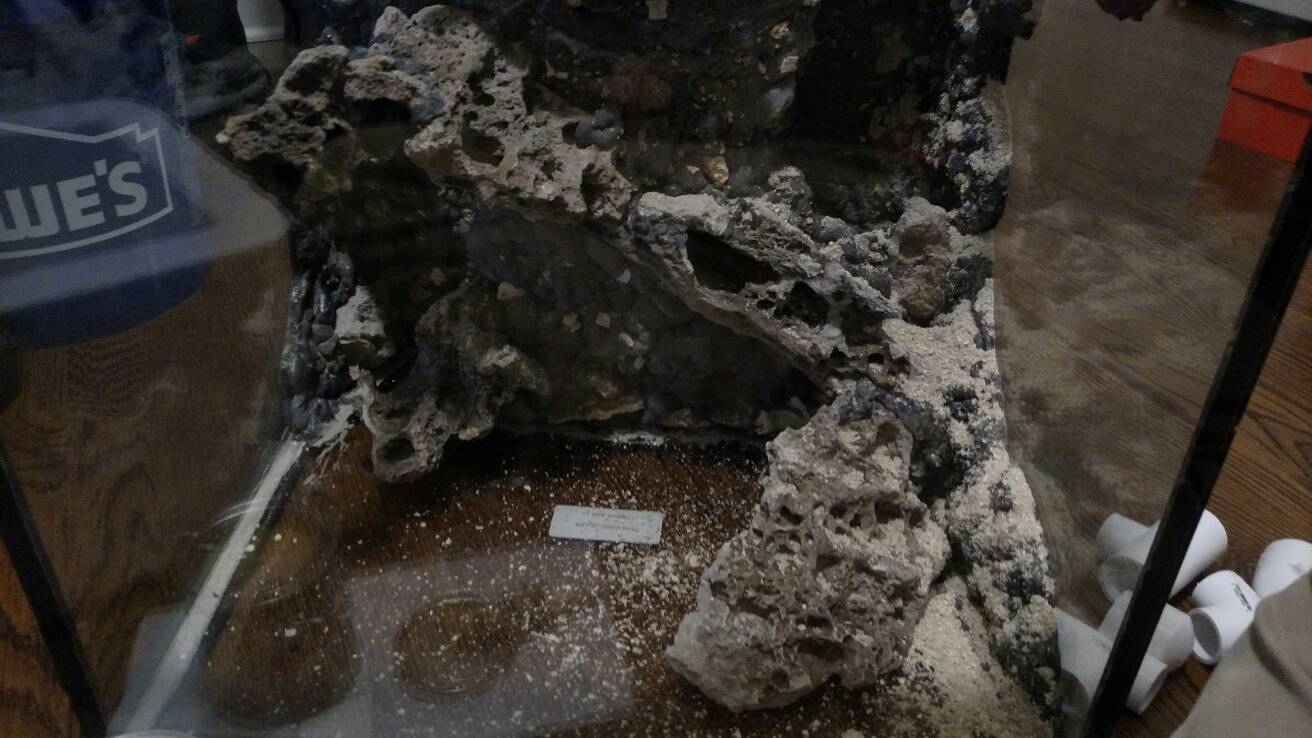
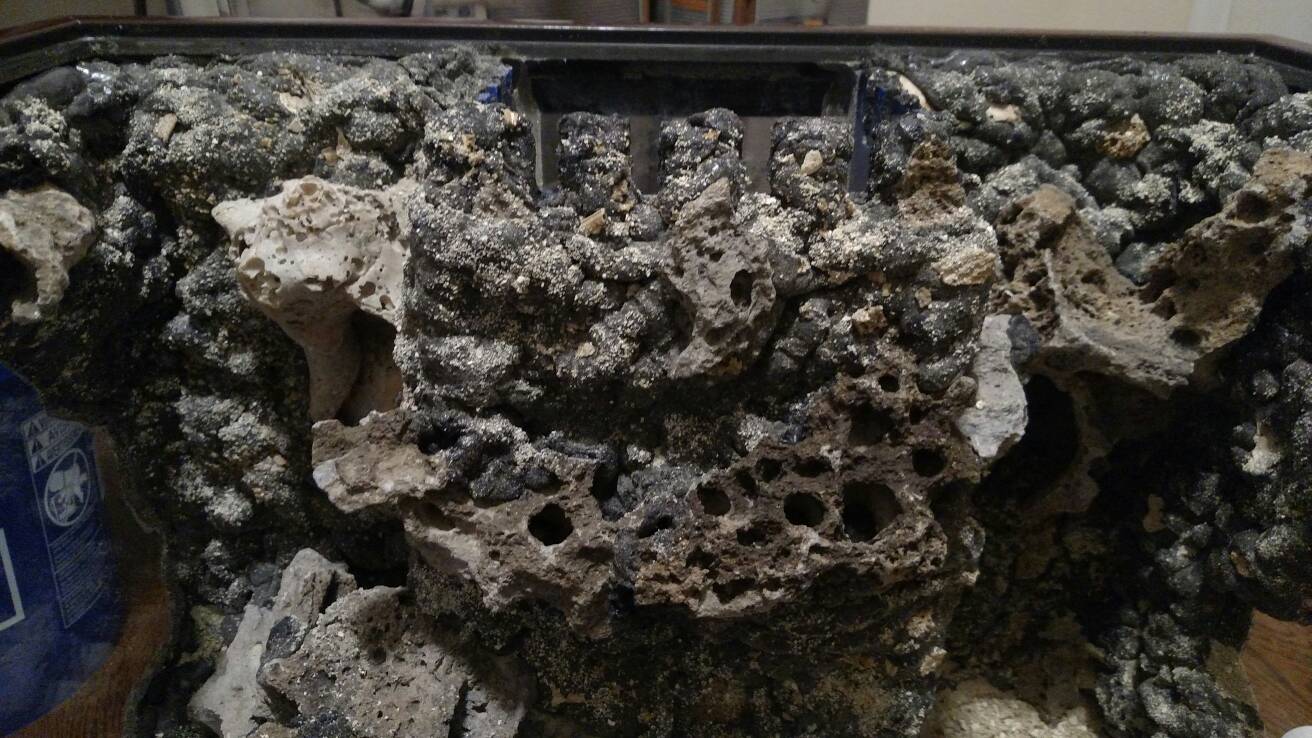
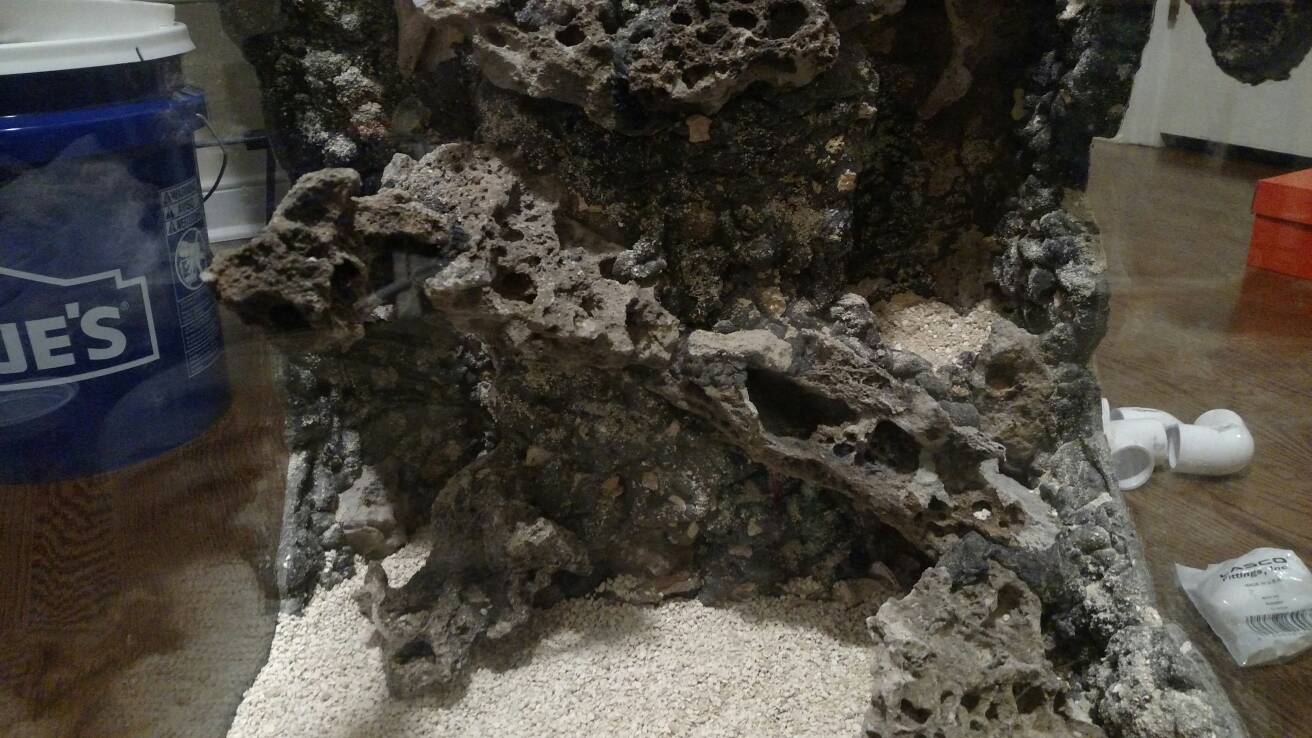
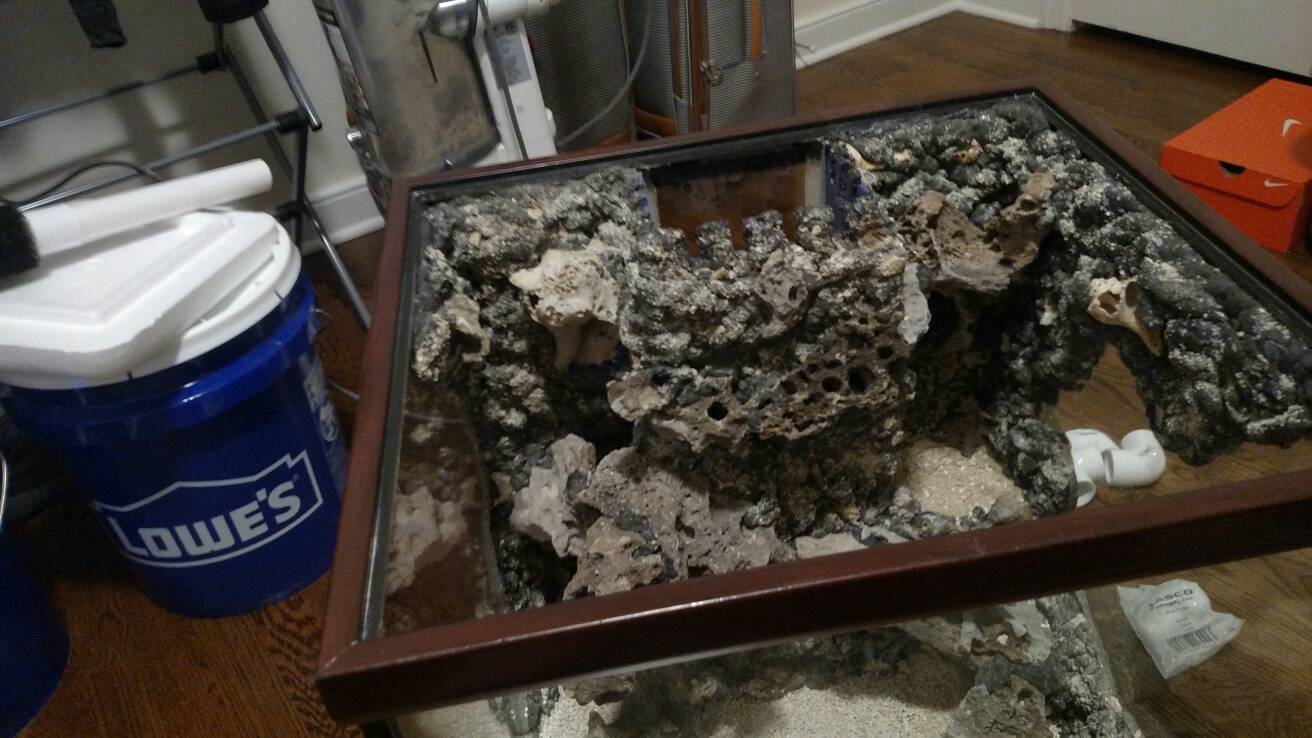
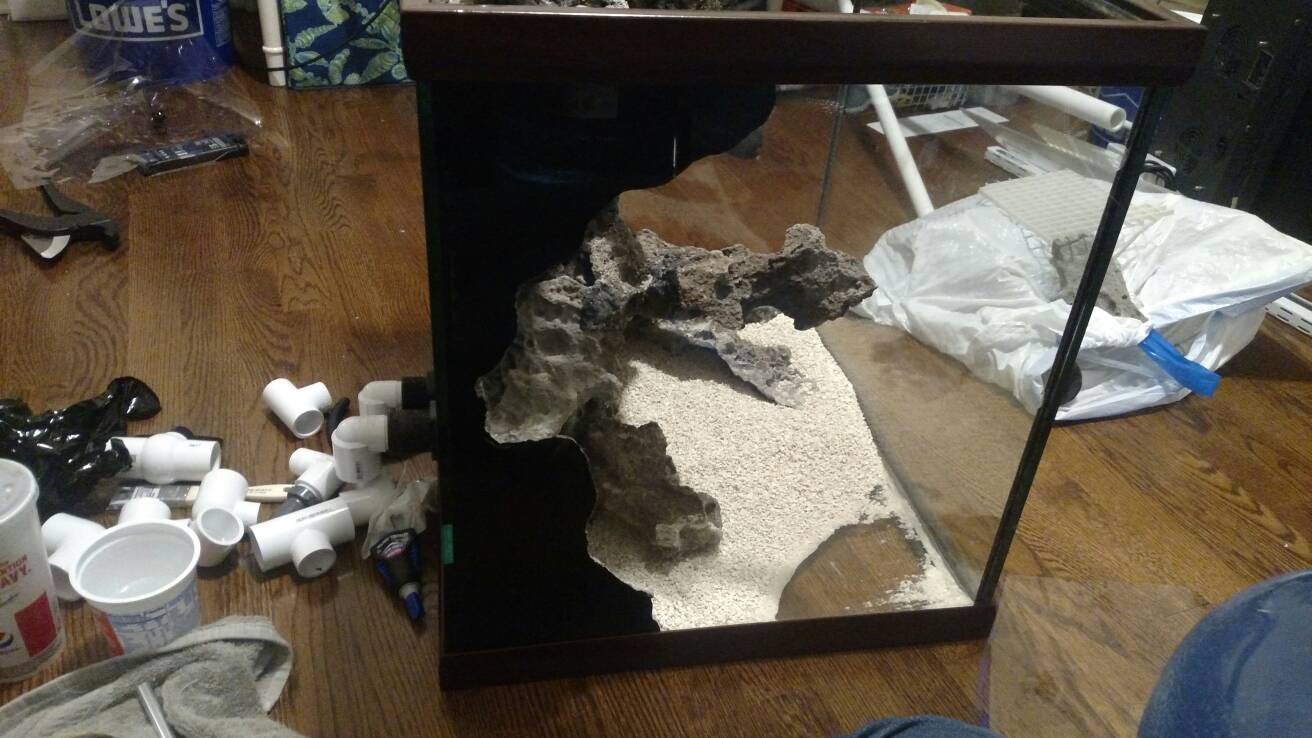
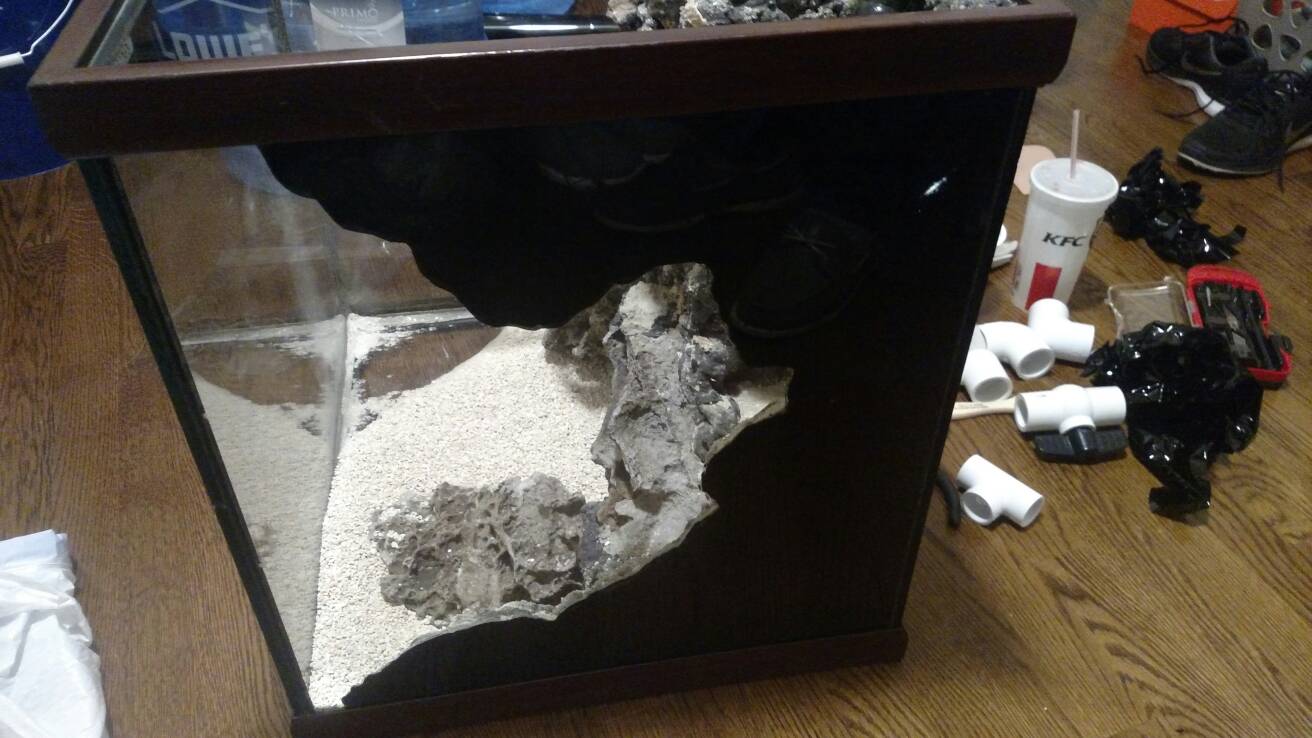
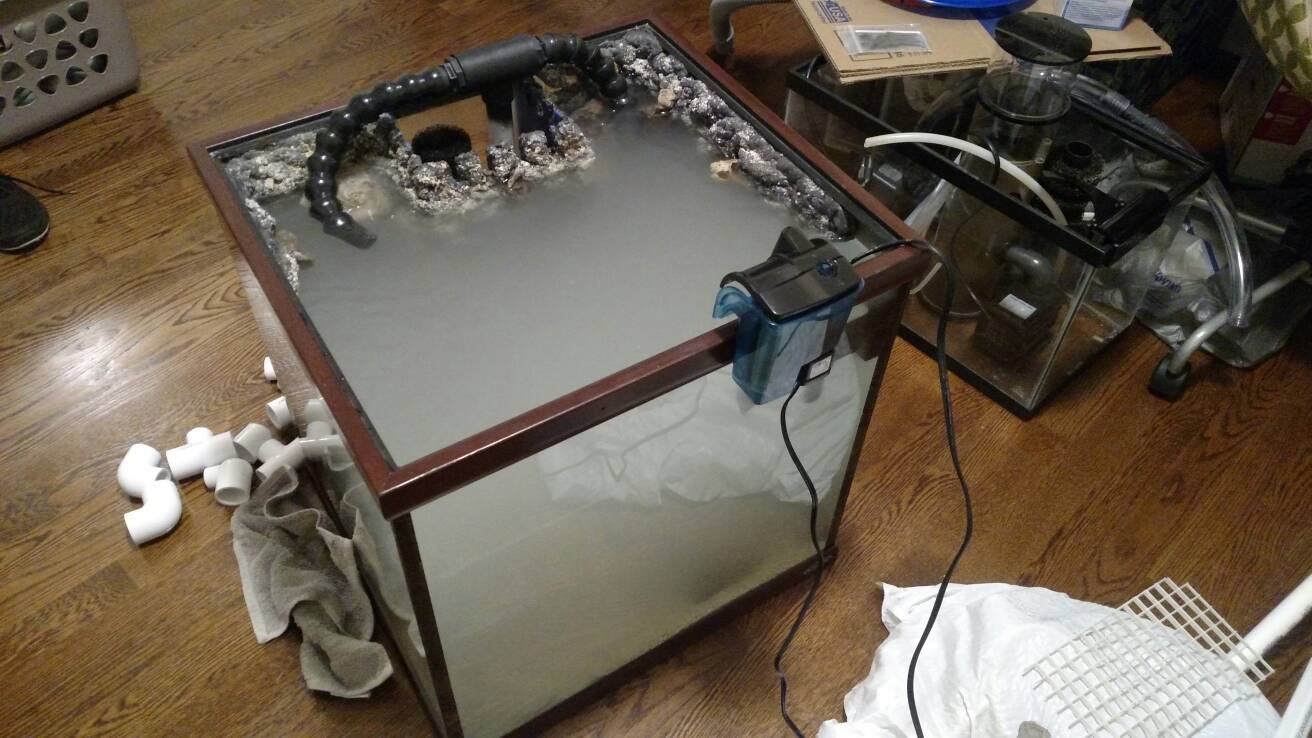
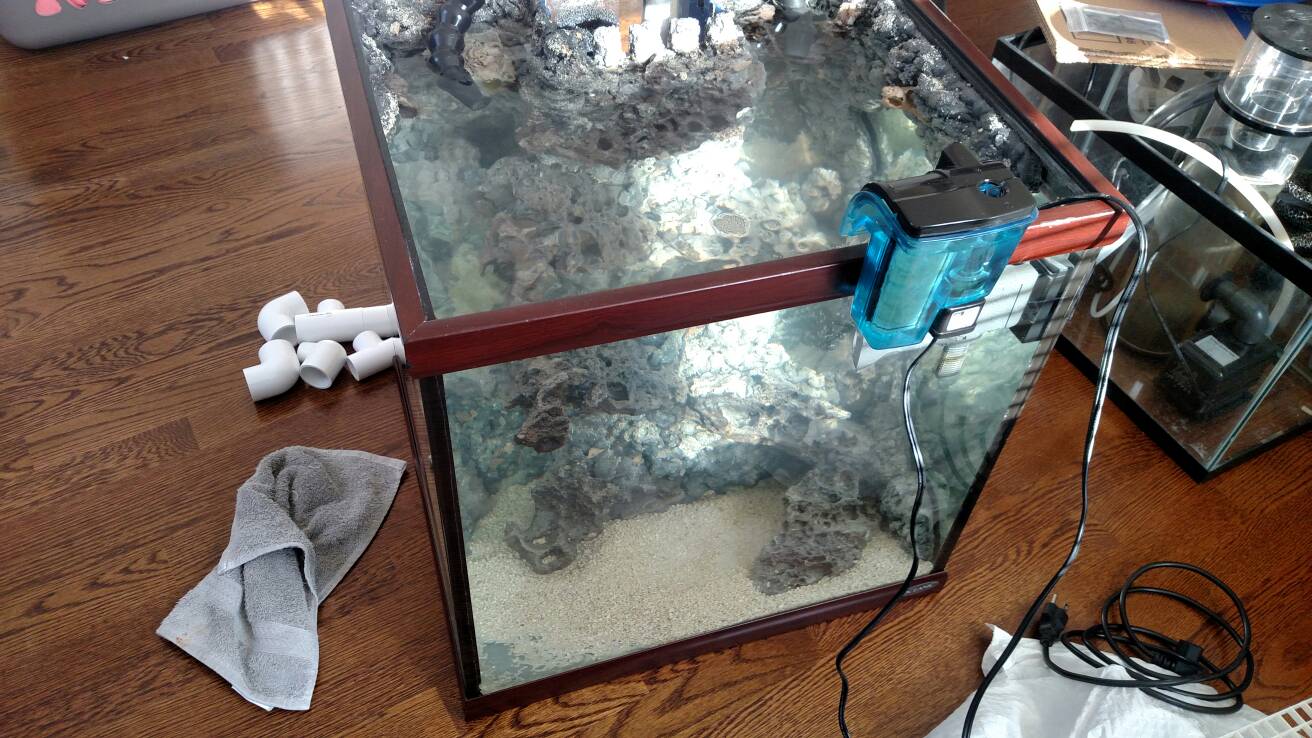
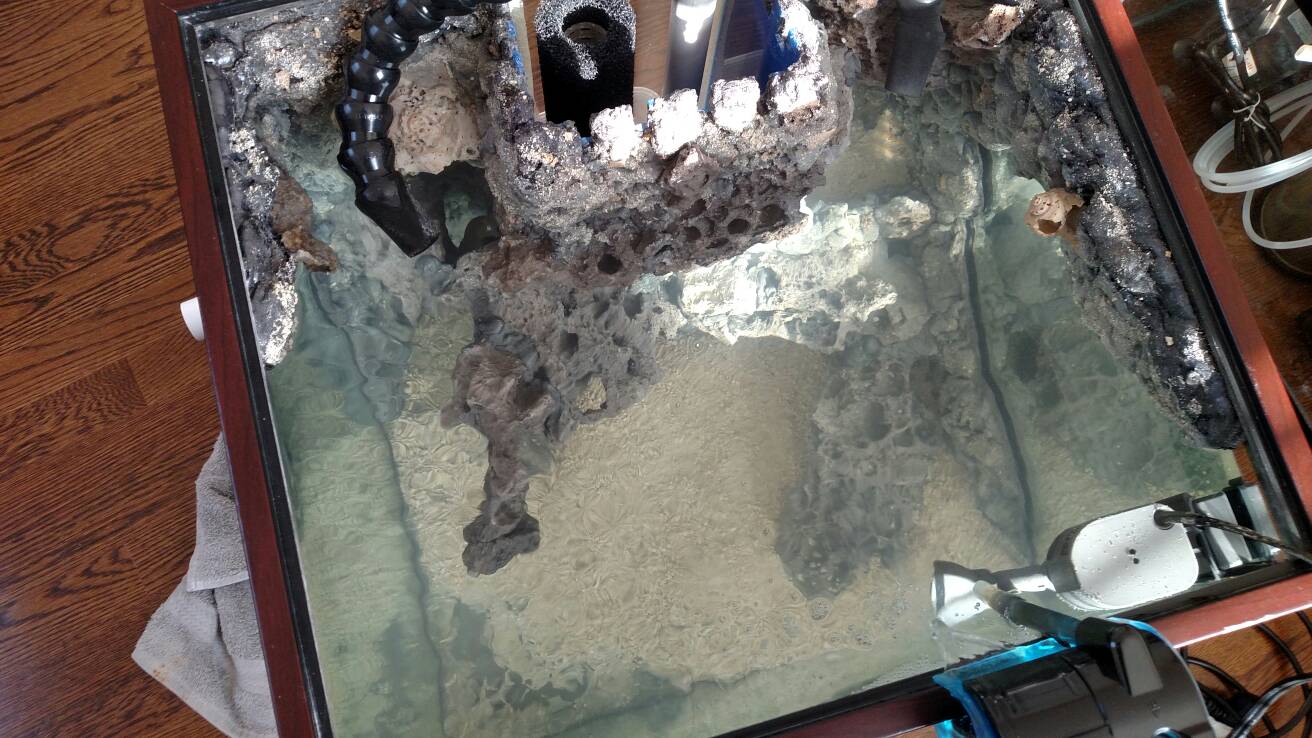
This time I decided to foam directly through the eggcrate to the glass as opposed to foaming the eggcrate outside of the tank, trimming it, then re-installing it. I still siliconed where the foam meets the display glass all around to keep critters from picking away at it, etc. I also made a special 6" deep sand bed in the back right corner for hopefully a garden eel! I put a bunch of shells at the base of it so Snappy, my Caribbean pistol shrimp, doesn't try to make it through to the DSB..

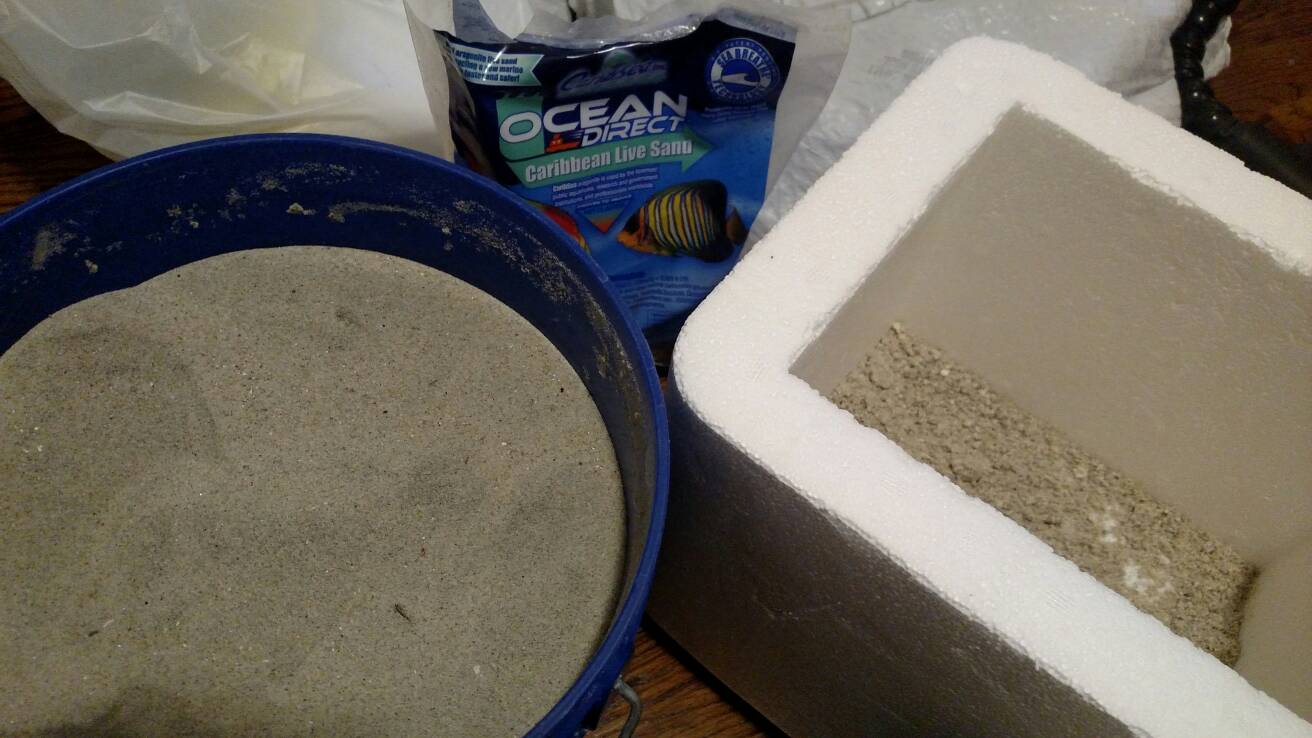
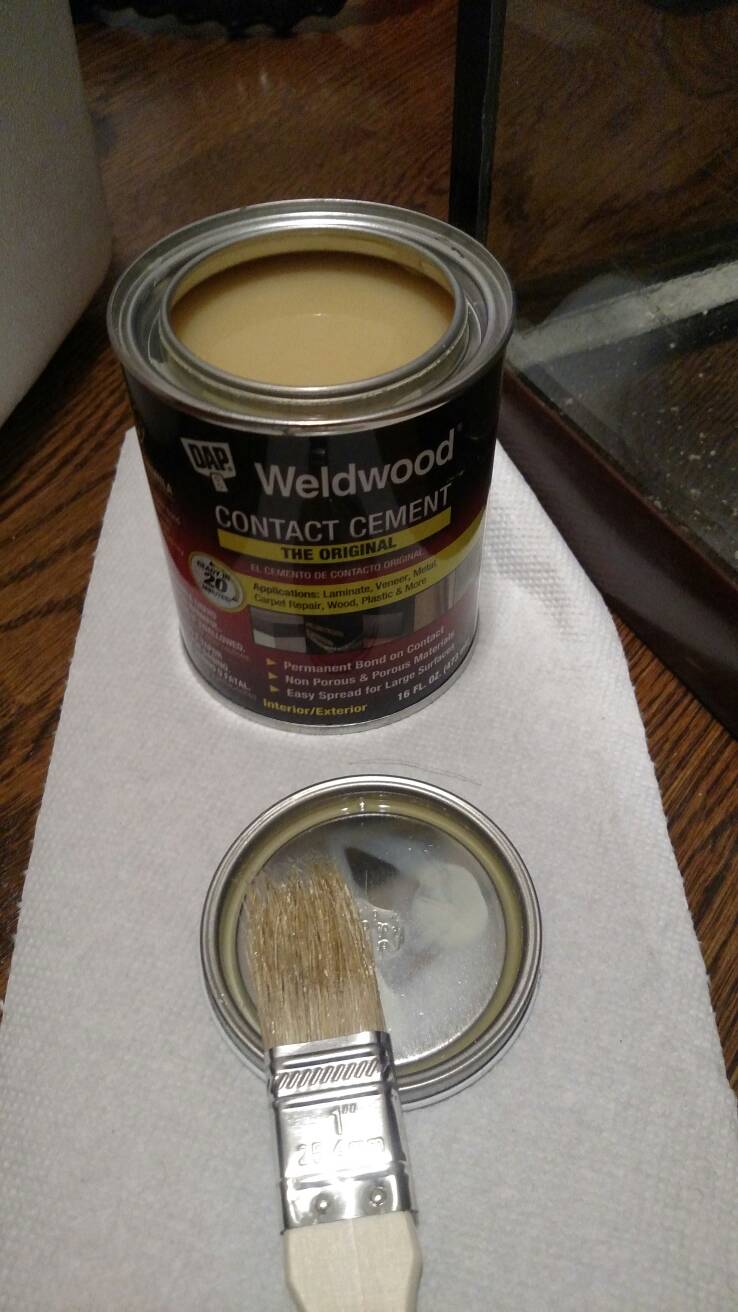
I threw on some fine Charleston beach sand after foaming while it was still wet and finished it off with brushing contact cement on the dried foam and tossing a mix of CaribSea sand and Charleston sand for texture and color.
I plan to add RO water in a couple days to flush it out, then repeat for a few days, then get it salty. If all goes to plan, I'll have it cycling for 2 weeks setting it up for livestock on Jan 1!

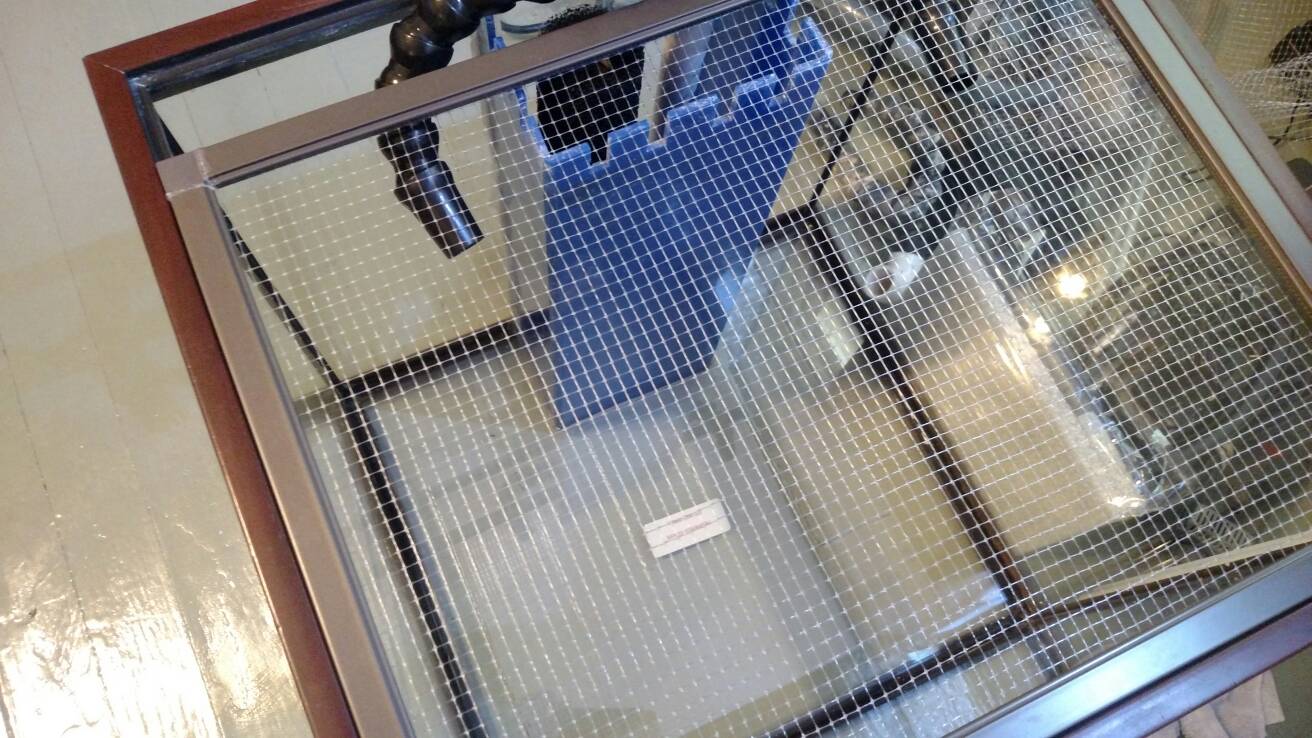
Leak test
If you have any questions, fire away! I'll be updating the thread as the tank progresses and I'm open to any suggestions.
I recently bought a used 30 gallon cube Oceanic glass aquarium to replace my potentially leaky Aqueon 26g bow front aquarium that has been set up for the past 3 years. This was my first attempt at a reef tank and I wanted to do something a little different. I created a foam wall. I saw a thread on a foam wall before I set up the tank and knew that's what direction I wanted to go.*
I have since created a thread detailing and highlighting the do's and don'ts of creating your very own foam wall. So technically, this will be my third foam wall build. I decided not to make this one as in depth as the other two regarding how its made, so I have included both links if you are interested in learning more.
Any all all questions are welcome via any of the three threads!
26g Foam wall build:
http://www.reefcentral.com/forums/showthread.php?t=2457621
Complete How-To:
http://www.reefcentral.com/forums/showthread.php?t=2611894
**Pictures are still viewable on mobile devices using Tapatalk. Thank Photo bucket for bending me over it's knee...
30 cube Build
This tank has a fun story!
I determined the 26g had a slight leak, but I had no idea where it was coming from. Slight as in the bottom plastic rim randomly collecting water. Not sure where it was coming from or if it was the hob skimmer overflowing.. don't know.
This prompted my search for a new tank.
I had been searching the Craigslist for a tank when I stumbled upon a drilled Oceanic 30g cube that came with a 10g sump, return pump, Reef Octopus nw10 skimmer, UV sterilizer, trickle filter and a couple pumps. A stand was also included although in rough shape.
Here's the fun part!
I live in Lynchburg, Va and the tank I found was located in Richmond, Va which is about a 2 hour drive one way. I really didn't want to have to drive 4 hours to get it and bring it back, sooo I flew there to pick it up and bring it back!
For those who don't know, I am a flight instructor and what better way than to have my student fly me, especially since we were going to KRIC anyways. The guy and his son selling the tank were only able to meet the evening we had planned ahead of time and when the time came, a big storm was starting to roll into Lynchburg from the West (Richmond is to the East). There was some heavy precipitation and thunderstorms that were soon to hit and my student and I decided to go for it. We split the tasks during the preflight and got the plane started and ready to go in record time, got our taxi clearance, and we were able to takeoff and head towards Richmond with the big storm behind us!
We made it to the airport as planned and we were able to get a crew car (free courtesy car offered by the General Aviation building we parked at). We got the Mercedes instead of the Honda! We then drove to the predetermined parking lot where I met the man and his son, who's tank it was, inspected the tank and equipment, paid, and started loading it into the Mercedes. Then it was time to load the stand into the trunk... It didn't fit! We ended up leaving the stand behind since it didn't fit and we had doubts it would even fit in the plane. We drove off with a smile on my face and got something to eat before returning to the plane. I asked the receptionist when we got back if I could drive out to the plane to load a fish tank and she said yes with a smile. I'm sure that was a first. We managed to cram it through the doorway behind the front seat and set in the rear seat of a Cessna 172 for the flight back. All the other equipment and the sump went in the rear baggage area and off we went!
Fast forward a month with the tank sitting on the floor in my small 450 sq ft house... my wife wanted the accumulating pile of fish stuff to move off the floor. SO what was my solution? MOVE! haha
It was about time for us to move into something bigger anyways. Now we are renting a 2 bedroom house with a full basement! It's going to be nice having a washer/dryer, driveway, and central heat/air. We're almost completely moved in now and the fish room/spare bedroom without a bed, is starting to get organized, well.. I still have fish stuff everywhere all over the floor
The move was definitely sketchy... I ended up getting most coral removed from the wall of the 26g and into baggies or directly placed into one of the three 5g buckets for transport. I couldn't get the RBTA's to let go so they ended up dangling for over an hour out of the water. I would try to splash them to keep them wet periodically. Being 30 degrees outside didn't help! I put it into high gear when I started loading all the live critters into the back of the 4Runner. Then the 10 min ride to the new house and the scramble to get everything inside and wet again. The RBTA's were cold and very dry when I sat the tank on the floor of the spare bedroom. I then dumped the 15g in with the bags of coral. I now had to quickly mix 10g of new saltwater for the remainder of the tank (nems still out of water). I finally got everything set up temporarily and everything, including the nems, made it and have bounced right back!
The stand is being redone and upgraded with a plywood backing and a new rear extension fame in the back. I'll need to come up with a new light hanging rig since I bought another 16" ever grow fixture because the 24" is too wide for the 30 cube.
The 30 cube has a custom overflow installed new by an aquarium shop in Richmond that the guy I bought it from, bought brand new along with all the equipment
I decided to ditch the trickle filter for a filter sock. I'll be testing the flow with the UV sterilizer to see if I want to keep that on not. I'll be running two 3/4" discharge nozzles up top and my MP10 on the right side.
This time I decided to foam directly through the eggcrate to the glass as opposed to foaming the eggcrate outside of the tank, trimming it, then re-installing it. I still siliconed where the foam meets the display glass all around to keep critters from picking away at it, etc. I also made a special 6" deep sand bed in the back right corner for hopefully a garden eel! I put a bunch of shells at the base of it so Snappy, my Caribbean pistol shrimp, doesn't try to make it through to the DSB..
I threw on some fine Charleston beach sand after foaming while it was still wet and finished it off with brushing contact cement on the dried foam and tossing a mix of CaribSea sand and Charleston sand for texture and color.
I plan to add RO water in a couple days to flush it out, then repeat for a few days, then get it salty. If all goes to plan, I'll have it cycling for 2 weeks setting it up for livestock on Jan 1!
Leak test
If you have any questions, fire away! I'll be updating the thread as the tank progresses and I'm open to any suggestions.
Last edited: