40 breeder build (pictures/queations/first saltwater tank)

Isaacs55

New member
So after a long time coming, I'm finally slowly starting my build. If you weren't apart of my thread poll I posted it's ok cuz everything in the build will be posted here. So there was a good amount of people that chose a 40 breeder tank over a 55 gallon tank. Actually I think it was like 40-1. So I decided to go with a 40 breeder!
So far I've got my stand somewhat built just need to do some finishing touches on it. Built my sump out of the glass from my first 40 breeder I baught and cracked while drilling....... (more on that later) I've actually came across a couple problems already. I Just finished drilling my drain and return but I have some questions on my overflow. I made the mistake of drilling my main line and emergency line before I got my overflow box. It's an internal CPR retrofit 07. So when I tried putting the box over the two bulked it wouldn't fit. So basically I screwed up by drilling the wholes to far apart. So what did I do? Being impatient as we all can be with this hobby, I went a head and siliconed it on over one of the bulkheads and left the other bulkhead (emergency line) on the outside if the box. I'll post pictures later so u can see. So here's my question. Can I drill another whole in the overflow box and make it so I have two emergency drain lines or will my glass crack if i try drilling another whole? Or should I leave it how it is? My first tank I drilled I cracked it because I think I was too close to the rim or drilling with too much pressure. I'm hoping this isn't the case this time? Any thoughts and advise would help.
 
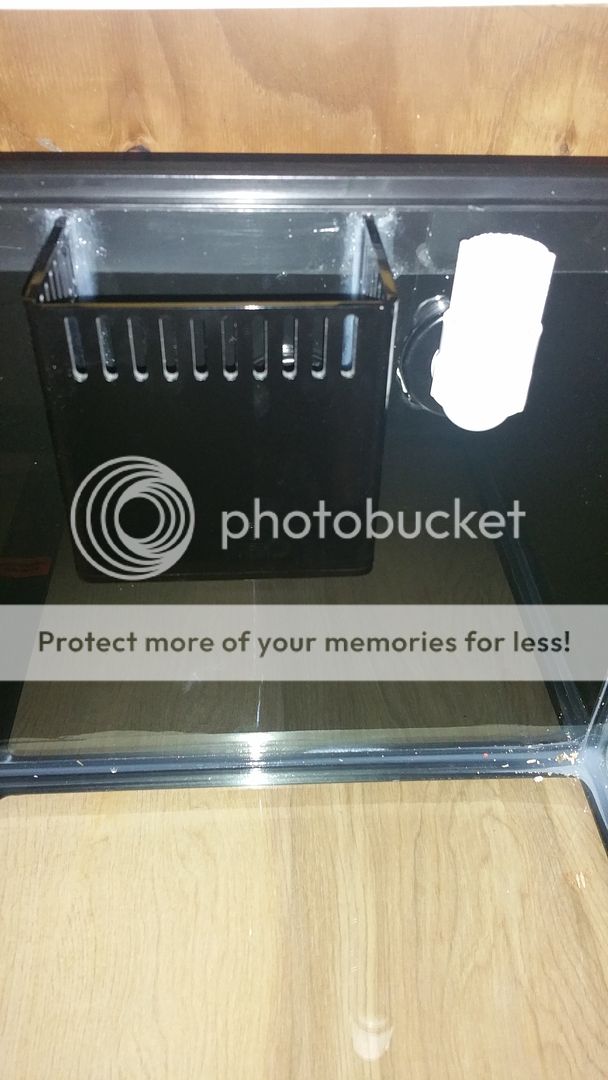
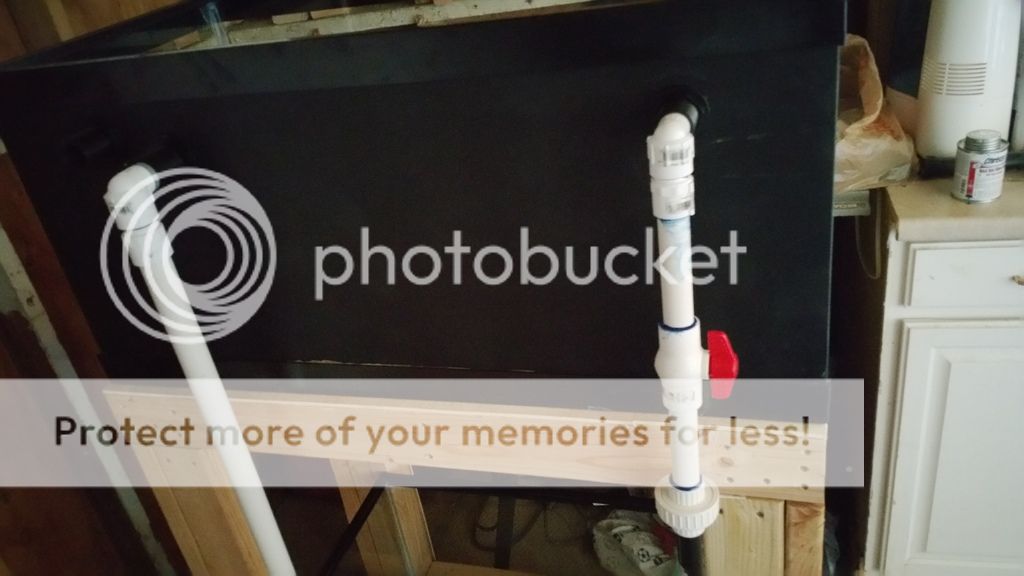
So here's what I'm talking about with my 2 bulkheads. One is on the inside of the overflow and the other is on the outside of the box.


I probably could just take off the overflow and buy a bigger one to fit over the two bulkeads.
 
Here's a picture of the inside if the overflow box. I was hoping I could just drill another whole here without cracking the glass and just plug the other bulkhead? If i did drill the whole though, the 2 bulkheads would literally sit right next to each other.

 
looks good so far man. You could enclose the two with a larger box. It would tidy things up a bit. I don't think it would change the function any just the look. what's your plan for flow?
 
Yea I'm just going to buy another box that will cover the two. I just found out that I made another mistake with using GE 2 silicone so it has to come off anyway. And I have to take my whole sump apart too cuz I used the same silicone :( I'd rather fix the little problems now before having bigger ones later. My plan for flow is the herbie method with 1 inch drain and emergency and 3/4 return. My return I am using a Rio 2500 so it's rated for 725 gph but I only need 400 gph so that's why I have a ball valve on my return to adjust if i need to.
 
I know I was going to start cycling it soon too. I used GE 2 silicone for door and windows. I guess that's bad? I've been reading posts about GE 1 and 2 silicone and they said 1 has no mild inhibitors and 2 does? But then I read that only GE2 bath and kitchen has the mold inhibitors and not the GE2 doors and windows??? If this is correct then I may leave it. But idk it's risky unless someone on here has successfully used GE2 doors and windows and not GE2 bath and kitchen Wichita has the mold inhibitors.
 
I had to pull my overflow off cause I screwed up the inside weir. I used GE whatever-the-right-one-is in a clear color for the first one like you, but for the second try I got the (not GE) kind that is called a sealant. I can't remember the name, I think it was 3 letters, and honestly I'm not as careful as I could be about reef-safeness sometimes so you should research for yourself. But, the difference is night and day.

The black sealant kind looks so dope with the black acrilyic box, waaay better than the clear silicon did. It's pretty much invisible now, the back wall disappears. And, since you can't see it, I could really load it up on the outside seams. I didn't believe people about how much stronger it is, I just got it for the color, but it holds so much better. I could just peel the silicon off the acrylic before, the sealant I have to really chip at with my fingernail. Is still flexible, but like it's actually stuck on the plastic. It was like $4 more for a tube, so at least for the display it was worth it for me.
Like I said though, not super confident on the chemical part but you might want to look into it for your display at least.

Idk about the particular overflow you have, but I think it shouldn't matter if the emergency is close to the main line. I guess you can leave them how they are and spray paint the white one so it doesn't show, or put both inside the box.
 
Hmm that's a good idea I'm going to pull the overflow and redo it with black silicone sealant for sure. I think I'm going to order some 1/4 inch black acrylic and diy the overflow box so my drains can fit inside the box.
 
I know I was going to start cycling it soon too. I used GE 2 silicone for door and windows. I guess that's bad? I've been reading posts about GE 1 and 2 silicone and they said 1 has no mild inhibitors and 2 does? But then I read that only GE2 bath and kitchen has the mold inhibitors and not the GE2 doors and windows??? If this is correct then I may leave it. But idk it's risky unless someone on here has successfully used GE2 doors and windows and not GE2 bath and kitchen Wichita has the mold inhibitors.

I did the same thing to my sump for the 40. If it says any form of "mildew prevention" or "mold protection for blah-blah years" it has the mildewcide. I used a razor to get all the silicone off. Didn't take too much effort. I used GE I for doors and windows. This has no form of mildewcide in it according to the MSDS.
 
Hmm that's a good idea I'm going to pull the overflow and redo it with black silicone sealant for sure. I think I'm going to order some 1/4 inch black acrylic and diy the overflow box so my drains can fit inside the box.

check the yellow pages. I got lucky and found an acrylic shop near me, they make trophies and wedding favors and stuff like that. They sold me a sheet real cheap and I got a few pieces out of the scrap box too. Mine cost like $15 and it goes all the way across the back. That's called a "coast to coast" and its a good way to do it cause the water at the surface has more of the dirt in it, so your overflow is more efficient this way. Maybe look at some of those designs if you're going to build one anyway. While you're at it, drill another hole and make your drain a "bean animal" ;)
 
Just by the cheap stuff that says 100% pure silicon in the small squeeze tube from any hardware store. Looks like a large tube of tooth paste.
 
Just by the cheap stuff that says 100% pure silicon in the small squeeze tube from any hardware store. Looks like a large tube of tooth paste.

The labels are misleading. Even the ones that say 100% silicone will have "mold protection". If you look up the MSDS, they are not truly 100% silicone at all.
 
Hey thanks cstrickland! Im going to try that one out hooefully it works for me! And it's been working for you? No problems with fish dying or anything?
 
Yea you can always learn from peoples mistakes. I researched and researched and obviously it wasnt enough lol ive been learning and researching for 2 years and finally starting lol
 
Yea you can always learn from peoples mistakes. I researched and researched and obviously it wasnt enough lol ive been learning and researching for 2 years and finally starting lol


Thanks, I've been thinking about this for almost a month. Hubby said he would drill the hole for me and build the base to hold the tank. I just need to figure all this plumbing stuff eek.
 
So I took my first 40 breeder I had cracked and took all the oanes apart and used that for my baffles for my 20 long sump.


The baffles sizes are (from left to right) 8"--8 1/2"--10"--9 1/2"
It's a 3 chamber drains on on the right , refugium in the middle chamber and return on the left


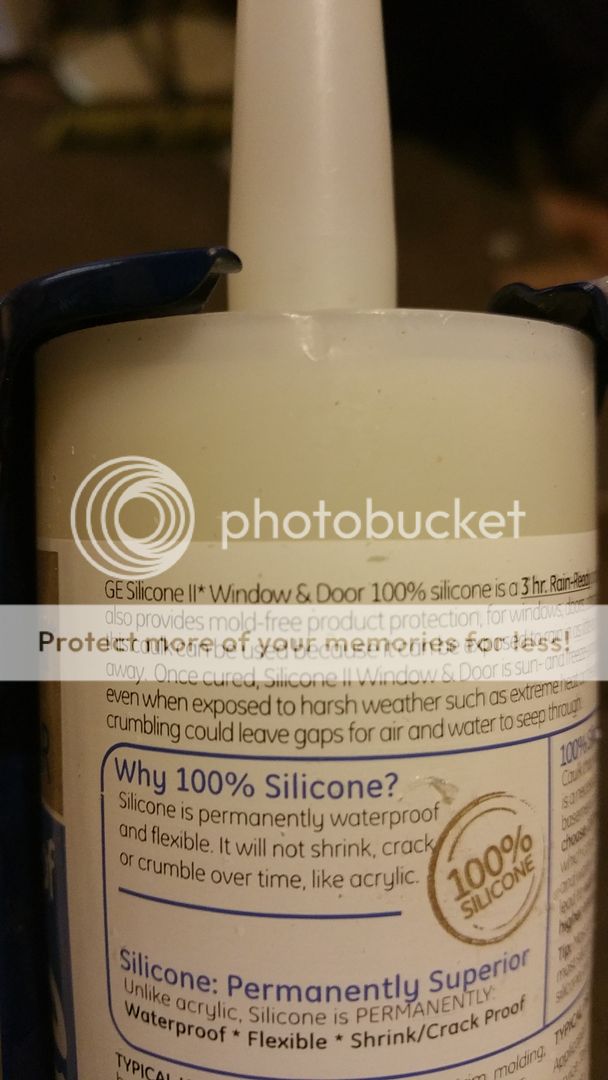
So this was cured only to find out I used the arong silicone. So I will ve taking the baffles apart and re-silicone them with the right silicone. But that wont be done for about a week or 2 because ill be at Disneyland next week. But here is a picture of the silicone that I used which is the wrong silicone to use.


Heres why you dint want to use it. It says right on the back. Second line I believe. It says it is a mold free resistant product protection. Meaning you don't want that.


Sorry it may be hard to make out.
 
Back
Top