jcazz
New member
Hi all -
I've been a member here for a long time (6+ years) and this is my first post!
Anyway - I had a 90gal reef setup for about 4 years, but due to a move and no space in the new place had to part with it a couple of years back. I finally got the itch to do something and started reading up on nano reefs.
I headed to the LFS to pickup a 10gal tank to DIY a system and while there I found the Aqueon Evolve 8 and thought - that's exactly what I want - all-in-one and seamless. Eighty-nine bucks later it was mine.
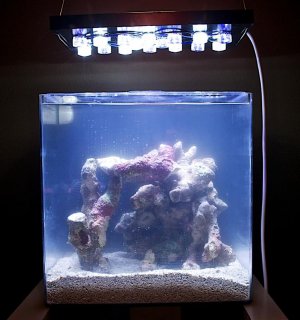
I decided that I wanted to try my hand at some coral that required more light - so I knew the stock light wouldn't cut it. I went the DIY route with LEDs and built a 16-LED (8x 10k, 8x 455nm) hanging fixture (running at 48 watts). This sucker is BRIGHT and I'm thinking I'll be able to keep anything under the sun with this thing (pun intended).
I thought I would toss out a few pics as this build progresses:
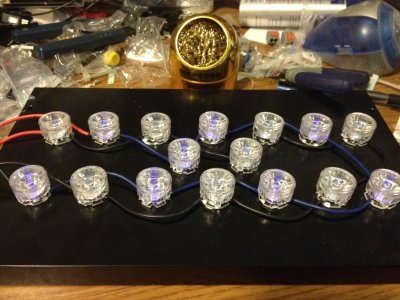
The first picture shows the LEDs attached to the heatsync & wired together. They're all sporting 60 degree optics except for the middle two which have 45 degree optics.

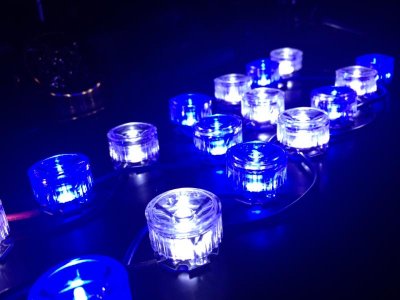
Here they are on. You cannot tell from this picture how bright they are, but it's amazingly bright.

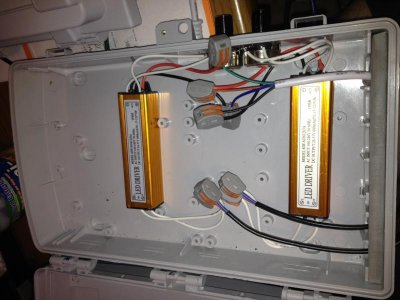
I wanted the LED drivers mounted remotely, so I used 18/4 cable with a 4-pin waterproof connector between the light fixture and the driver box.

This is the driver box (version 1). Now that I know it works, I'll hard wire the power connections & remove those clamp-on wirenuts. I also am going to be adding a small cooling fan and building in an Arduino controller to handle timing the lights on/off and doing dimming (instead of the pots currently mounted on the side of the box).

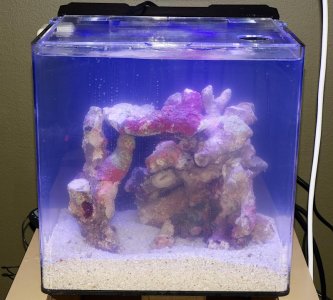
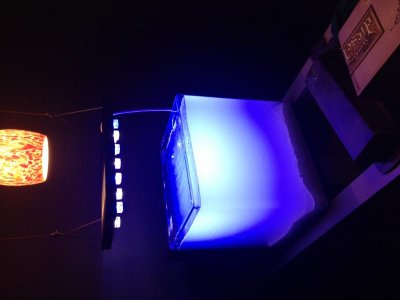
Lastly, here's a FTS with the lights on. The water had just been added so it's still really cloudy. Running about 1.25" - 1.5" finely crushed coral bed.

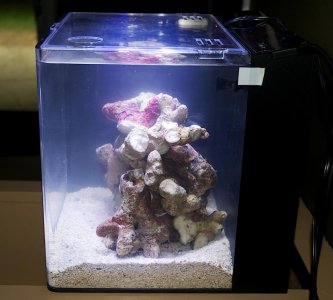
Now that the water has cleared, the LEDs give that shimmering effect with the movement of the water. It looks really nice.
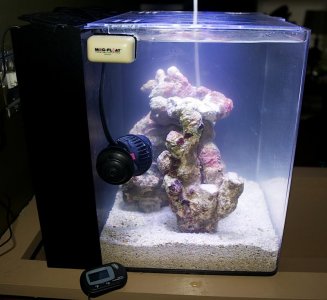
I've also added a Koralia Nano 240 for some extra flow and I've got a Jager 50w heater in the overflow.
I'm extremely lucky in that Premium Aquatics is in my back yard. I literally live 15 minutes away. I'm headed there tonight after work to pickup LR so I can start the cycle. I've calculated the volume of the display area to be about 6 gallons. So I'm not sure if I should shoot for between 6 and 8 pounds of rock, or judge it based on the whole volume and pickup between 8 and 10 pounds. Decisions, decisions!
I'll post more pictures after I get the rock in the aquarium.
Jacob
I've been a member here for a long time (6+ years) and this is my first post!
Anyway - I had a 90gal reef setup for about 4 years, but due to a move and no space in the new place had to part with it a couple of years back. I finally got the itch to do something and started reading up on nano reefs.
I headed to the LFS to pickup a 10gal tank to DIY a system and while there I found the Aqueon Evolve 8 and thought - that's exactly what I want - all-in-one and seamless. Eighty-nine bucks later it was mine.
I decided that I wanted to try my hand at some coral that required more light - so I knew the stock light wouldn't cut it. I went the DIY route with LEDs and built a 16-LED (8x 10k, 8x 455nm) hanging fixture (running at 48 watts). This sucker is BRIGHT and I'm thinking I'll be able to keep anything under the sun with this thing (pun intended).
I thought I would toss out a few pics as this build progresses:
The first picture shows the LEDs attached to the heatsync & wired together. They're all sporting 60 degree optics except for the middle two which have 45 degree optics.
Here they are on. You cannot tell from this picture how bright they are, but it's amazingly bright.
I wanted the LED drivers mounted remotely, so I used 18/4 cable with a 4-pin waterproof connector between the light fixture and the driver box.
This is the driver box (version 1). Now that I know it works, I'll hard wire the power connections & remove those clamp-on wirenuts. I also am going to be adding a small cooling fan and building in an Arduino controller to handle timing the lights on/off and doing dimming (instead of the pots currently mounted on the side of the box).
Lastly, here's a FTS with the lights on. The water had just been added so it's still really cloudy. Running about 1.25" - 1.5" finely crushed coral bed.
Now that the water has cleared, the LEDs give that shimmering effect with the movement of the water. It looks really nice.
I've also added a Koralia Nano 240 for some extra flow and I've got a Jager 50w heater in the overflow.
I'm extremely lucky in that Premium Aquatics is in my back yard. I literally live 15 minutes away. I'm headed there tonight after work to pickup LR so I can start the cycle. I've calculated the volume of the display area to be about 6 gallons. So I'm not sure if I should shoot for between 6 and 8 pounds of rock, or judge it based on the whole volume and pickup between 8 and 10 pounds. Decisions, decisions!
I'll post more pictures after I get the rock in the aquarium.
Jacob

")