Chris's Reef Savvy, Dreambox and Overhead Refugia Build

Chris_S

New member
Hey guys,

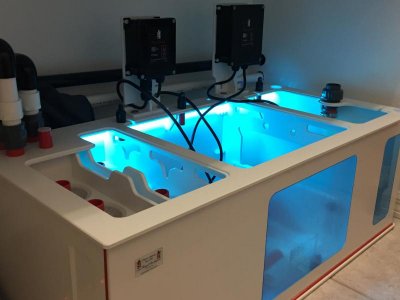
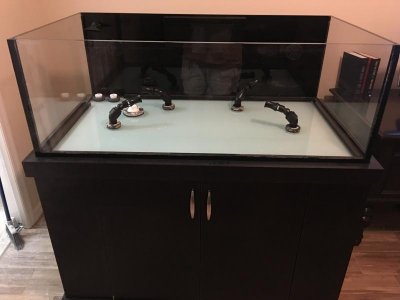
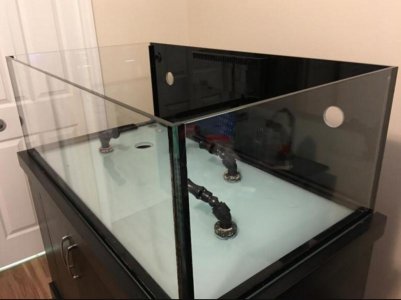
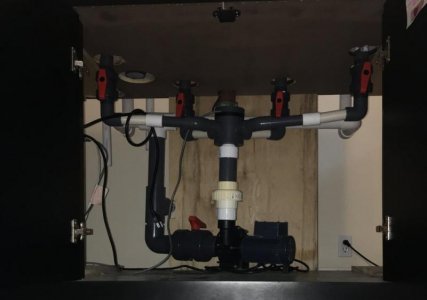
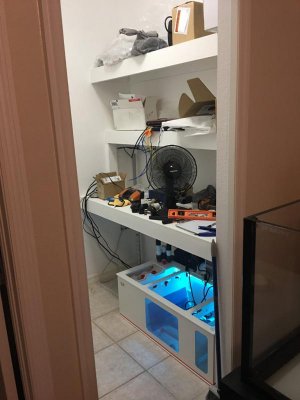
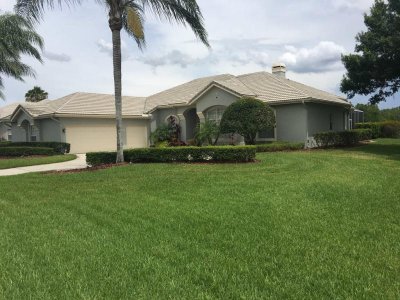
We recently moved our family into our dream home in Tampa Florida. It was just an 8 mile move north but this is our keeper home. Things have settled in and everyone is adjusted to the new life, new school, new everything. Now its time to start a new build for the home office. Felix from Reef Savvy built the tank and stand while Scott and Marco from Royal Exclusive helped with the filtration system that ties it all together. Most of the gear has arrived and I've started dry fitting the plumbing into place this week.

Here is an equipment rundown:
Tank: Reef Savvy 110 gallon 52x28x18in, low iron, eurobraced on bottom
Stand: Reef Savvy built for tank
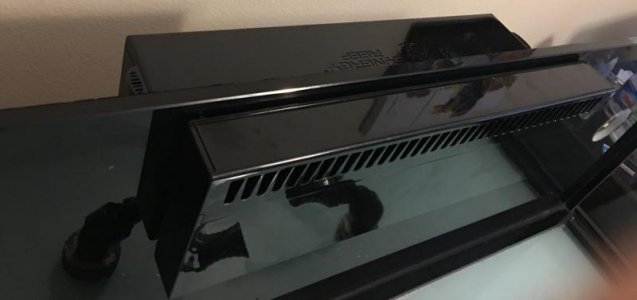
Lighting: ATI 48 8x54w T5 Sunpower HO
Skimmer: RE Double Cone 180 w/RedDevil3 50w pump
Sump: RE Dreambox filter system 100x50x35cm
Return pump: RE w/RedDevil3 80w pump
Overhead Refugium: Glass 48x12x12in
Flow: Oceans Motions Closed Loop w/Reeflo Dart Hybrid
Controller: GHL Profilux 4
Skimmate Locker: Avast Marine Davy Jones' w/auto skimmer shutoff


First up, RE Dreambox.
attachment.php
 

Attachments

  • Sumpfile.jpg
    Sumpfile.jpg
    39.8 KB · Views: 2
Whoa that sump!

Had the opportunity to meet the owner of RE at reefapalooza Orlando just last month. Would you believe he still personally does the final pvc welding or every sump that goes out? Those guys at RE are sticklers for quality and I can't say enough about how much they impressed me. This particular sump is a lower cost, off the shelf model I found out about. Just couldn't pass it up. I'm 200 pounds and I could stand on this sump if I wanted to. It's that well built!
 
Here is the tank. There will be no pumps in the display. All returns will be hidden by rock from Tampa Bay Saltwater, which is just don't the road about 10 miles away.

attachment.php
 

Attachments

  • IMG_3508.jpg
    IMG_3508.jpg
    35.1 KB · Views: 1
Here is the tank. There will be no pumps in the display. All returns will be hidden by rock from Tampa Bay Saltwater, which is just don't the road about 10 miles away.

attachment.php

Woot! I was gonna say... if you don't do TBS.... :D

Looks great so far. You don't see many closed loop systems these days.
 
Woot! I was gonna say... if you don't do TBS.... :D

Looks great so far. You don't see many closed loop systems these days.

No doubt, TBS is the way to go. Richard is a great guy to work his product is the real deal. Most of us locals buy our rock from him and pickup in person.

The closed loop works out well since all the other equipment is in the nearby fish room. The display area ultra quiet, cable free and the closed loop provides ever changing flow right from the bottom of the tank up, right where I want it. When this is finished you won't be able to see any PVC in the DT.

attachment.php


attachment.php
 

Attachments

  • Tank2017-06-02_9-45-45.jpg
    Tank2017-06-02_9-45-45.jpg
    37.2 KB · Views: 3
  • ClosedLoopfile-1.jpg
    ClosedLoopfile-1.jpg
    32 KB · Views: 0
Here is the fish room. Too keep moisture to a minimum, the sump and refugium have lids. There is also an AC vent. The walls are painted with a heavy duty indoor/outdoor floor and patio paint.


attachment.php


attachment.php
 

Attachments

  • FishRoom1.jpg
    FishRoom1.jpg
    46.9 KB · Views: 2
  • Fishroom2.jpg
    Fishroom2.jpg
    25.7 KB · Views: 1
Nice set up you now have no excuses. :)

Thanks reefwiser, If you have any suggestions along the way, please don't hesitate to share.

One change I made with the Reef Savvy tank was the overflow. This tank originally came with a traditional corner overflow on the left that I ripped out. Now it has a Synergy Reef overflow in the center. I drilled the glass myself and also installed 3M high gloss black vinyl on the back. Definitely happy with how it all turned out.

attachment.php
 

Attachments

  • SynergyReeffile1.jpg
    SynergyReeffile1.jpg
    24.8 KB · Views: 2
Looking good keep the pics/updates coming....

You certainly cannot say you didn't put enough money into it..
Even my wallet puckered some seeing that list of equipment.. :)
 
Looking good keep the pics/updates coming....

You certainly cannot say you didn't put enough money into it..
Even my wallet puckered some seeing that list of equipment.. :)

With our new home purchase, this build is something that doesn't cost much in the grand scheme of things. I had solid success over the past 8 years so I knew what brands to focus on and which ones to not waste my time on.

This build is really a celebration of our new home and is basically the last thing I wanted to get done as part of making the move complete. With that in mind, here are a few pictures of the new place and some toys. Enjoy!

attachment.php


attachment.php


attachment.php


attachment.php
 

Attachments

  • NewHome.jpg
    NewHome.jpg
    91.2 KB · Views: 0
  • NewHome2.jpg
    NewHome2.jpg
    46.5 KB · Views: 0
  • benz1.jpg
    benz1.jpg
    73.4 KB · Views: 0
  • bike2.jpg
    bike2.jpg
    52.7 KB · Views: 0
It's all good my friend! :beer:

I just moved into my "dream house" last week too.. I'm right there with ya..
But wife has other "priorities" at this time and says "your current tank is just fine"..
New patio set.. New dining room set.. New flat screens all around.. New grill.. My bank account is getting hit hard too..
At least she has let me have fun with "smarthome" purchases... fans/light switches/hue/smartthings hub/echo dots/zwave/zigbee,etc...

So for now I'm going to "live through you" on the new tank side of things.. Cheers right back at ya... :beer:
 
It's time to start plumbing this baby together. I have five foot lengths of red, black, and white 1" PVC.

I think I'll go all white for the bean animal returns back to the sump. Red for the PVC from the pump to the refugium and red again from the pump to the DT. Any suggestions out there?

attachment.php


attachment.php
 

Attachments

  • pipefile-10.jpg
    pipefile-10.jpg
    37.7 KB · Views: 2
  • pipesfile-9.jpg
    pipesfile-9.jpg
    35.8 KB · Views: 0
Tip: For clean PVC work use a self priming clear PVC cement like Oatey Fusion Single step. If you use a separate primer and a separate cement, make sure you use a clear cleaner or clear primer instead of purple primer. Purple primer leaves a messy look that is unnecessary and undesirable.

The reason that most primers are purple is because they are dyed that color so that contractors can pass inspection. They have to prove that they used a primer.


attachment.php
 

Attachments

  • fusionPVC.jpg
    fusionPVC.jpg
    61.8 KB · Views: 0
Where did you find that Fusion glue? :eek2:
Never seen that before. As I sit here with glue and primer for today's project.
 
Back
Top