tkeracer619
New member
Hey everyone, I've been really busy lately so haven't had much opportunity to hang out online but I just upgraded my 40w sterilizer to a 75w unit and thought some of you would enjoy/benefit from this.
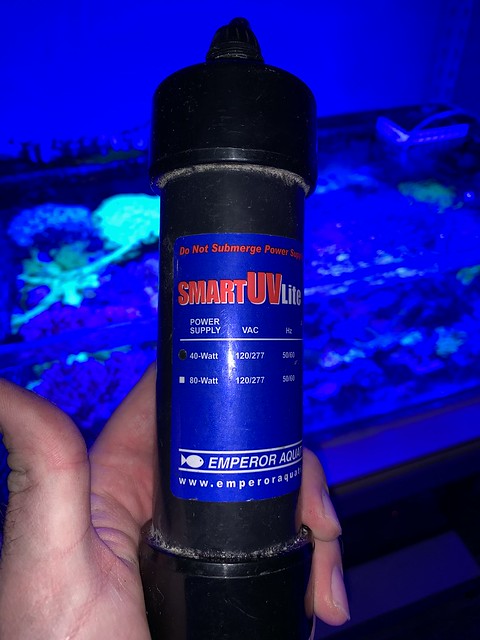
My UV is an Emperor Aquatics (Pentair) 40w Smart UV but this should work on all T5 based 40w UV sterilizers.
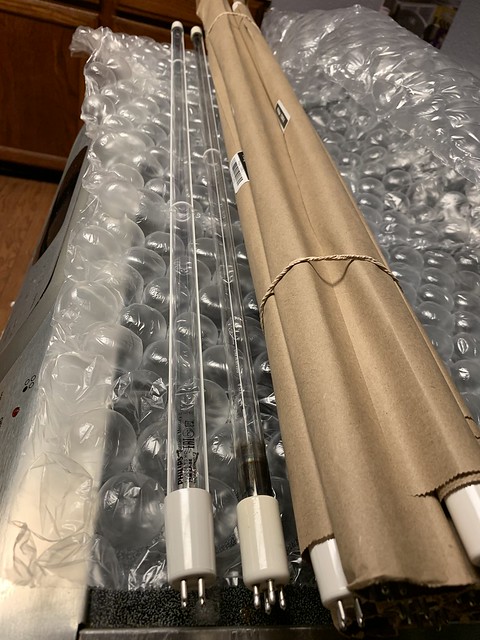
Long story short but my sterilizer was burning though bulbs every 6 months, after the 3rd bulb (pentair) I got frustrated and contacted the manufacturer. I assumed at this point the ballast had gone bad and had hoped they would warranty out the bulb if I bought a new ballast. Nope, no warranty past 3 months :thumbdown. They would however gladly sell me a new ballast. I declined having already spent $204 on their lamps in 1.5 years. Burned bulb on right, new on left.
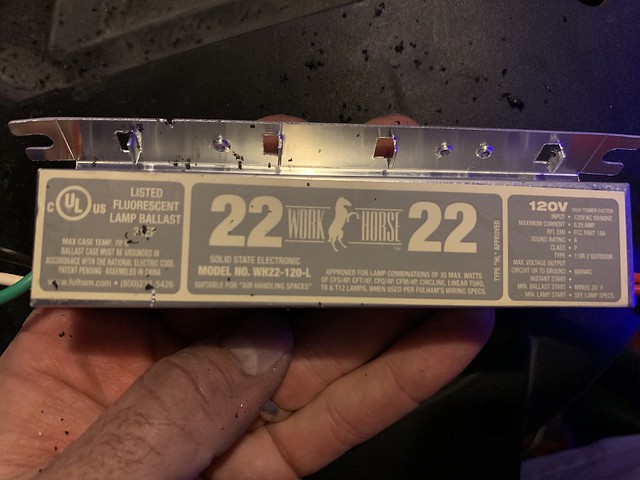
This is where it gets interesting, I decided to cut the ballast apart so I could just get a replacement. To my surprise... Workhorse 22... Not spec for any T5, certainly not a UV bulb, and with a pf of .8 was actually driving the bulb at 33w. Lame... my quest on finding a quality source of UV supplies was on. (To be fair, my unit is old, and they have moved on from that ballast)
I decided to go with Philips Lighting. They are well regarded in the UV industry, have long life, have spec ballasts, and publish bulb degradation data. The bulbs are also cheaper. Interestingly enough they have a high output 75w version of the bulb size most of our 40w setups use.
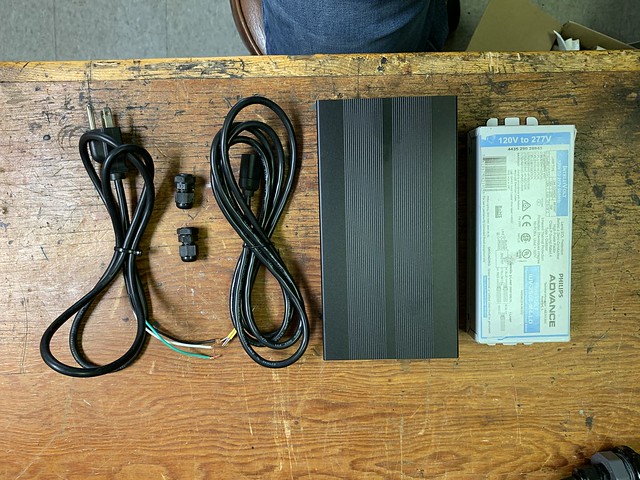
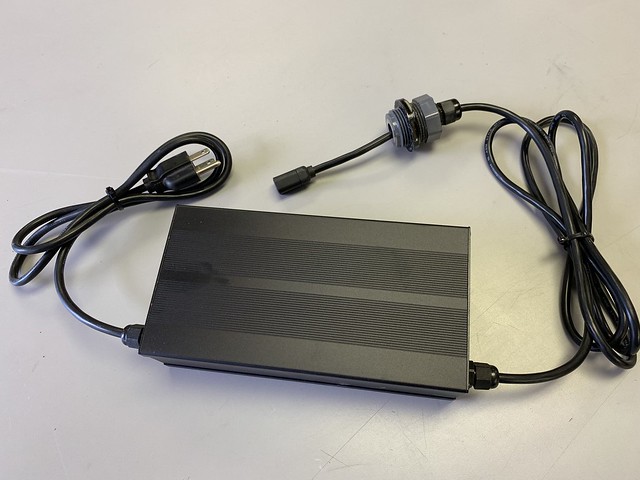
Here are the components I went with. Total was $150, less than a new ballast and bulb from Pentair or AquaUV
Bulb: Philips TUV 36T5 HO 4P SE UNP (bulbconnection.com $22ea)
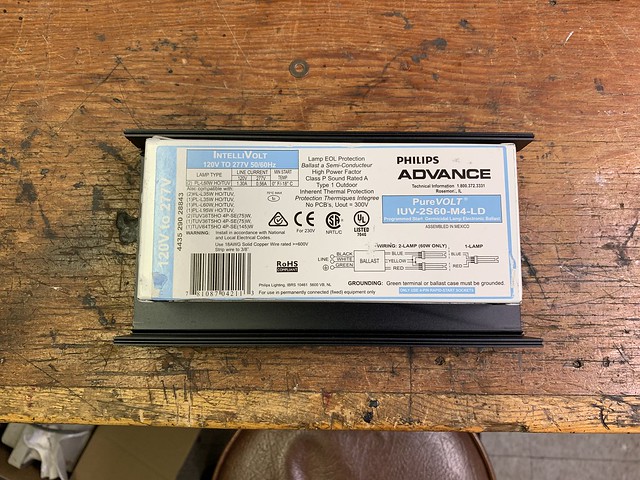
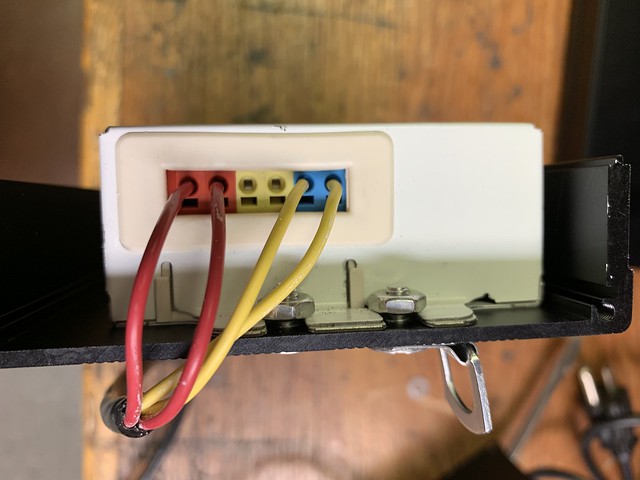
Ballast: Philips Advance Purevolt IUV-2S60-M4-LD Germicidal Ballast (Ebay $80)
Cord: 05-0191A2 Lamp Socket: 4 Pin w/2 meter Leads (Atlantic Ultraviolet $17)
Enclosure: 200x106x55mm Aluminum DIY Project Box Enclosure Case (Ebay $15)
Strain Reliefs: Big Bag of Cable Glands (Amazon $10)
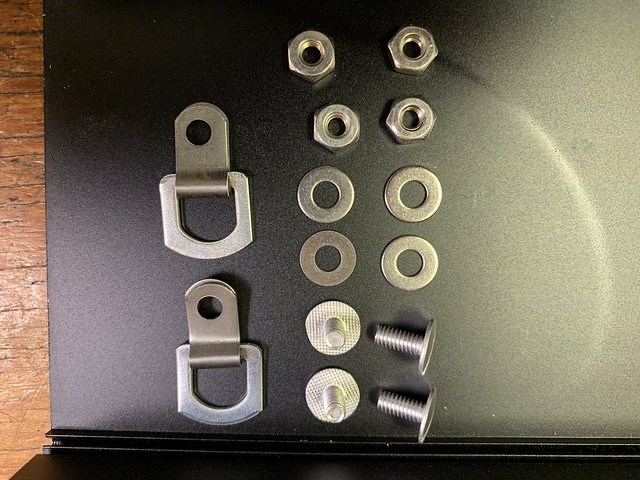
Misc Hardware: Screws and Hangers (Ace $6)
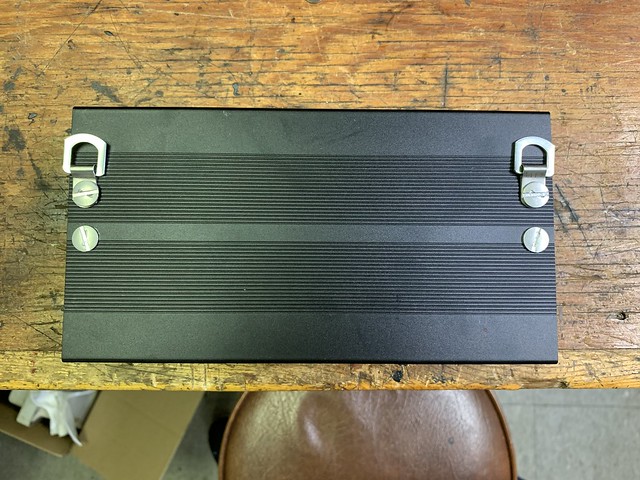
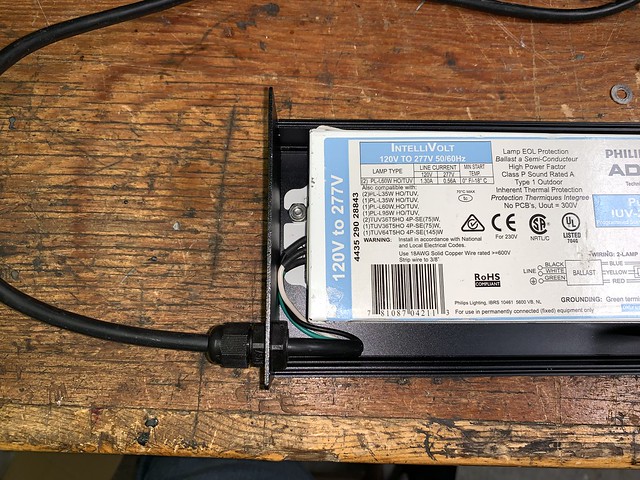
First Step: Mount the new ballast and hangers to the aluminum enclosure. Shift the ballast up towards one side to leave room for the cables.
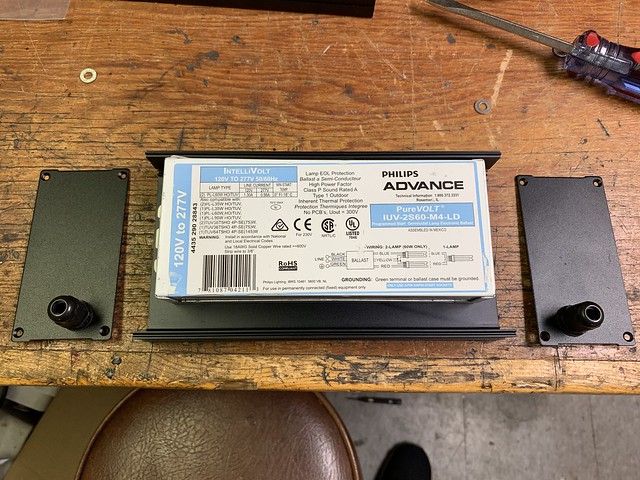
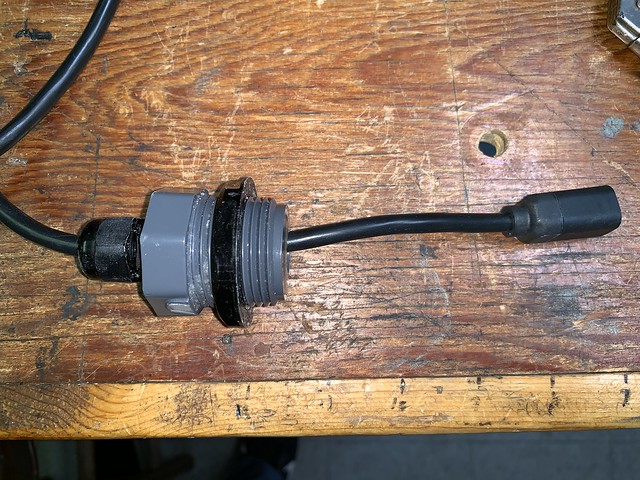
Mount the end plates, mark the locations for the cable glands, and install one cable gland into each end plate.
My UV is an Emperor Aquatics (Pentair) 40w Smart UV but this should work on all T5 based 40w UV sterilizers.
Long story short but my sterilizer was burning though bulbs every 6 months, after the 3rd bulb (pentair) I got frustrated and contacted the manufacturer. I assumed at this point the ballast had gone bad and had hoped they would warranty out the bulb if I bought a new ballast. Nope, no warranty past 3 months :thumbdown. They would however gladly sell me a new ballast. I declined having already spent $204 on their lamps in 1.5 years. Burned bulb on right, new on left.
This is where it gets interesting, I decided to cut the ballast apart so I could just get a replacement. To my surprise... Workhorse 22... Not spec for any T5, certainly not a UV bulb, and with a pf of .8 was actually driving the bulb at 33w. Lame... my quest on finding a quality source of UV supplies was on. (To be fair, my unit is old, and they have moved on from that ballast)
I decided to go with Philips Lighting. They are well regarded in the UV industry, have long life, have spec ballasts, and publish bulb degradation data. The bulbs are also cheaper. Interestingly enough they have a high output 75w version of the bulb size most of our 40w setups use.
Here are the components I went with. Total was $150, less than a new ballast and bulb from Pentair or AquaUV
Bulb: Philips TUV 36T5 HO 4P SE UNP (bulbconnection.com $22ea)
Ballast: Philips Advance Purevolt IUV-2S60-M4-LD Germicidal Ballast (Ebay $80)
Cord: 05-0191A2 Lamp Socket: 4 Pin w/2 meter Leads (Atlantic Ultraviolet $17)
Enclosure: 200x106x55mm Aluminum DIY Project Box Enclosure Case (Ebay $15)
Strain Reliefs: Big Bag of Cable Glands (Amazon $10)
Misc Hardware: Screws and Hangers (Ace $6)
First Step: Mount the new ballast and hangers to the aluminum enclosure. Shift the ballast up towards one side to leave room for the cables.
Mount the end plates, mark the locations for the cable glands, and install one cable gland into each end plate.
Last edited:

")