Hi all, decided to create a thread of my 120g. So here it goes:
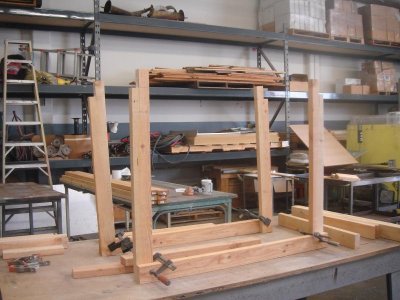
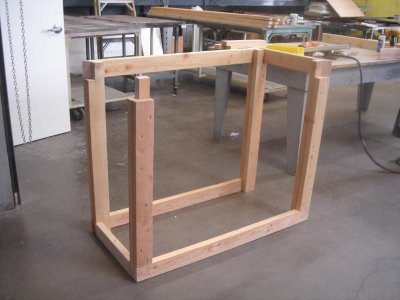
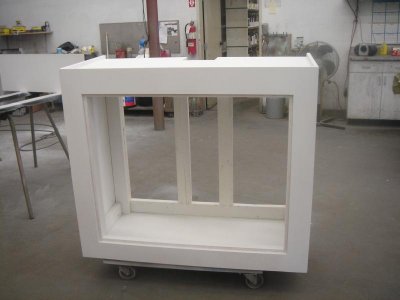
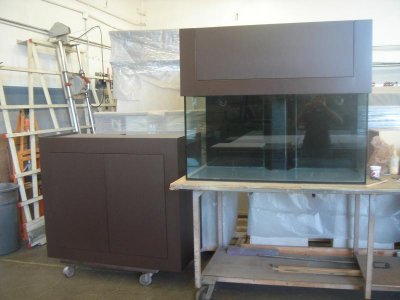
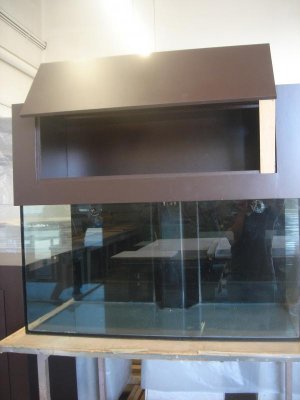
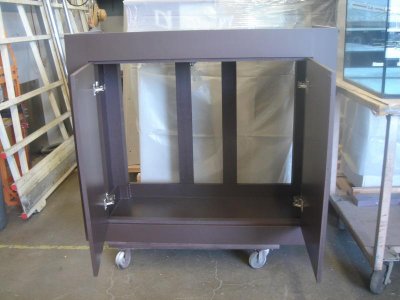
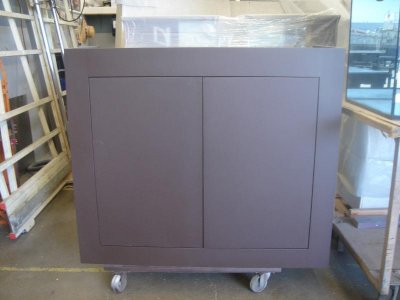
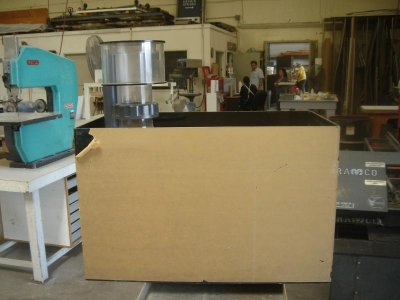
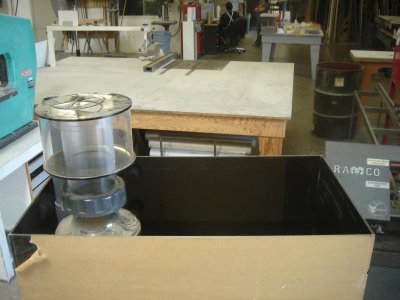
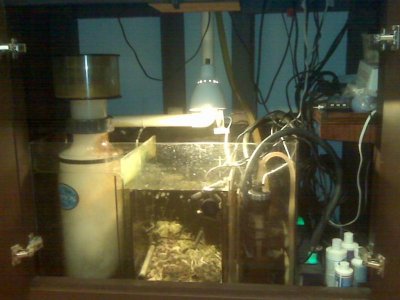
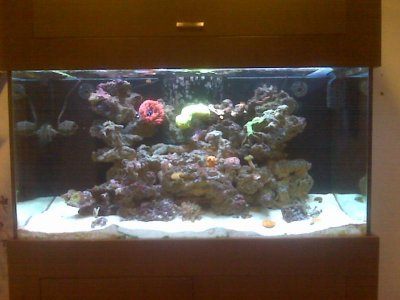
Got the tank from a friend that sold his house, originally it was built into the wall with a makeshift canopy. The tank is a leemar 120g 4' x 2' x 2' with euro bracing, trapezoid overflow in the middle. It is also drilled on the top left and right for the return. I wanted to have a sleek and modern look, so I build the stand and canopy with flush doors and no molding. The stand is 42" high so the tank will be at eye level. inside the stand is an aluminum pan to catch any water. Everything is primered with Kilz and painted with a polyurethane paint (deep clocolate color). The canopy is 18" tall to house an 8 bulb t5 light fixture. L.E.D. moon lights are custom made from extra blue L.E.D. modules from a project at my company. The sump is 32" x 18" x 20" with a refugium. Skimmer is a Euro-Reef 200, return is an Eheim 1262, cooling is done by a ¼ hp JBJ Artica. I'm also running a phosban reactor and a 25w UV light. The rock work consist of three pillars, that I drilled and use ½" acrylic rods. I wanted to keep it "open" for the fish to swim around.
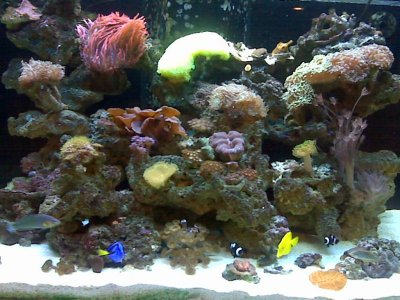
Livestock: Yellow Tang, Blue Tang, Starry Blenny, Wrasse (forgot the name), a pair of Black misbar clown, a harlequin shrimp.
Corals: RBTA, yellow flowerpot, hammer, frogsprawn, xenias, zoas and palys, a couple of chalice, and some acans.
Thanks for looking.
Got the tank from a friend that sold his house, originally it was built into the wall with a makeshift canopy. The tank is a leemar 120g 4' x 2' x 2' with euro bracing, trapezoid overflow in the middle. It is also drilled on the top left and right for the return. I wanted to have a sleek and modern look, so I build the stand and canopy with flush doors and no molding. The stand is 42" high so the tank will be at eye level. inside the stand is an aluminum pan to catch any water. Everything is primered with Kilz and painted with a polyurethane paint (deep clocolate color). The canopy is 18" tall to house an 8 bulb t5 light fixture. L.E.D. moon lights are custom made from extra blue L.E.D. modules from a project at my company. The sump is 32" x 18" x 20" with a refugium. Skimmer is a Euro-Reef 200, return is an Eheim 1262, cooling is done by a ¼ hp JBJ Artica. I'm also running a phosban reactor and a 25w UV light. The rock work consist of three pillars, that I drilled and use ½" acrylic rods. I wanted to keep it "open" for the fish to swim around.
Livestock: Yellow Tang, Blue Tang, Starry Blenny, Wrasse (forgot the name), a pair of Black misbar clown, a harlequin shrimp.
Corals: RBTA, yellow flowerpot, hammer, frogsprawn, xenias, zoas and palys, a couple of chalice, and some acans.
Thanks for looking.