Weyrman
New member
Six weeks ago in late March I received a new 135 gallon mixed reef with fish addition to my house. The former owner had been having a water change service come in every week to do water changes and a bit of cleanup. That was costing her about $100 a week.
I'm new to the salt water scene. Have always wanted to get into it. Even bought a 240 gallon tank for it. Just never put my toe in the water. So this new tank got the juices flowing. But I didn't want to screw up so figured I'd have the service continue.
I called the service multiple times to find out about changing over to my place. The former owner called on my behalf as well. The service never returned our calls. If that's service then I don't want it.
Obviously I had to do something.
So I started out with about 12 - 7 or 8 gallon containers for getting water from the LFS for water changes and top off. They are currently being stored in the foyer, bathroom, and behind the kitchen table. This will not work long term.
Going each week to the LFS turns out to be rather time consuming just for water changes. Enjoyed looking at the fish, coral, and other goodies. But I'm usually on a mission when trying to get things done. Again, a problem long term.
I figured I could kill two birds with one stone if I made the RO/DI water here at home. I could save the weekly trips and maybe get rid of some of the water containers.
10 days or so ago I set up an RO/DI system and tied it into a water storage barrel. That barrel was pretty old and sprung a leak. So I took the hint and also did some planning ahead for that 240 gallon build and ended up deciding to build a stand for the storage barrel that would also hold the salt water mixing can and about 100 feet of aquarium cleaning and filling hoses that keep ending up in the guest room bathtub.
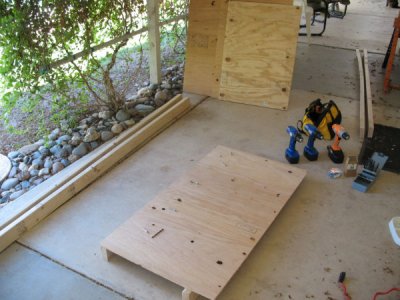
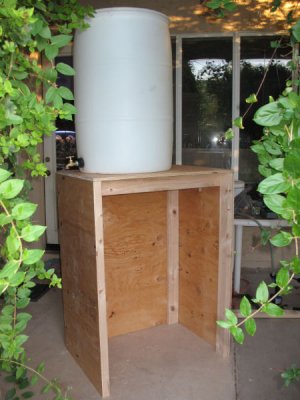
Today I built the stand for a new 55 gallon RO/DI storage barrel I picked up at Tanknbarrel in Apache Junction for $35. My idea was to build a stand high enough that I could store the Rubbermaid 44 gallon Brute can (used for mixing the salt & water in) underneath. The Brute can has been sitting in the kitchen as there's no place else for it to go at the moment.
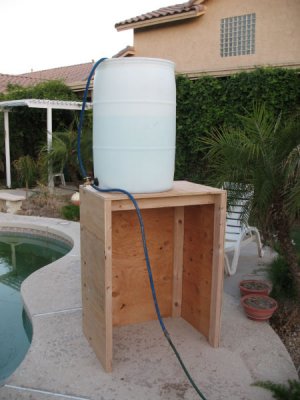
The stand will go in the garage. I have the RO/DI unit plumbed out to the garage already.
Materials used:
1 - 11/32" thick 4x8 sheet of plywood for the sides - $15
1 - 23/32" thick 4x8 sheet of plywood for the top - $23 (a 2x4 piece was $22 so I figured I'd just get the full sheet and have some left over for the next project)
3 - 2x4x8
About 26 each - 12-2 and 12-1 1/2 flat head wood screws - already had a couple boxes of 100 so don't know what they would cost.
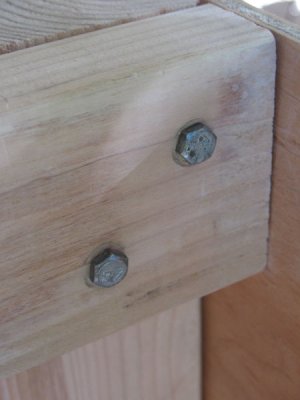
8- 1/4" x 2 1/2" lag bolts - left over from another project
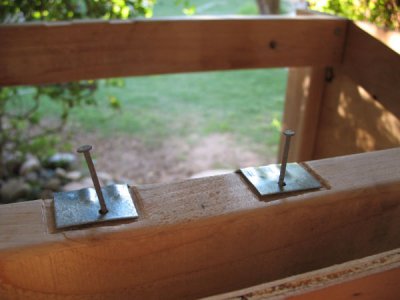
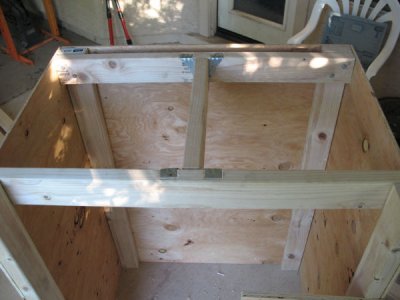
2 - 2x4 hangers - $3.50
Dimensions:
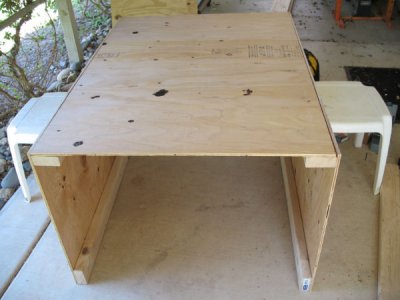
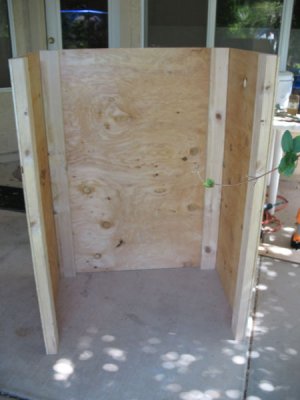
top - 26" deep x 36" wide
Height - 4'
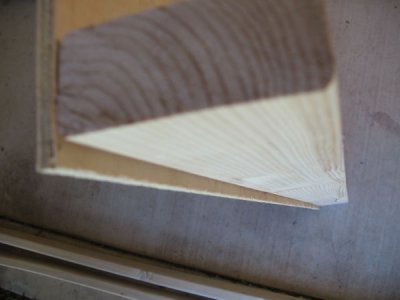
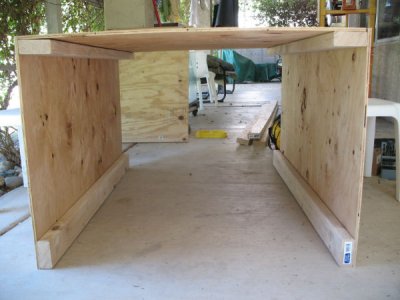
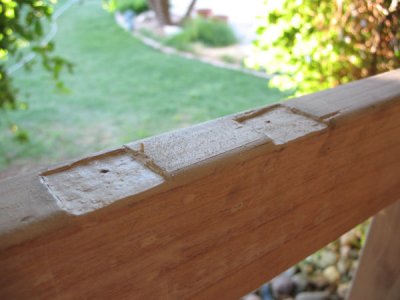
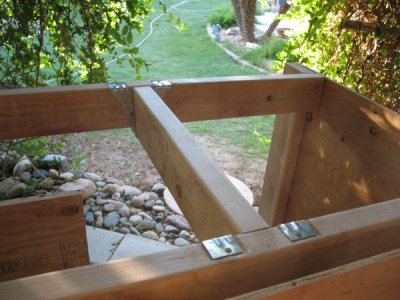
The front support 2x4's were placed sideways to allow for a wider object to be put into the storage area.
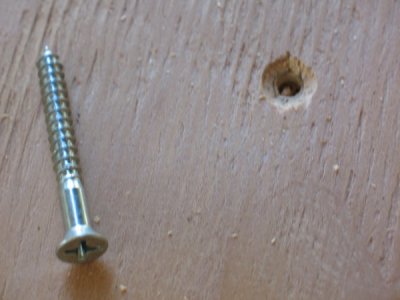
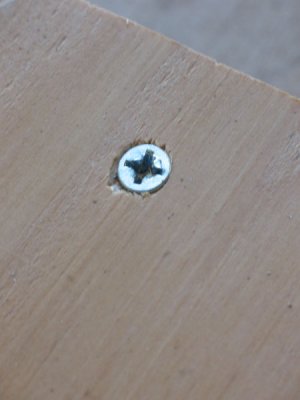
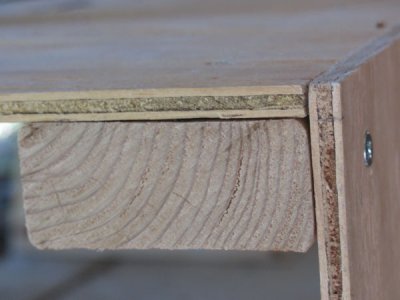
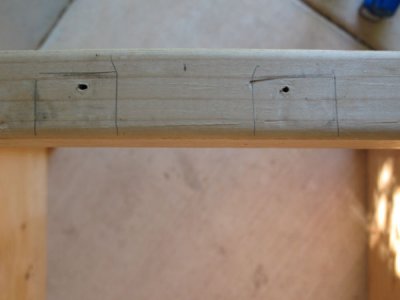
I countersunk the wood screws so the surface would be flush.
The plywood for the sides was hung over the back by 11/32" to make the back plywood piece lay flush. I can put sheet rock over this easily for my, as yet, undecided plans for the 240 gallon to be in wall in my office and backed up into the garage. I'll incorporate the RO/DI storage water stand into that build if I get that far.
I'm new to the salt water scene. Have always wanted to get into it. Even bought a 240 gallon tank for it. Just never put my toe in the water. So this new tank got the juices flowing. But I didn't want to screw up so figured I'd have the service continue.
I called the service multiple times to find out about changing over to my place. The former owner called on my behalf as well. The service never returned our calls. If that's service then I don't want it.
Obviously I had to do something.
So I started out with about 12 - 7 or 8 gallon containers for getting water from the LFS for water changes and top off. They are currently being stored in the foyer, bathroom, and behind the kitchen table. This will not work long term.
Going each week to the LFS turns out to be rather time consuming just for water changes. Enjoyed looking at the fish, coral, and other goodies. But I'm usually on a mission when trying to get things done. Again, a problem long term.
I figured I could kill two birds with one stone if I made the RO/DI water here at home. I could save the weekly trips and maybe get rid of some of the water containers.
10 days or so ago I set up an RO/DI system and tied it into a water storage barrel. That barrel was pretty old and sprung a leak. So I took the hint and also did some planning ahead for that 240 gallon build and ended up deciding to build a stand for the storage barrel that would also hold the salt water mixing can and about 100 feet of aquarium cleaning and filling hoses that keep ending up in the guest room bathtub.
Today I built the stand for a new 55 gallon RO/DI storage barrel I picked up at Tanknbarrel in Apache Junction for $35. My idea was to build a stand high enough that I could store the Rubbermaid 44 gallon Brute can (used for mixing the salt & water in) underneath. The Brute can has been sitting in the kitchen as there's no place else for it to go at the moment.
The stand will go in the garage. I have the RO/DI unit plumbed out to the garage already.
Materials used:
1 - 11/32" thick 4x8 sheet of plywood for the sides - $15
1 - 23/32" thick 4x8 sheet of plywood for the top - $23 (a 2x4 piece was $22 so I figured I'd just get the full sheet and have some left over for the next project)
3 - 2x4x8
About 26 each - 12-2 and 12-1 1/2 flat head wood screws - already had a couple boxes of 100 so don't know what they would cost.
8- 1/4" x 2 1/2" lag bolts - left over from another project
2 - 2x4 hangers - $3.50
Dimensions:
top - 26" deep x 36" wide
Height - 4'
The front support 2x4's were placed sideways to allow for a wider object to be put into the storage area.
I countersunk the wood screws so the surface would be flush.
The plywood for the sides was hung over the back by 11/32" to make the back plywood piece lay flush. I can put sheet rock over this easily for my, as yet, undecided plans for the 240 gallon to be in wall in my office and backed up into the garage. I'll incorporate the RO/DI storage water stand into that build if I get that far.

")