mcozad829
Premium Member
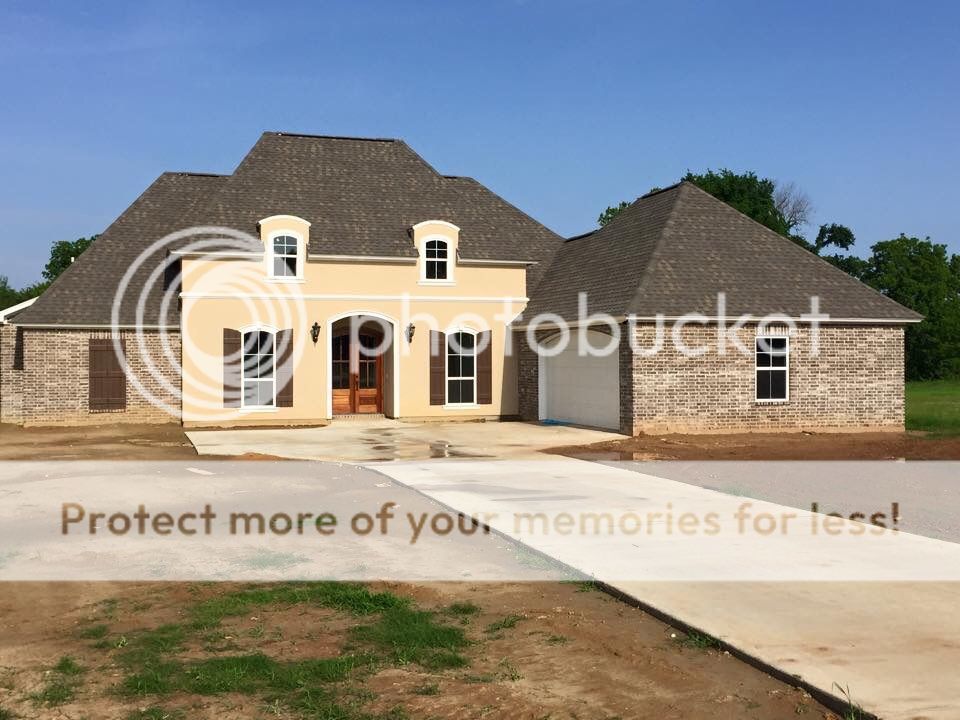
The Purpose behind this tank is to create a active (swaying) reef tank that has as little maintenance as possible. In the beginning I was going to go FOWLR to really keep the maintenance down but later decided to go the softie route because the FOWLR just wasn't going to have enough stuff going on for me. So this project began in January with the construction of a new house. Here are some pics to bring this thread up to date.
Began the Forming of the House and laid the plumbing in the slab. Had a drain line and water line placed directly behind where I wanted the tank in my home office.

Slab got poured walls started going up and I had two outlets installed on the tank wall on a dedicated 20 amp circuit.

House was finished in may and we moved in.
I built a pond outside of my office window, so I get to see fish in each direction.

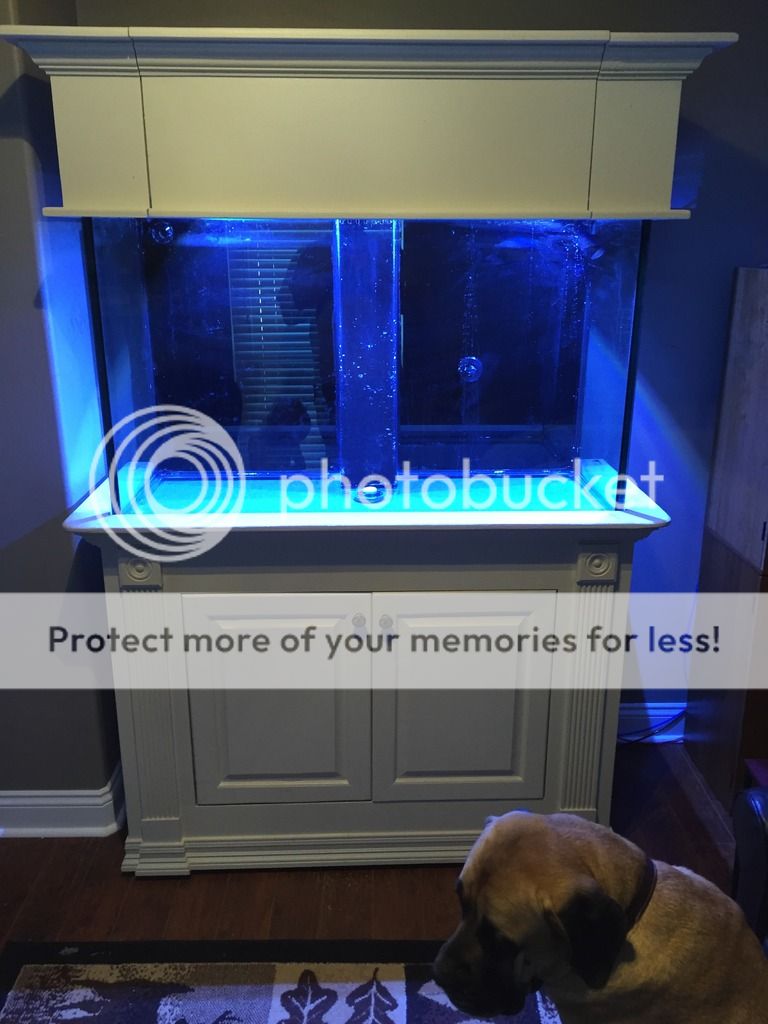
I was originally going to have a custom tank built, but moving and landscaping ate a lot of my tank budget so I ended getting a 110 Gallon with stand and canopy from a local reef club member for a steal. Brought it home and got it placed in its spot.

A little vinegar and elbow grease and I got it looking close enough to new for the price.
I bought this cabinet from wally world for $60 and reinforced the bottom. I hooked my RODI unit to the water line and installed float valves in my 13 gallon mixing container and 5 gallon ATO (under the stand). I put a powerhead, heater, and submersible pump in the mixing container and plumbed it to the DT by means of vinyl tubing and a dedicated return.

This tank was originally drilled for a closed loop system so I plugged the return hole in the bottom and used the drain bulkhead for a tank drain. I plumbed it to the drain I had installed in the wall and now I can drain the desired amount of water out of the DT with the turn of a ball valve.


For the sump I decided to go with an eschopps RS-300 3rd gen. It is rated for 300 gallons so I can use it again if I upgrade to a 6 or 7 ft tank.

Began the Forming of the House and laid the plumbing in the slab. Had a drain line and water line placed directly behind where I wanted the tank in my home office.
Slab got poured walls started going up and I had two outlets installed on the tank wall on a dedicated 20 amp circuit.
House was finished in may and we moved in.
I built a pond outside of my office window, so I get to see fish in each direction.
I was originally going to have a custom tank built, but moving and landscaping ate a lot of my tank budget so I ended getting a 110 Gallon with stand and canopy from a local reef club member for a steal. Brought it home and got it placed in its spot.
A little vinegar and elbow grease and I got it looking close enough to new for the price.
I bought this cabinet from wally world for $60 and reinforced the bottom. I hooked my RODI unit to the water line and installed float valves in my 13 gallon mixing container and 5 gallon ATO (under the stand). I put a powerhead, heater, and submersible pump in the mixing container and plumbed it to the DT by means of vinyl tubing and a dedicated return.
This tank was originally drilled for a closed loop system so I plugged the return hole in the bottom and used the drain bulkhead for a tank drain. I plumbed it to the drain I had installed in the wall and now I can drain the desired amount of water out of the DT with the turn of a ball valve.
For the sump I decided to go with an eschopps RS-300 3rd gen. It is rated for 300 gallons so I can use it again if I upgrade to a 6 or 7 ft tank.


") I really dig the pond outside the window!
I really dig the pond outside the window! Now time to go get some seafood!
