220g In-wall build thread

jcolley

Member
Greetings all!

Well, I've lurked here for a couple of months and trying to learn as much as possible.

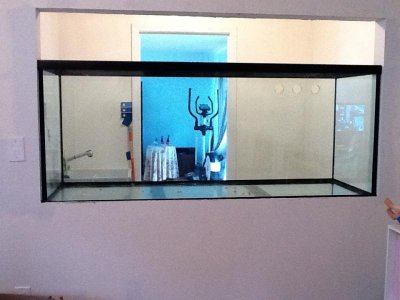
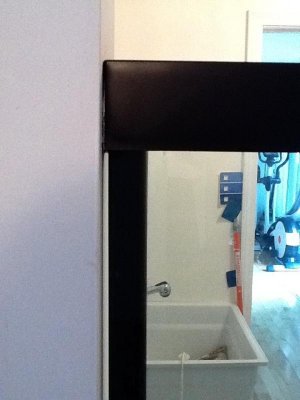
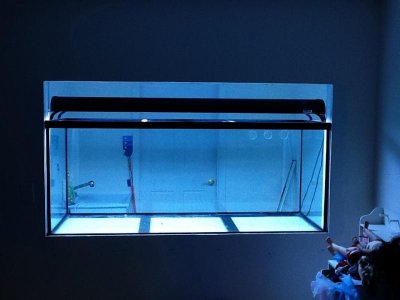
My wife thinks the 125 in the family room dominates the room and takes up a little too much space, so we agreed to make a closet off the room a fish room and build the tank into a wall.

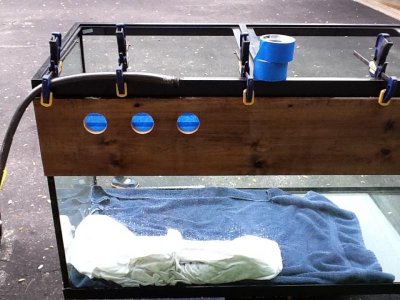
While starting all the planning for this, I realized that the front glass of my 125 was a little scratched up and changing tanks later would be too much of a pain. So, with a little luck, I snagged a new 220 and I'm starting the project.

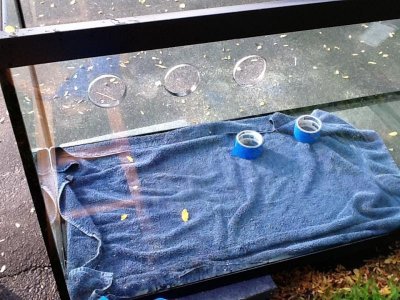
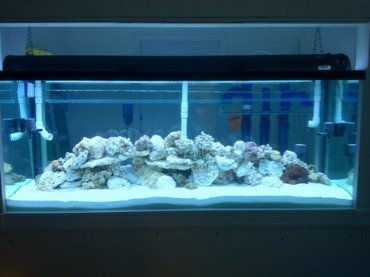
I figured I would post a couple of pics of my stand design and wall plans and get some feedback.

stan%20bottom%20iso.JPG


stand%20bottom.JPG


stand%20iso.JPG


stand%20left%20iso.JPG


stand%20and%20wall%20rear%202.JPG


stand%20and%20wall%20rear.JPG


Open to any thoughts, but anxious to get rolling, so let 'em fly!
 
Was hoping for a little feedback by now... :hmm4:

I guess I didn't really state anything to start with, so here goes:

125 FOWLR was taking up too much space for boss's taste and she made the mistake of mentioning "in-wall". Her mistake...

The 125 was bought used and although was always marine, I had no idea what may have been done with it prior. Also, the front glass was fairly scratched, almost as if someone had used steel wool in a few stubborn areas. Now, why go through the effort of building an in-wall without nice clean glass to go with it?

So, I did away with a few non-keeper fish and kept only my two black and white clowns, cardinal banggai, and firefish goby. I set up an old 10gal tank and transferred them over. It's been a month now and chemistry looks good and the fish don't seem as angry about their new hotel as much as I might have thought. However, I think Mrs. Clown (kids don't seem interested in naming her) is starting to look for more closet space.

Build will start simple:
- Perfecto 220 Gal Aquarium
- Internal glass overflow ala BeanAnimal with (3) 1.5 inch bulkheads to (3) 2" drains pipes
- Sump still TBD
- Mag 24 pump mounted externally for ease of maintenance
- (3) MaxiJet 1200s
- (2) ViaAqua 300W Titanium Heaters (will add another if needed)
- E-Shopps PSK-300 Skimmer

- Lighting will start off with about 400W of Power Compacts I have laying around as I eventually build an LED hood.

- I will be setting up a water mixing station in the cellar with a transfer system to the fish room. Eventually, this whole rig will be automated, salt mixing, water changes, etc.

Pics coming soon, I got bored with the Solidworks and starting tearing a closet apart! :bounce3:
 
First things first... Support.

The 125 was against an exterior wall and even though it was parallel to the floor joists below, it sat in the center of the family room wall which had a 3-ply sandwiched 2x10 under it. I was never worried about the weight there.

The new location though was chosen for aesthetics and the wall existing. So, as luck would have it, the tank stand footprint fell directly on top of one single 2x10 joist nearly in the center if its 10' span. That wasn't going to do at all, so a little reinforcement was in order.

I forgot to take a shot before I started placing reinforcement joists, but the doubled joist on the left was the lonely joist with unfortunate luck. So, I doubled it up. I also drilled a small pilot hole in the subfloor to locate the forward edge of the tank stand. I then placed two 2x10 joists to support the forward edge of the tank.
fishroom_001.jpg


Then, once all the joists were placed, they were thru-bolted with five 1/2" bolts.
fishroom_004.jpg


I was a little surprised how easily I was able to roll the joists into place, they are supported on either end of their 10' span directly on the main beam and the foundation sill plate, just as the original joists are.
fishroom_003.jpg


Then, since I'm not a structural engineer, I have no idea how to calculate load stresses on dimensional lumber that doesn't follow standard building practices. So...
fishroom_002.jpg


So, being out of material for the crawl (duckwalk?) space, I moved up into the closet for some demo.
fishroom_006.jpg


New plumbing for a small utility sink to the right of the tank.
fishroom_007.jpg


Near the floor on the left of this picture is the drain line for the tank sump. I will put a valve tapped into the bottom of the sump and the height of that bulkhead will be set to drain 10% of the total water volume when the pumps are off. This will greatly simplify water changes.
fishroom_005.jpg


More has been done, but was too "focused" (lazy) to take pictures along the way.

I have to say, the handiest little tool I've used so far is a Rigid JobMax. This little thing drilled 1/2" holes with a spade bit in joists 5" apart from each other. It zipped right along drywall to cut out the tank window (pics soon). Probably twice as useful as tools I spent far more on.

More soon!:spin1:
 
Last edited:
Stand

Stand

Hello,

Looks like you have a more than adequate stand plan. I just built an inwall tank for a 201 gallon on a concrete slab.

My best advice, borrow (if you don't have one) a big level and make sure your wall, the floor your stand will be on, and the your stand once built is extremely level.

My concrete floor was a bit off and created some issues I had to readjust to.

Also, when you get your dimensional lumber, particularly for the "joists" of your aquarium stand, measure exactly as many of the boards from the big box stores can vary up to a 1/4". You can adjust your vertical supports accordingly to account for the variance.

Had I followed these more closely, I would have avoided some extra work down the road.

Good luck, I look forward to seeing the build in action.
 
I made a lot of progress this weekend, but man I wonder why I take on projects like this at times. I took photos, but I'm in between computers right now and won't be able to post them for a day or so.

- Tank wall is framed with king studs, trim studs, and a double 2x10 header over the tank. This wasn't really necessary as the only load this wall is bearing is about 16 cu ft of drywall, but I had extras laying around and I'm getting tired of runnin to Lowes and Home Depot every 4.7 minutes.

- All plumbing is done with the exception of tying into the 4" sewer line that conveniently runs directly under the tank room. There is a drain connection for the utility sink which may look a little odd in the pics above. There is a sanitary tee just downstream of the sink connection before the drain line taps into the 1.5" tee for sewer/vent. This dumps the a portion of sink water down a 1" line which is routed down into the floor and primes the 3" U-trap for the floor drain.

- There is another 1.5" tee which is in the left of the plumbing pic near the footer. This is the low point connection for a tank/sump drain system that will allow manual draining of the sump to sewer for water changes and there will be a high point "overflow" of sorts in the sump which will dump directly to sewer as well. The idea is that if there are any problems in the system, it should automatically prevent overflowing the sump.

- Also I added a 1" PVC supply line into the wall(not in pics yet) which supplies water from the mixing station in the cellar (other end of the house) via solenoid valves and pumps. The goal here will be an inherently safe, engineered method (eventually automated) of performing 10-15% weekly water changes.

- The stand is almost built. I varied slightly in the design from the drawings above, but mostly in the legs/floor. The legs are 2x6, sandwiched, and a 2x6 side brace similar to RocketEngineer's design. I ended up making all legs equal length and laying 2x4 on the subfloor on the perimeter of the stand to make even height instead of the goofy looking notch for the wall footer as shown above. Drilled my first Kreg PocketJig holes yesterday. A little slow at first, but now after 4 legs with 12 holes per leg, I think I've got it!

- Moisture barrier laid down in the entire room and up the walls/frames about 1", so even if any water builds up in the room on an accident, I can hopfully prevent some of the water from leeching up into the drywall. I'm considering extending this poly sheeting up the wall about 4" from the floow behind kickboard to make sort of 4" bathtub. Any thoughts on this?

So now for questions. As I work on the manual labor part of the project, my brain keeps churning and second guessing past decisions.


- BeanAnimal overflow on a 6' tank. I had planned on a glass internal overflow box 5' in length centered along the back glass. The remaining 5" on either side would be used to route the returns. But now, I keep thinking how much I won't like the real estate lost inside the tank with this arrangement. I like the idea of a 5' wier skimming the surface, but I'm considering putting it on the side of the tank instead of the back. 24" still isn't bad. I'm a little iffy about cutting slots myself in this tank for an external overflow. I also had the idea of a internal wier at a 30 degree angle to the back glass with holes cut through to an external box for the beananimal drains. Thoughts?

- Sump design: I like the simplicity of an all-in-one sump, but there's no way a skimmer's going underneath this monster stand, so that rules that out. Also, I really like the idea of growing pods in a fuge and gravity draining them to the tank for food. Not exactly simple. Any good pictures you guys have seen of an arrangement like this?

That's all for now, will have pics up soon for those who aren't Leo Tolstoy fans. :reading::spin2:
 
And done.

The edges on the inside didn't come out as nice as I would have liked, but a little dremel action with a sanding drum cleaned them up nicely.

Tomorrow she goes in the house!
 

Attachments

  • ImageUploadedByTapatalk1311721114.438680.jpg
    ImageUploadedByTapatalk1311721114.438680.jpg
    99.1 KB · Views: 3
Making progress, but a lot of work left.

Had some friends come by after work and the tank is in. My measurements were tight, but it's in!
 

Attachments

  • ImageUploadedByTapatalk1311799307.629306.jpg
    ImageUploadedByTapatalk1311799307.629306.jpg
    55.8 KB · Views: 4
  • ImageUploadedByTapatalk1311799319.518184.jpg
    ImageUploadedByTapatalk1311799319.518184.jpg
    48.1 KB · Views: 3
  • ImageUploadedByTapatalk1311799344.897195.jpg
    ImageUploadedByTapatalk1311799344.897195.jpg
    42.4 KB · Views: 3
Still trying to decide on what color to paint the room...

Covered everything in Kilz2 primer, silicone caulked every crack and crevice in the room. Hopefully I can avoid any water issues from humidity too. I will eventually install a Panasonic bathroom fan on a humidity sensor, but other projects in the house are calling my name (along with She Who Shall Be Obeyed).

I have about 150 lbs of live rock cooking in the basement, so hopefully my cycle time will be somewhat shorter.

I know I'm lacking pics at this point, sold my laptop and just on an iPad now. Anyone recommend a good way to edit photos and upload to an FTP server for IOS?
 
Tested the light in the room, still trying to decide about blocking the back of the tank and sides. There's a lot of stuff behind it to paint the room that will still be visible.

This is our girls' playroom right now, will be an office for me as they get older. I'm trying to convince the wife that we need a futon or something in there as a reading couch. :/
 

Attachments

  • ImageUploadedByTapatalk1312335371.731244.jpg
    ImageUploadedByTapatalk1312335371.731244.jpg
    40.6 KB · Views: 4
Wow. It has been a while since I've updated this...

Tank is in, reached temp and salinity November 1st. I let the tank cycle for a month an added the live rock I have been cooking for 5 months or so.

Got our first fish, a Firefish Goby the girls had and he's doing great. Have about 100 Astreas, 200 Nassarius, and 200 Ceriths.

Added a little sea cucumber and a lettuce Nudi to get some of the initial hair algae under control.

Added a lawn mower blenny last week and he's quite a character.

Now in QT are two Peppermint shrimp and a Banggai Cardinal with about 3 weeks to go.

Here's a few phone pics, will have a few more from a real camera later.

Headed to sea for a few weeks so keeping my fingers crossed everything lives under wife and daughter care.
 

Attachments

  • ImageUploadedByTapatalk1328033530.817782.jpg
    ImageUploadedByTapatalk1328033530.817782.jpg
    29.1 KB · Views: 3
  • ImageUploadedByTapatalk1328033547.311007.jpg
    ImageUploadedByTapatalk1328033547.311007.jpg
    25.4 KB · Views: 3
  • ImageUploadedByTapatalk1328033567.813368.jpg
    ImageUploadedByTapatalk1328033567.813368.jpg
    23.8 KB · Views: 3
Back
Top