Coast to Coast algae/fish cover

sleepydoc

Team RC
I've seen this question/issue in a couple other threads so I thought I'd start a new thread for it.

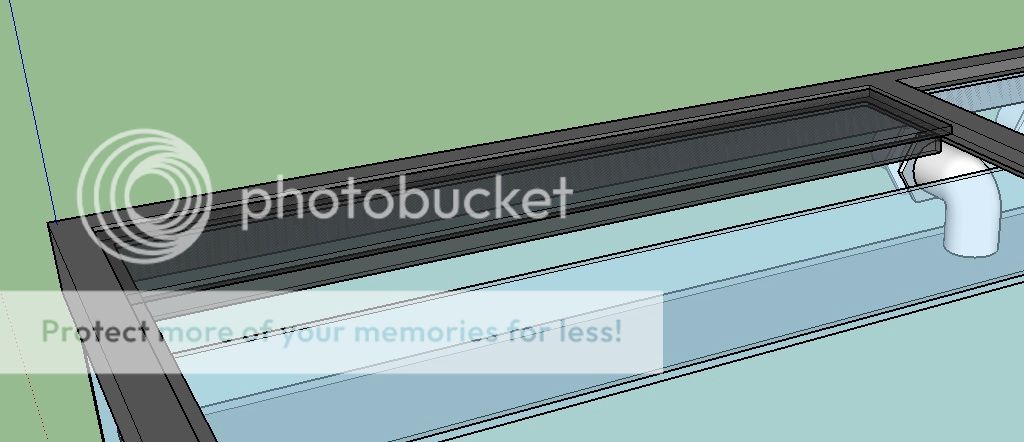
I will be tearing down my tank soon and converting it to a coast to coast overflow. Below are my plans for a cover over the overflow to keep critters out and minimize algae growth.

It's essentially a piece of acrylic the width of the overflow cut to fit in the lip of the tank rim with another piece cemented to the edge that extends down towards the overflow weir. I had planned on using black/painted acrylic, hoping that the edge piece will be enough to prevent warping. Glass is a possibility, but I'm not sure if it's possible to get a ¾" x 24" piece of glass cut without it breaking.

The 1" gap I have pictured is just for illustration. I need to calculate the height over the weir needed for adequate flow. Goals are obviously to minimize the gap without restricting flow at all.

I'm sure someone else has thought of & used this approach in the past; curious as to how it turned out.
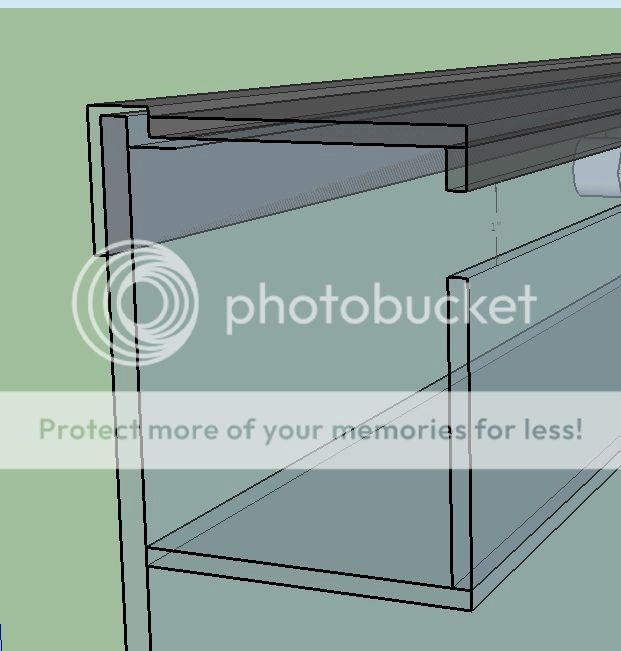
C2CCover1_zps9a0b2442.jpg


Cut away view
C2Ccover2_zpse64263d5.jpg
 
I recently installed weir fences that are essentially the same. In my case I used glass. One thing you might consider (if you haven't already thought of it, I can't tell from your dwg.) is moving the leading edge of the fence back to the trailing edge of the weir. That way, you can bring the fence down to virtually the surface of the tank as the water depth flowing over the weir will be lower on the trailing edge.
 
Here was my solution. I just finished glue it up and should be doing some flow test in the next week or so. The box is actually made of black and the external box (not shown) uses a modified version of the bean system. The internal box is 42 inches long with an effective weir length of 36 in. Its going on a 48 inch standard 120.

a>
 
Here was my solution. I just finished glue it up and should be doing some flow test in the next week or so. The box is actually made of black and the external box (not shown) uses a modified version of the bean system. The internal box is 42 inches long with an effective weir length of 36 in. Its going on a 48 inch standard 120.

what thickness material are you using? I would really encourage using more bracing as shown in center to prevent deflection outwards under lighting and in the reef environment. I made similar design for my internal with 3/4" flat strip bracing reinforcement for 70% of the length of the overflow and over the course of a year, the other 15% not reinforced on each end bowed out and began taking in all the water of the overflow instead of a smooth laminar sheet of water coming in. just rebuilt mine as a single toothless weir with many more lateral supports to prevent this from ever happening again.
 
it is 1/4" and I actually ended up putting two braces, so that there is only about a 10 inch space in between braces. There will only be about a 1 inch water height differential, so if it bows in any, it should be very minimal. Why would it bow out if the water height is higher on the outside of the box. I would think if it was to bow it would bow in.
 
it is 1/4" and I actually ended up putting two braces, so that there is only about a 10 inch space in between braces. There will only be about a 1 inch water height differential, so if it bows in any, it should be very minimal. Why would it bow out if the water height is higher on the outside of the box. I would think if it was to bow it would bow in.
my first iteration was a mailbox design which might be the reason vs a traditional box design.
 
Monkiboy, could you provide a picture of your weir? Interested in where your lateral supports are. Thanks.
sorry, not lateral, rather perpendicular I suppose. but yes, i'll try and get one. basically exactly as shown above but more spaced out evenly in the internal overflow to keep the weir rigid across the plane.
 
Back
Top