The Reef Addict
Member
Reefers!
I am finishing up a rebuild on a 220g and I figured I would share my journey with you all. Overall, it's not a terribly hard job - just VERY time consuming. I've got almost two full work days into this. I hope it pays off!
From the research I have done, it is absolutely imperative to rebuild a tank if you have a leak. The reason for this is simple - if you have a leak, it means the silicone in between the panels of glass has let go. There's no way to get the silicone between the panels out without taking everything apart, cleaning out the old silicone and rebuilding the tank. Now that I have done this myself, I can say for sure - this is the right way to do it!
1) Tools/Supplies
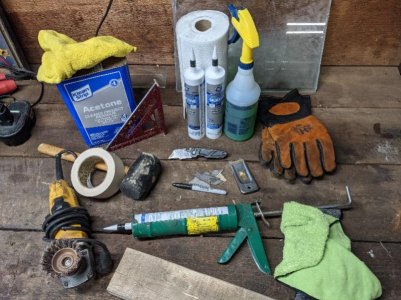
Basics include - GE Silicone I, caulking gun, razor blades, knife/scraper, masking tape, acetone/rags, rubber mallet, metal scraping tool, super glue, and a block of wood. There's probably a few more I'm forgetting off the top..Oh yea, and a lot of arm/back muscle!!!
2) Trim Removal
This is the hardest and most stressful part. I spent at least an hour on this alone. Use a razor blade around the trims edges to partially break the silicone seal, then grab your metal scraping tool and start bashing the end of it with your rubber mallet. If you look through the glass from inside the tank you will be able to see if you are penetrating through the seal to the top of the trim piece. Do this all the way around the tank. Then grab yourself a good ol block of wood, place it up against the trim and start whacking away at it with your mallet. Once you start to get some seperation, begin working your way around the tank. Nice and even! You don't want to put too much stress on the plastic and snap it.
3) Label, then Seperate the Panels
Labeling your panels before disassembly will avoid confusion later on. Masking tape and a sharpie makes quick work of that. Now for the fun part, disassembly! Start with the front panel (if you have overflows) and cut the interior seals. Then go at the seams from the outside of the tank where the panels meet it. The first cut is the most difficult due to how tight the seams are. Start at one of the upper corners and stab/slash away at the seam. Rocking the blade back and forth helped quite a bit. Once the blade is in, continue working your way down. It might help if you can apply some outward pressure to the pane of glass while cutting. Follow this procedure for the rest of the teardown. Make sure to look for/save the small spacers in between the panels of glass. The spacers allow silicone to penetrate between the panels during the assembly process. Then make sure to clean the panels with rags doused in acetone.
4) Scrape, Scrape, Scrape
Pretty self explanatory. Scrape ALL the silicone off!!! Especially where the panels meet up, everything needs to be as clean and bare as possible. New silicone does not bond well with old silicone. Which explains why many "patch jobs" end up leaking. P.S. - You will go through a TON of razor blades, so be prepared! I found that an angle grinder with a wire wheel made real quick work of the glass edges. Do not try to use this trick on thinner glass, or the front/back sides of glass.
5) Reassembly Location
You will want to do the reassembly in a well ventilated area, or somewhere away from your main living space. The fumes from silicone are extremely potent. It's extremely important to make sure you have a nice flat area to work on as well!
6) Panel Spacers
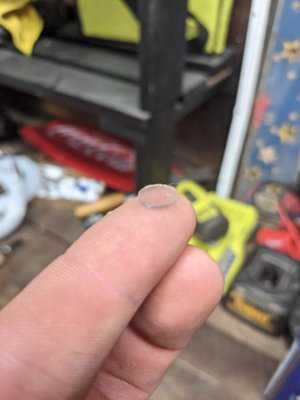
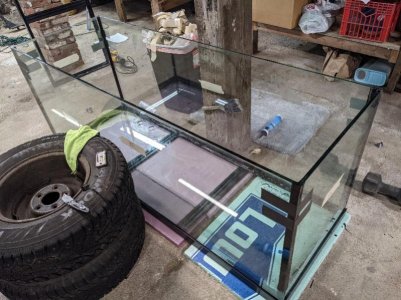
You saved them, right!? Lay down your bottom brace and place your bottom panel into the brace. Put in your panel spacers. A dab of super glue ensures the spacers won't shift around during the reassembly. What I ended up finding out later was - you will likely need more spacers. I found that the spacers were so far apart that the glass was flexing in the middle. I couldn't even get a razor blade in-between the panels! How would silicone ever make it in between the panels?! This is likely the cause of why these seams blow out. If you find it necessary, now would be a good time to place a bunch of extra spacers all around the base panel to spread out the load of the glass. I found (for my tank) the spacers were the exact thickness of a zip tie, so I cut up a bunch of small pieces and used those as my spacers.
7) Reassembly of Glass Panels
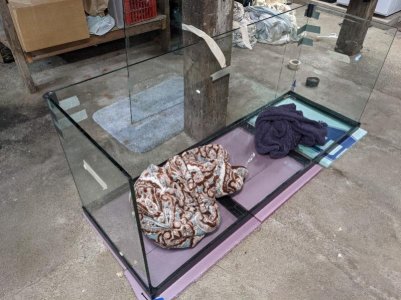
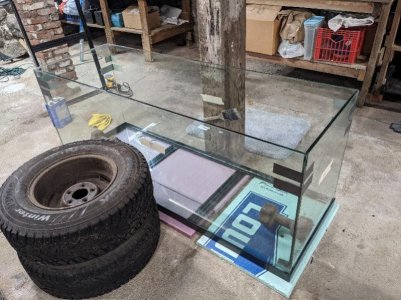
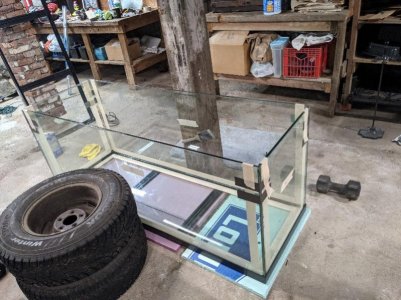
Start with your rear panel. I was working by myself so I leaned the panel against a post (part of my reassembly strategy). Then put in your side panels and use tape to hold the panels upright and together. Same method for the front panel. Make sure you are putting spacers in between these panels as well! I used a couple tires to put pressure against the front panel, and wedged a paint brush in between the rear panel/post to keep everything tight.
8) Masking/Silicone Prep
Now is a good time to hit all your panels with another round of acetone. Then begin masking all the areas you will be silicone-ing. The rule of thumb is the silicone should be as thick - if not thicker than the thickness of the glass.
9) Silicone
I recommend starting with either the left or right side panel and working your way to the other side. I recommend starting at one of the upright corners because you can see (from the outside of the tank) if you are getting proper penetration between the panels. Once you have a good idea of what it takes to get the proper penetration, start doing the bottom seams. I personally used my finger at first, to PUSH the silicone in-between the panels. Then went over the area several times before applying more silicone. For the real thick corner bead's I used the back of a small spoon (don't use your Wife's fine china, fellas) to spread it. It wasn't as smooth as a factory seam, but I could care less about that. Continue this process the whole way through, and make sure to do smaller sections at a time! Silicone can start to set in 5-10 minutes, and if you wait too long your masking tape will become binded to the glass/silicone and you will not be able to remove it! So.. do a section at a time and remove masking tape as you go. Time management is extremely important at this stage. You DO NOT want to do this whole process over again.
10) Final Assembly
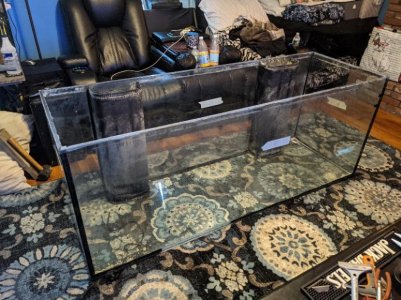
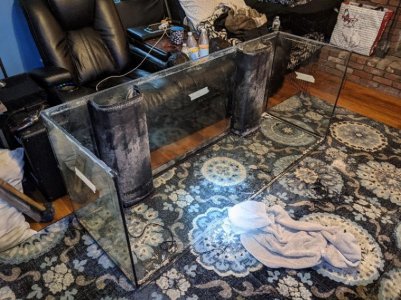
Wait at least 24 hours for the silicone to cure. Then install your overflows and bottom/top braces with silicone. And wait another 24 hours (at least) before water testing. You probably could silicone the bottom brace during the beginning stages, but I'm glad I didn't try to do that because it would have been a mad dash and a mess. Especially since I had to lift up all the panels to install extra spacers.
11) Water Test!!!!
I believe that's it folks, I hope this helps someone out there! It was worth a try at the very least. The tank was free to me, and I've always been skeptical with bigger tanks made by certain manufacturers that are known to commonly have issues. I have yet to silicone my braces/overflows in, but I should be ready for a water test come next weekend. Luckily my basement is unfinished, and if all fails - I'll have my sump pump ready! I might let it sit for a few months before bringing it back upstairs. Anyways, thanks for listening - happy reefing!
Attachments
-
 PXL_20210228_145537123_copy_800x600.jpg98.6 KB · Views: 64
 -
 PXL_20210227_155411656_copy_800x600.jpg103.8 KB · Views: 68
 -
 PXL_20210227_161028016_copy_800x600.jpg105.2 KB · Views: 70
 -
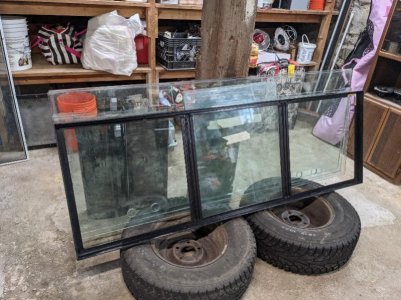 PXL_20210228_145135054.MP_copy_800x600.jpg95.8 KB · Views: 59
 -
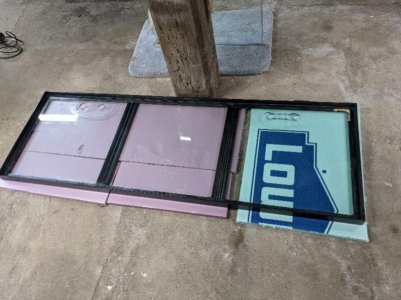 PXL_20210228_151801269.MP_copy_800x600.jpg76.5 KB · Views: 70
Last edited:

