herring_fish
Crazy Designer

I have finally re-started my reef tank after relocating. I am developing a new design for a non-photosynthetic system and I need your help. My old tank is documented on my web site, http://asaherring.com although the articles are 9 or 10 years old. I work as a designer and I experiment a lot so when I saw that dendros were being grown successfully, I decided to jump into the fray despite my lack of knowledge. I hope that I will get feed back on the design and setup phase of this endeavor. Below I have listed what I have so far.
130 gallon tank
Lots of Pumps and Lights.
Dump Bucket/Algae Scrubber
I am committed to my old favorite because I have used it for many years and love it (no skimming). I was going to put plants in the top of the sump instead but Chuck Stottlemire suggested that using vodka may suppress growth in complex plants too much so I will try this as an experiment. Cool lights can be closer to the water in this scrubber and (thriving or not) the simple algae may work if only to provide some insurance.
Horse Trough that has room for about 20†below the water line
I think that I will try to employ an upside down sand bed.
I hope that Charles Matthews and anyone else will give me some feed back on depths of sand, gravel, dead reef rock etc.
6 Inch by 6 Foot Lexan Tube
I was going to try a 2 tube sulfur denitrification system like you can see in the picture but Chuck also suggests that it may irritate dendros. Therefore I’m wondering if I could use just one tube for calcium carbonate gravel only. With water flowing upward slowly, the water may turn anaerobic to denitrify. On the other hand, could I dose vodka to create a bacteria incubator? Perhaps I could denitrify low in the tube and introduce air and vodka higher in the tube. All this may be stupid and not worth trying. I don’t know.
I think that I will buy a small wine cooler (not cold enough) freezer/refrigerator that I found. I hope to place it in the top of the cabinet at the back and take care to vent the heat outside the cabinet. I will place the containers of food, as purchased or diluted as little as possible, into the cooler. I’ll run the tube lines from inside of the containers to a multi-station dosing pump, either through the wall of the cooler or through the seal at the door. From the pump, the drops of food will go directly into my dump bucket to get fairly diluted. Then the rich water will cascade into the tank with an energetic splash at one end of the tank, in front of the main pump outlets. That way, I hope to be able to “set and forget†the feeding process as much as possible. Perhaps, I’m little naïve. Of courser I have to consider laminar flow and I have some plans that I am developing for that.
I hope that you will help me by posting answers, corrections, redirection and more ideas.
Last edited:
") . Life choice.
. Life choice.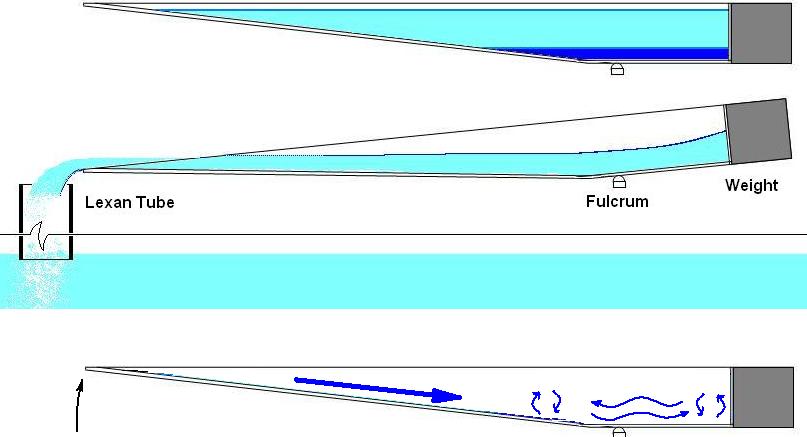


") .
.


