IUfan
Member
Looking for some input on my other thread over in DIY, any advice would be appreciated.
Link to pictures is at the bottom. Thanks
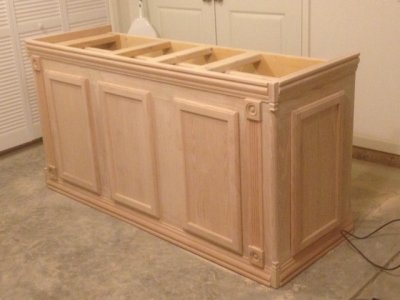
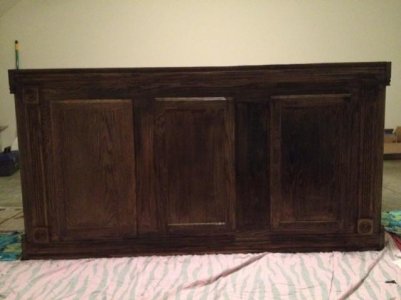
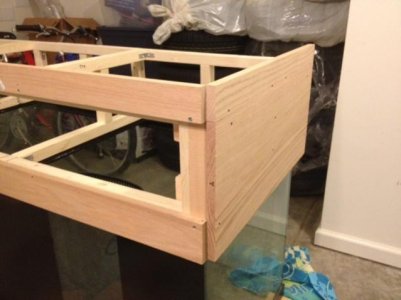
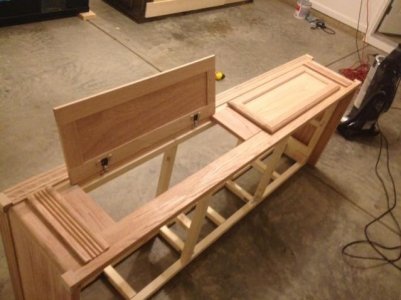
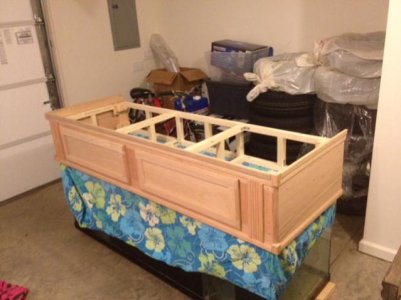
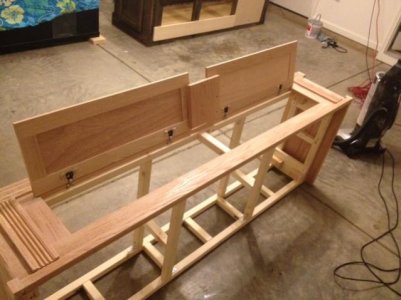
Hi, Just got a 180 tank and built a diy stand, taken a lot of hard work but the stand and canopy are now finished aesthetically speaking.
I now have to make sure I've not forgotten any other important steps before I move this baby indoors and put the tank on top, once that happens, its set and I dont want to have to move it again, if I can help it!
Steps I have in mind.
a. RedGarding the floor and 3" up the walls inside the stand.
b. putting soundproofing foam on the inside of the stand to keep noise down.
Questions.
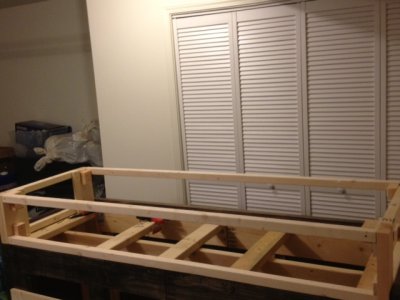
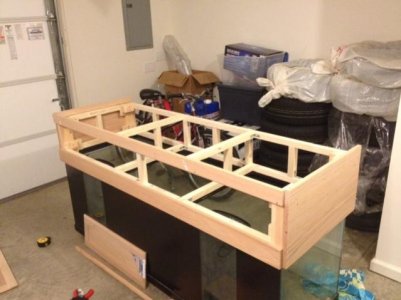
1. Looking at the first picture, of the frame, does the design look like it will hold 180gallons, I actually bought the stand frame 2nd hand with the tank, it feels very sturdy, but I'm not an engineer, and 180 gallons is an incredible amount of weight alone, without a 300lb glass box thrown in on top! So if anyone can comment and put my mind at ease that would be great. - I did put a few steel corner braces on several of the corners to help reinforce those areas.
2. the stand is made of oak, the back is mostly open, do I need to use a protective coat on the inside to protect from moisture damage with the sump being in there?
3. same for the canopy, do I need to put protective coat on the inside, and if so, what kind, KILZ2?
4. Do I need to paint the cannopy white to reflect light? I plan on using LEDS?
Thanks for your advice in advance!
http://www.reefcentral.com/forums/showthread.php?t=2250167
Link to pictures is at the bottom. Thanks
Hi, Just got a 180 tank and built a diy stand, taken a lot of hard work but the stand and canopy are now finished aesthetically speaking.
I now have to make sure I've not forgotten any other important steps before I move this baby indoors and put the tank on top, once that happens, its set and I dont want to have to move it again, if I can help it!
Steps I have in mind.
a. RedGarding the floor and 3" up the walls inside the stand.
b. putting soundproofing foam on the inside of the stand to keep noise down.
Questions.
1. Looking at the first picture, of the frame, does the design look like it will hold 180gallons, I actually bought the stand frame 2nd hand with the tank, it feels very sturdy, but I'm not an engineer, and 180 gallons is an incredible amount of weight alone, without a 300lb glass box thrown in on top! So if anyone can comment and put my mind at ease that would be great. - I did put a few steel corner braces on several of the corners to help reinforce those areas.
2. the stand is made of oak, the back is mostly open, do I need to use a protective coat on the inside to protect from moisture damage with the sump being in there?
3. same for the canopy, do I need to put protective coat on the inside, and if so, what kind, KILZ2?
4. Do I need to paint the cannopy white to reflect light? I plan on using LEDS?
Thanks for your advice in advance!
http://www.reefcentral.com/forums/showthread.php?t=2250167