220 rebuild thread

wolfenstein87

New member
Earlier this year while I was in class, my fiancé sends me a text saying she found our dream tank at a steal of a price. We found a 220 gallon tank with stand for $450 because the owner was moving and needed to get rid of it fast.
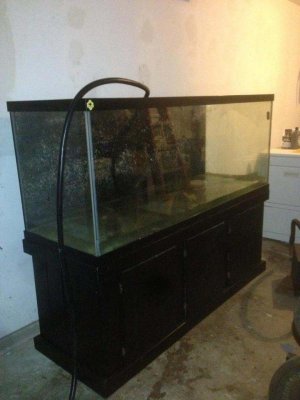
ImageUploadedByTapatalk1377487082.006789.jpg

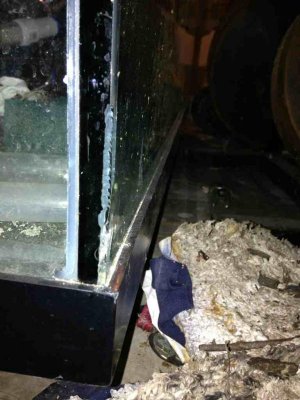
From the pictures she sent me, everything looked great. The guy showed up with movers, they set it up in our garage, funds were exchanged and dude was gone. All was great until I was sent this picture along with a slurry of frantic ****ed messages.
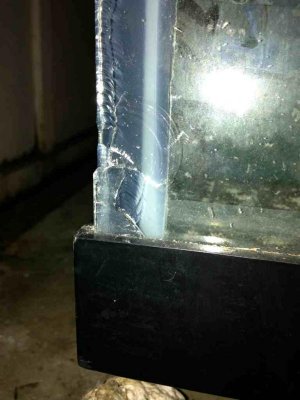
ImageUploadedByTapatalk1377487449.141934.jpg
ImageUploadedByTapatalk1377487462.041986.jpg

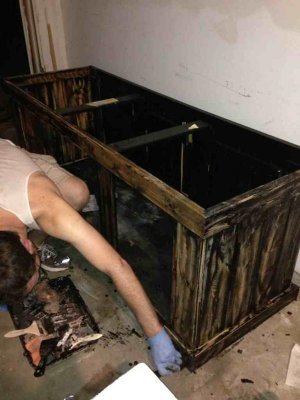
Long story short, dude wasn't going to give us our money back. Our plan is to break down the tank, and replace the chipped panel with quality low E glass, euro brace the too and then drill holes for filtration (I have read on a few methods, but any insight on how big/location would be appreciated). Another big issue is that the stand is missing some of the bracing and will need to be fixed. Instead of being butthurt over the lost money; we decided to rebuild it from scratch. Our first thing we wanted was to remove the black paint and refinish it (exact color not decided. Might do a cherry stain)
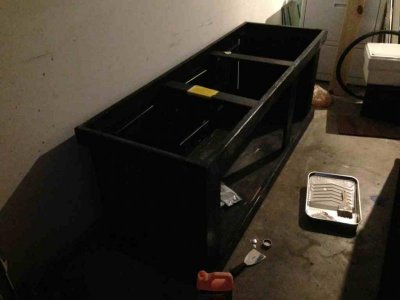
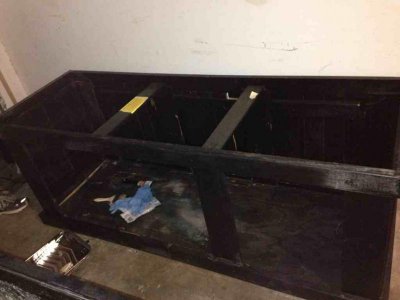
ImageUploadedByTapatalk1377487728.974785.jpg
ImageUploadedByTapatalk1377487755.174692.jpg
ImageUploadedByTapatalk1377487770.291324.jpg

After a visit to Home Depot, we spotted all of the wood we will use to add additional corner bracing, replace the missing rear brace, as well as a cabinet bottom that we will reinforce for the sump. All of the exact hardware hasn't been thought out yet, but we will for sure be putting a mix of mp60s, 40s and 10s. I am thinking about turning a 30 gallon tank into our sump and putting in a spot for the filter sock. Other than that, there will be no other mechanical filtration, only live rock.

That's about it for now. We're looking forward to seeing how this all comes together. Any tips, or suggestions will be greatly appreciated.
 
Texas heat makes doing any outside work a little difficult, phew. We have most of the paint stripped and started sanding today. Once the sanding stage is finished, the next stage will be rebracing and getting it square again.
remybyre.jpg

he3edasy.jpg
 
Very nice...

There are lots of things but lets start with the tank.

Who / where are you getting the panel replaced?
 
Our focus has just been redoing the stand at the moment so we haven't scoped out any dealers that we would get the glass from. If you or anybody has any suggestions for the DFW area, or an online shop that won't cost an arm and leg for shipping, we're all ears.
 
Sorry.. was busy with my boys.

The mp's.... 60-40-10... Why so many and different speeds? I would get some 60's and 40's The overall GPM flow will hands down knock the 10 out of the way. You can have better range with just the 60 and 40. While the 60, even at it's slowest will flow quite a bit, the 40 will be the good inbetween flow for regular continuous usage.

I would set the 60's up at opposite ends and set it up to do a tidal flow. It will ramp up and down in a preset schedule.

If you get a controller (like and apex), and the wxm module, you can have better flow possibilities throughout the day/evening.

What stocking are you wanting to eventually have? This will/may dictate what type flow you want/need to have.
 
Apex is definitely going to be put in place. Would like to make this as automated as possible. Nothing is solid on what we're stocking quite yet. We'll be moving everything in our 55 gallon over to the new tank:
Starry blenny
Pair of Carmel, now black clowns
Tiger ship and goby pair
Blastomussa
GSP
Armor of gods
Trumpet coral
Pocillipora

I would like to get a small school of chromis, leopard wrasse, an angel or two. Money won't be an object on equipment or stock. As far as corals, we are wanting to stick with soft and LPS corals. This will also be filterless so the sump will be full of LR and potentially a refugium, haven't decided on that yet.

The plan is to eventually make this tank viewable from all sides, or as a peninsula, so I've considered drilling the bottom of the tank. One hole in the center for a drain, with a return on each side.

Thoughts?
 
Hummm.... I would (personally) put the returns and the drain on the same side.

Set the returns to push/flow away from the drain and make it push out to make a slight corkscrew aspect. Like out on top and return down below in regards to flow.

This should, along with the mp's, be able to keep it flowing nicely. Any anemones you may get, in the future, would prob like to set in the area with flow on top and on bottom of it.

When I first set up my 180 I had it set to push almost in a figure 8 pattern and it would flow back up the side toward the mp head. I took some flake, to check the flow, and it made two loops around the tank before hitting the mp again.

Just have to set it where there are no dead spots.

Have you filled and leak tested that tank? I would do it for like a week if I was you. Just to make sure.
 
I get what you're saying and was hoping to have that kind of effect with the returns. Do you have any pictures of your setup that I could refer to? Also, is there a rule of thumb for hole/plumbing sizes? And anything to watch for when once it's plumed and ready to fire up?
 
I do... but I have changed my setup with moving it to my 180. I now have dual overflows in the corners.

I have a build page (a lot of pages I know) in this section. I have many videos and quite a few pictures too.

Click on it and look at the video's and all.

It may take you a bit, but you will see a lot of what you are looking for.

Keep asking away though, either I or others will keep answering.

Rule of thumb for holes... Hummm... bigger than a thumb... LOL Your bulkheads and piping will dictate what size you are looking for. The flow throughput will also matter.

The type of flow (gravity vs siphon) will also affect this.

The entire tank is NOT drilled currently right? (Can it be drilled? Do not want it to shatter the second you try.)
 
Tank isn't driller and if I remember right it can be. We talked with the tank manufacturer months ago about potentially replacing the one pane with the lifetime warranty but they wouldn't cover that as well as went over the kind of glass it was. I'll have to check with my better half on those details as she was the one who spoke with them.

Was planning on using gravity to lessen the equipment needed in the sump. Obviously they both have their cons, but any real reason to consider one over the other?
 
There is a real good thread, on here, for beananimal overflow. Look it up. It will take a bit of time to read.

I am getting ready to plumb in a 120 and put in a larger 75g sump. The 120 will be drilled and a beananimal put on it. The beananimal allows for much greater throughput of water with the siphon running.

The 120 will be for frags mostly... I think... LOL.. Have not planned what I am going to put in there yet.

The 75g sump will handle the 180 and the 120 both. So I will be dropping my 40 sump.
 
I think I have seen that one mentioned as well as one other, the name escapes me. I have been thinking about getting a 40 gallon tank as a sump, but like the prebuilt sumps. Definitely want to utilize filter socks though.

Did you have anything to add to our tank stand? I plan on keeping the back open and storing as much of the electrical as I can within.

While Texas summers can get to 100+, our current tank has been stable at 79 since we started it last year. I would like to have a chiller just for the added assurance, but can't justify it.
 
Me and a group of friends went fishing off the coast of Galveston. We pulled our limit of red drum within the first hour. Afterwards we ended up pulling around 50 total just for fun including a couple of shark, catfish, and this eel. Got to see some large jellyfish and a couple of schools of small jellyfish around the 500 count.
uhatypuv.jpg
 
Back
Top