Sump/Fuge Build Questions
Sump/Fuge Build Questions
To the acryli-nuts out there...

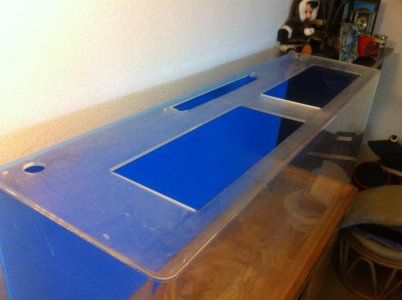
So, I was able to pick up a 60G acrylic tank from a dude on craig's list for a song. The tank had originally been used as a wet/dry filter set up for a freshwater cichlid tank, but I'm intending on converting it to a sump/fuge for my 180 gallon reef tank build.
Before I get too far into this and screw something up, I've got a few questions:
1) The guy I bought it from was a total tool and put his baffles and such in with as much aquarium silicone as he could use to ensure a (semi) water-tight seal. Yes, I'm serious. I have since ripped everything out and scraped as much of the silicone residue off the walls and floor of the tank as possible without gouging the crap out of the acrylic, but there is definitely more left. My question is: What should I do about that silicone residue? I'm assuming that my new baffles and dividers won't bond to it when using Weld-On, so it has to come off...any suggestions of how to get it off? Or, should I just design around those places that have the goo?
2) Since the tank is, well, a tank...and, has three sides, what is the best procedure for welding my new baffles and dividers in? i.e., weld the bottom first, then one side, then the other...or, weld one side, then the bottom, then the other side...or ??? Also, what's the best way to apply even weight/pressure to my joints when working inside a tank that I can't take apart?
3) Finally, given the above, what's the best product to use for my purposes? I'm thinking Weld-on #16, since I don't care (much) about bubbles or appearances...but could definitely be persuaded to use something else.
Thanks tons in advance for any help/suggestions/admonishments!!! :wave:
 you've got fractures in the vertical panels and you're not going to be able to transfer stresses effectively from those areas.. already have at least 2 issues going on...
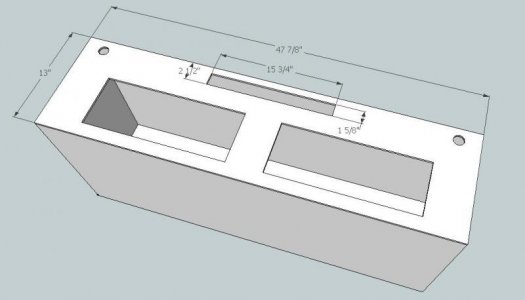
")