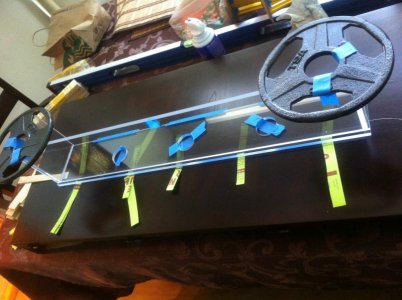
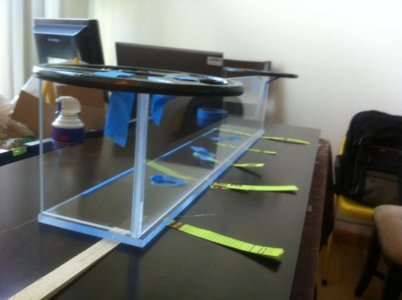
Acrylic fabrication questions? I can help!

L.O.L thats me no really he doesnt want people in his personal house. I have a talent, really a gift . no matter what I have put my hand too I was able to do it no matter what it was . Just need to c it done or be told how. An there is NO liability this is in a house of some one that is more than a buddy. I just dont want to catch fish, drain ,an fix more than once ... an this is small you should c what is at the office he has 25 or 30 thousand gallon shark tank. now thats something to c
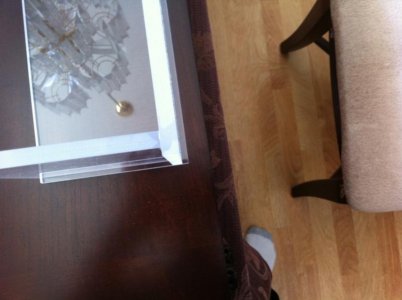
 
L.O.L thats me no really he doesnt want people in his personal house. I have a talent, really a gift . no matter what I have put my hand too I was able to do it no matter what it was . Just need to c it done or be told how. An there is NO liability this is in a house of some one that is more than a buddy. I just dont want to catch fish, drain ,an fix more than once ... an this is small you should c what is at the office he has 25 or 30 thousand gallon shark tank. now thats something to c

I know he wants to be secretive.... and that's totally fine. But you should be able to get some pictures with a nice camera.. and use a setting to where the edges are softened. That we don't have to see his house or what not.

But the way it currently sounds is that you have a car, its making a noise in the engine and you want to fix it.
We ask what it is. Your answer is, its a secret, but its a v8....

Without more info/better info, and pictures. This conversation is pointless....

Does that make since....

When taking pictures. Get a whole shot. (You can Photoshop the contents and what not. If that makes you and your friend to feel better)
 
is an acrylic tank shaped like this possible
Top view 8' long 4' wide 2' deep
also what size acrylic, euro brace width
and should the seams be arrange like in the pic
thanks guys
 

Attachments

  • Untitled.jpg
    Untitled.jpg
    11.7 KB · Views: 8
Anything is possible, it's just a matter of difficulty. This example is extremely difficult due to the angles on the edges that you have to prep, and I have no clue on the thickness and euro because of that.
 
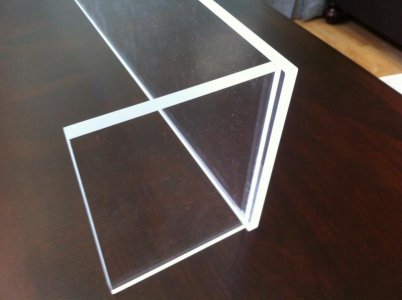
In making my external overflow box. I have the back and the sides glued on. Since there is a 1/8" lip on the sides as shown in the first attached picture, do I need to flush trim this before gluing the bottom piece? The second image shows it just placed on the bottom piece showing the corner where I see me having an issue in trying to flush trim as viewed from the top. Or I shouldn't be concerned and I can glue the bottom piece on and flush trim everything in the end all at once?

View attachment 185649

IMG_0349.jpg
 
Last edited:
Well, you "can" flush trim after bonding both, one pass will get you all the way to the other lip which you will roll over, then the pass on that lip will catch the part you didn't get on the adjacent lip. So the answer is no, but I flush trim before bonding anyways.
 
Cyro Calculator

18 tall and 24 long would need 0.359 or 1/2" Plex-G
24 tall and 18 long would need 0.378 or same as above

Could probably get away with 1/2" material in both cases, possibly 3/8" (0.354) for the 18 tall version, but you will have a fair amount of bow I would think. Definitely not 1/4". I don't use 1/4" at all, even for little tiny tanks. The price difference to go to 3/8" is negligible. But then again, I stock quite a bit of acrylic.
 
I've gotten my back and sides glued for my external overflow as shown in the first picture below. Now I'm ready to glue the bottom piece and I realized that one side piece's edge is perfectly aligned with the back piece edge (the edges that will be glued to the bottom piece) but the other side is slightly raised by a hair. I guess when I glued this second side piece it didn't align to the back pieces edge perfectly.

What should I do?


I continued on with the pins method and in setting up to glue the bottom piece, I ended up putting 2.5lb weights on top in order to get the pins to be snug. I couldn't get all pins snug until I added the weights. Does anyone see anyone issues with this? I'm afraid that when I pull the pins out, because of the weight it might shift the entire piece.

Here are some pictures that will hopefully clarify.

IMG_0345.jpg

IMG_0351.jpgIMG_0352.jpg
 
your table may not be perfectly flat either. hard to tell from the pic. try gluing on foam. I have to put on weights now and then. No biggie. But you should be able to snug up the joint with only shims.

If you're talking about the pieces not lining up because when you set them and pulled the pins, you forgot to align the piece such that the edges were flush, then if it's not too far off I would take a razor blade and scrape the one edge down so that it is flush, or at least pretty close, especially where the pieces meet. Otherwise you'll end up with a lot of bubbles when the solvent evaporates and a weak joint in that place. even if it's a fraction of a millimeter difference, it will take a couple dozen passes with a razor blade to trim it down so you'll get lots of practice lol
 
Yes, i was referring to the pieces not lining up. I will go ahead and shave it down with a razor.

The foam u are referring too is this the rigid panel insulation foam at home depot? Is this the same foam that should placed underneath the tank?
 
Hello,

I have about a binder paper gap between my key hole top and 8" cylinder what acrylic glue should i use at this area for best seal?
IMG_0192.jpg

IMG_0191.jpg


Thank You,
 
Hi,

My key hole top is not glued onto my reactor yet it's just sitting on there. It's not a snug fit i can slide a piece of binder paper between bottom flange of key hole and top of 8" tube . Not sure which is best acrylic glue to use since it's not a snug fit?

Thank You,
 
Back
Top