Annyeong's 280g SPS Reef Build

pisanoal

Member
Hello all. Although I have been around RC for a few years, and have gone through several tanks, this will be my first build thread. I started reefing a few years ago when my girlfriend, now wife, was talking about getting a saltwater tank. I’ve always loved fish, and in particular had always wanted a saltwater tank. She was the inspiration I needed to finally get into the “hobby”. I say hobby with quotations because at the time, if you had told me how much time, money, effort, aggravation, and joy I would get out of keeping some fish in a glass box, I would have called you crazy. I didn’t even know you could keep live coral… So I got a biocube 14, with a couple of clown fish, and a few other fish. I upgraded to a 40 breeder after a few months and had that for 2 years or so until I bought a house. Once into the house, we decided it was upgrade time again and we set up a standard 125g and it was “the biggest tank I would realistically want”. Now it is decidedly… too small. Naturally, now that this tank is finally starting to hit its stride, it’s time to upgrade to The Biggest Tank I Would Realistically Want. For real this time though…

Current Specs:
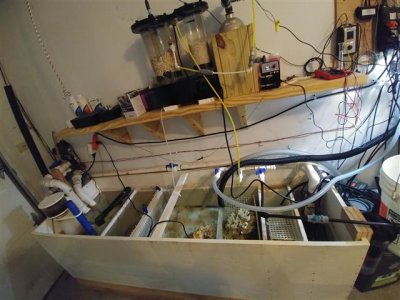
System Volume
– Display Tank (6ft long standard 125 gallon), Remote Sump – custom built plywood sump holding approx. 60 gallons.
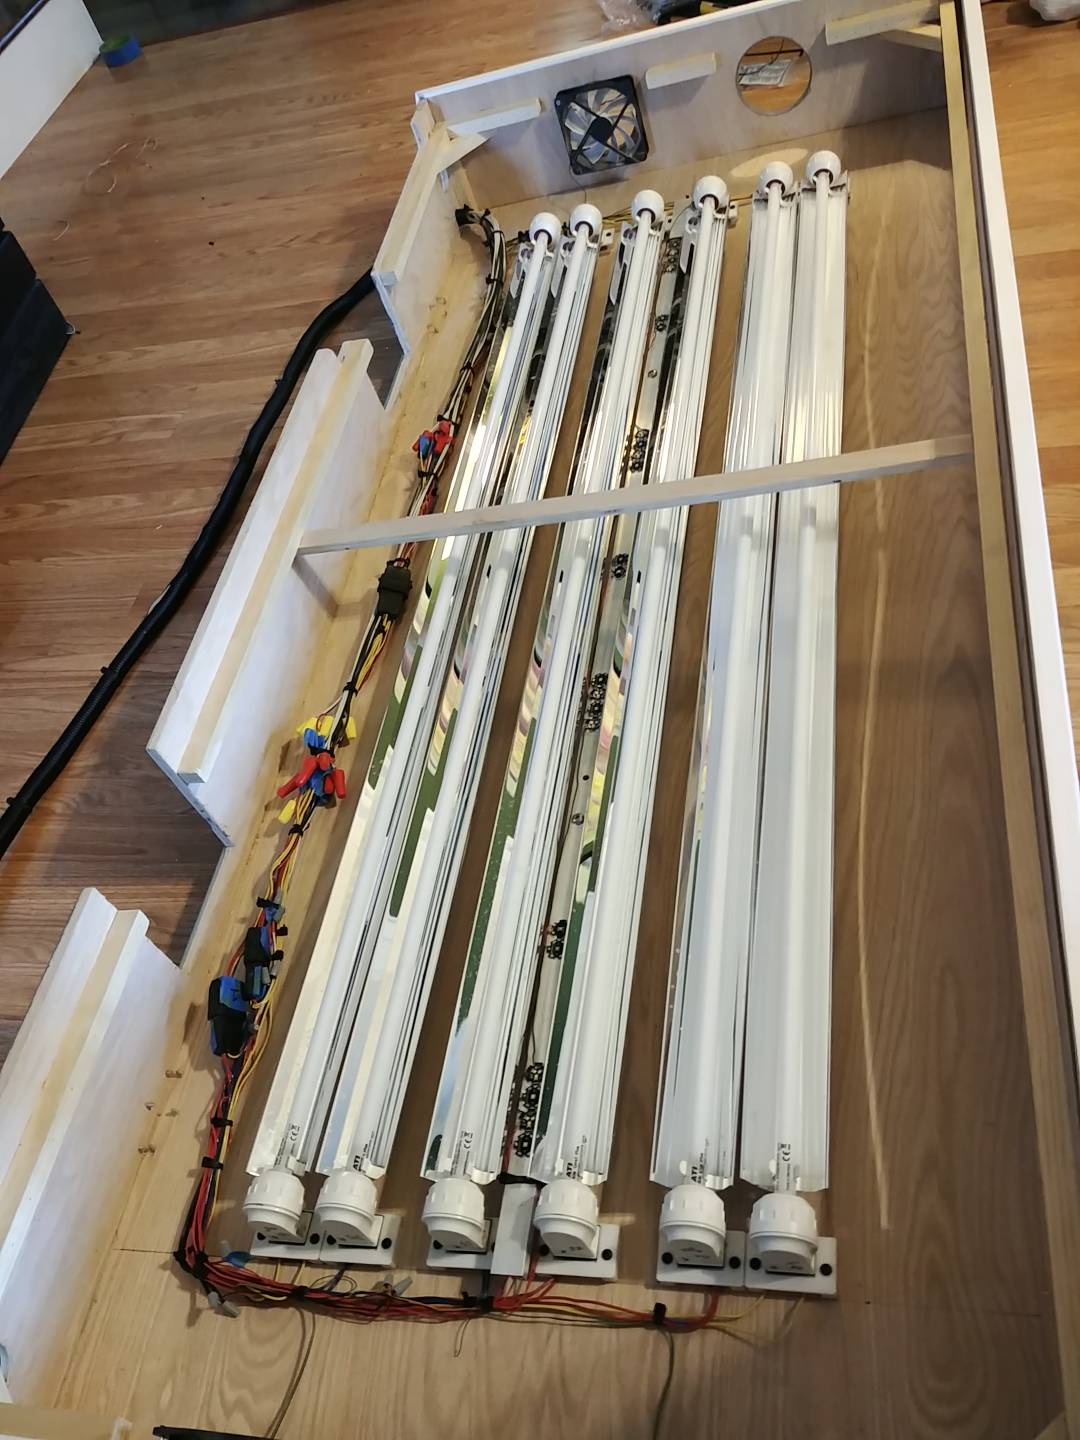
Lighting – 6x80 watt LET retro t5, with a diy LED bar down the middle for some shimmer and sunrise/sunset/moonlighting.
Skimmer – SCA 302
Circulation – 4 x Tunze 6065’s and a 1.5” Seaswirl with two VCA RFG nozzles pushing ~1400gph
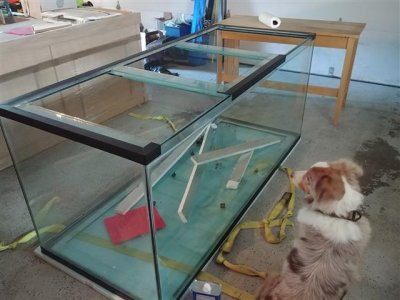
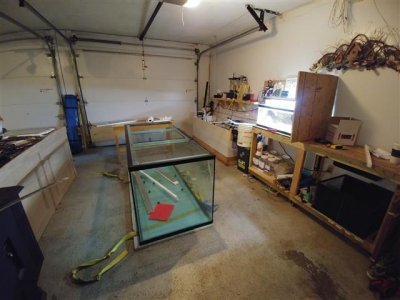
Custom PVC coast to coast full siphon, 3 standpipe system (aka beananimal “style”)
Barr Aquatic Systems 2-stage Calcium Reactor fed off return manifold, controlled with a kamoer continuous duty dosing pump.
Tank is driven by a Reef Angel Plus.

Fish:Melanarus Wrasse
2 Clown Fish
Lyretail Anthias
Bartlett’s Anthias
Juvenile (~4”) Clown Tang
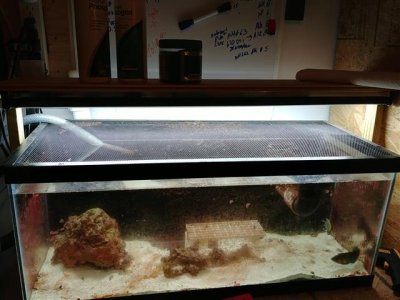
Splendid Dottyback (banished to sump)
Genicanthus Angel (forgot exactly which)
2 striped Dartfish

Coral:
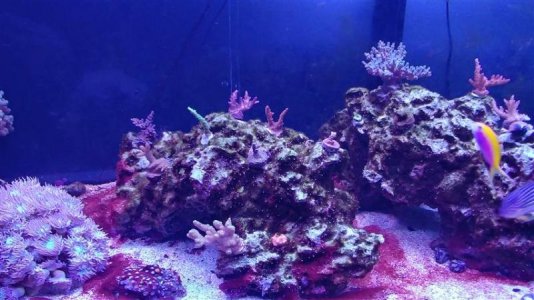
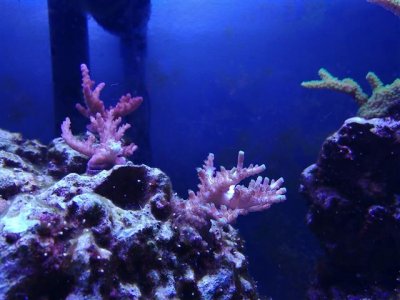
Mostly SPS, a few named pieces, (Myagi Tort, PC Rainbow, brand new – Fox Flame, Palletta Pink Tip, couple others I forgot…), a few nice random pieces from a “Battle Box”, before they were really called that, and about 5 pieces from Big E here on RC. He has great stuff by the way if he puts up another for sale thread. Very professional as well. There is also a youth football sized pocillipora colony in there that I would get rid of if the wife didn’t love it. To be honest, she has a point. It adds some nice structure to the tank, especially until the acros grow in.
A few LPS including some acans, a large 150+ head Duncan colony, and a smaller 40ish head colony, a 6ish head frogspawn that was on my original coral order (somehow managed not to kill it and for the first time, it’s finally growing), a purple gorgonian, a zoa colony etc.
A few other random inverts including 2 captive bred pincushion urchins, a feather duster, and a few hundred vermetid snails (yay…).

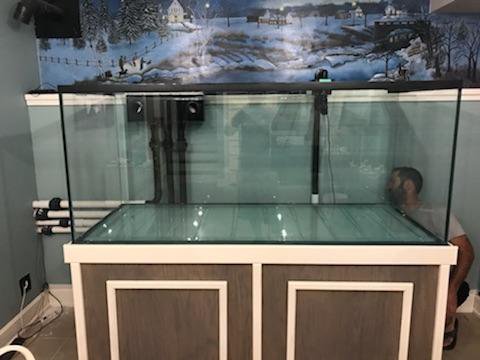
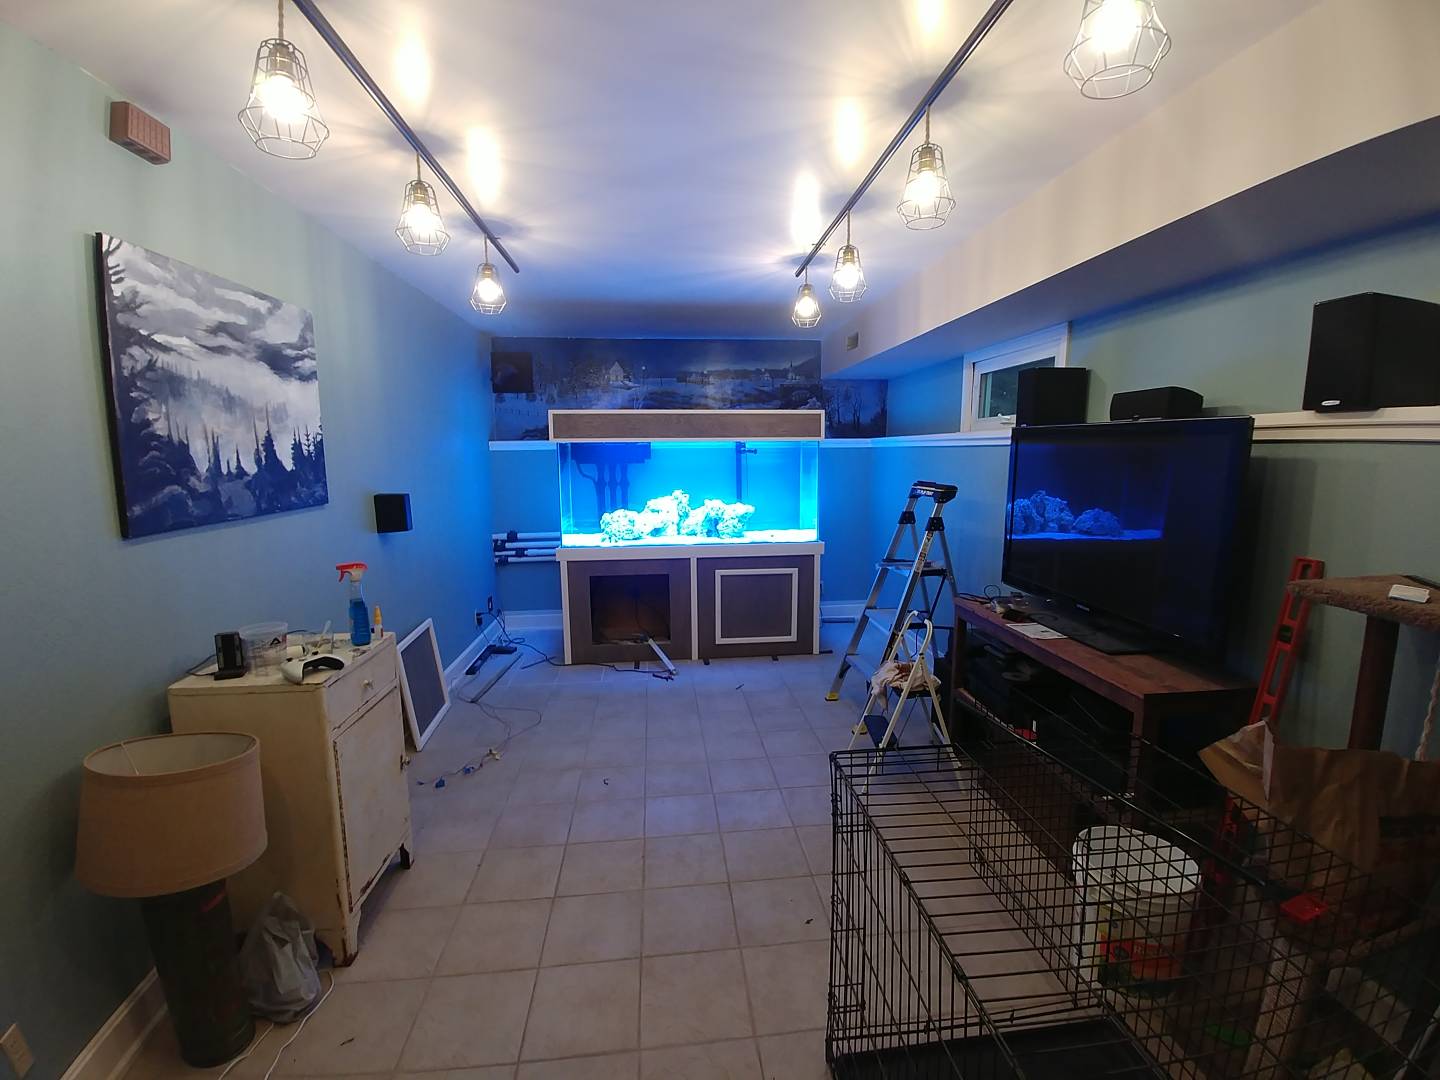
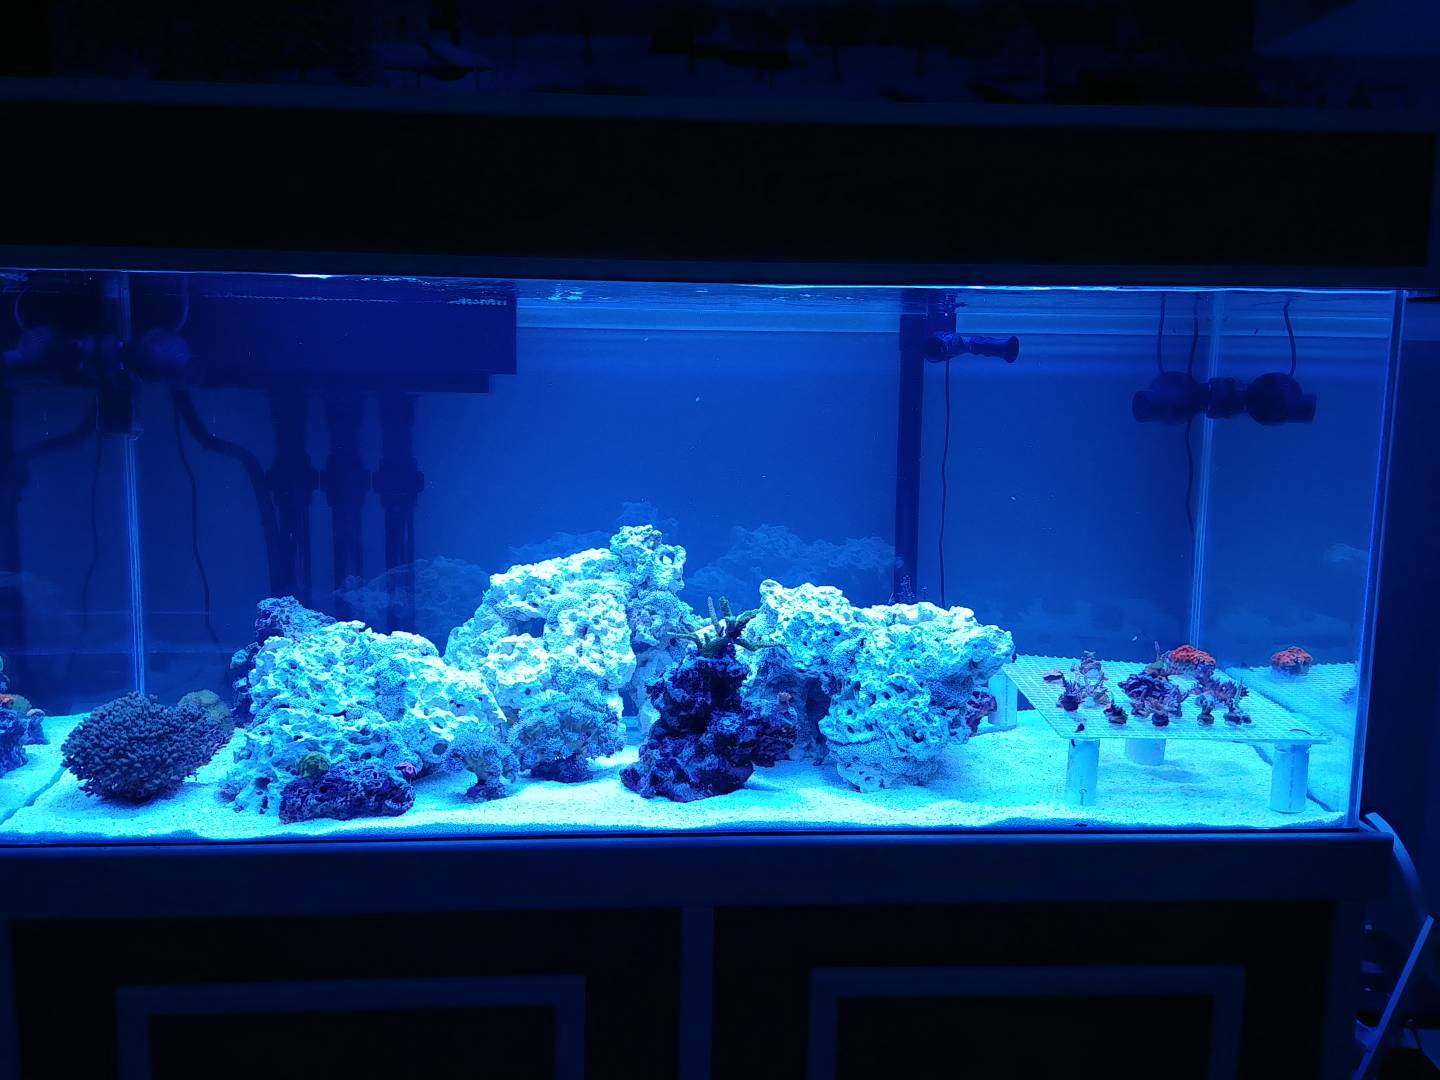
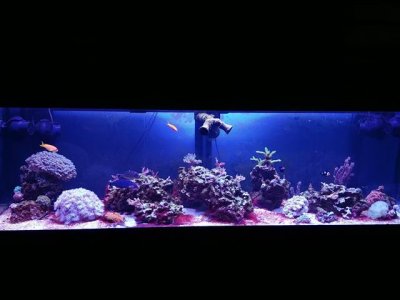
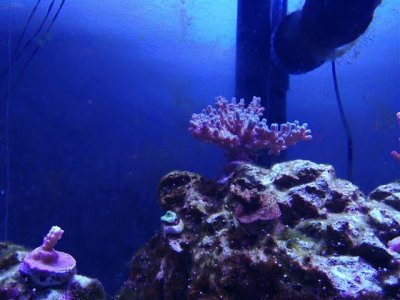
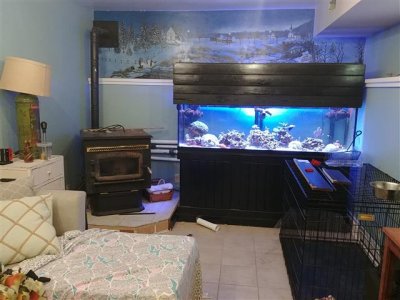
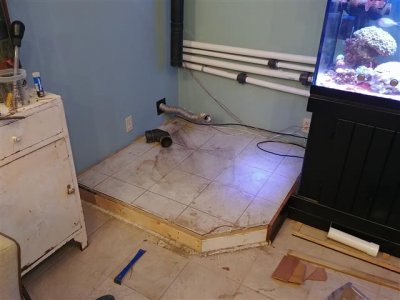
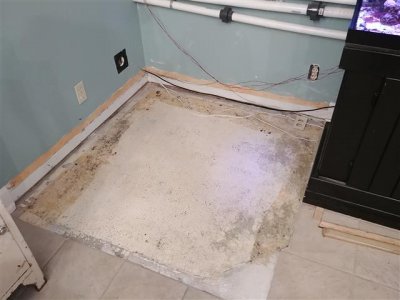
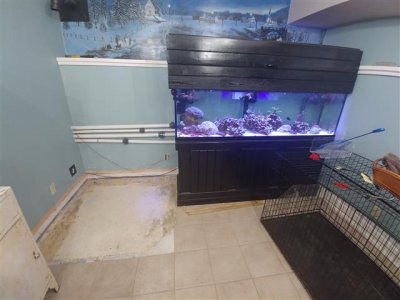
Some pics of my current setup are included. This is the 125 as of about 3 weeks ago. I am terrible at taking pictures of my tank, so hopefully someone has some good advice for me… Yes I had some cyano issues which I partially resolved by changing out half the sand bed. Next half to come in a few weeks once it settles in again. Please excuse the mess. One of the goals of the new system will be to have everything tidier.
 

Attachments

  • 0726181204b_HDR (Small).jpg
    0726181204b_HDR (Small).jpg
    69.4 KB · Views: 2
  • 0726181205_HDR (Small).jpg
    0726181205_HDR (Small).jpg
    62.7 KB · Views: 2
  • 0727181614 (Small).jpg
    0727181614 (Small).jpg
    62.4 KB · Views: 2
  • 0727181614_HDR (Small).jpg
    0727181614_HDR (Small).jpg
    47.2 KB · Views: 1
  • 0727181615a (Small).jpg
    0727181615a (Small).jpg
    61.3 KB · Views: 4
Last edited:
A few sump and Refugium/recovery tank photos.
 

Attachments

  • 0906180648 (Small).jpg
    0906180648 (Small).jpg
    72.4 KB · Views: 1
  • 0906180649_HDR (Small).jpg
    0906180649_HDR (Small).jpg
    67 KB · Views: 2
Now on to the good stuff"¦ the Upgrade! So about a month ago, I started thinking about possible upgrade solutions. The main reason being for the now Juvenile Clown Tang, whose name is Annyeong (after the Korean boy in Arrested Development). Since this upgrade is mainly to provide him the room he will need as he grows, the build thread is named for him. A quick aside, I bought him from my usual LFS who insisted I could keep him in a 125 for years before he would need an upgrade. When he got too big I could trade him back in. That won't work now as he is our favorite fish"¦ Also, he starting to get a little pushy with a few of the others, not mean, he will just push them with his body to one side of the tank or to the bottom on occasion.

When I was thinking about upgrading, I was considering doing a plywood build because large tanks are so darn expensive"¦ Especially the deep dimension tanks as you either need to go custom or marineland. My one big complaint about my 125 is the depth"¦ not a lot of room to get super creative on aquascaping. I decided I would plan the build and keep an eye out for a good deal on craigslist, but I didn't expect to do this build for at least 6 months to a year from now. However, I stumbled across a pretty epic find on craigslist in the form of a brand new, still in factory plastic, custom glass cages 72"L x 30"D x 31"H aquarium and oak stand just 2 hours away. There were some sketchy details in my interactions as it was being sold through someone that was not the tank owner. But it ended up being in a guys shed who had passed away, house had sold, and the new owner wanted it gone. So I picked up the tank and unfinished oak stand for $750.

The tank is ½" glass, eurobraced, undrilled. The only thing I wish it had is a low-iron glass front panel. But for such a good deal, it's hard to complain. Also, I'm not coming from a starfire aquarium, so I don't really "œknow" what I'm missing.

I plan to keep this a low cost upgrade, budgeting around $600 to get it up and running with the improvements I really want to make. I'm trying not to buy anything that has to be upgraded or changed later. If it has to be bought now, I'm getting what I think I will want in the long run. The few things that fall into that list are the overflow, the lighting, and the rockwork. For the overflow, I plan on going with the modular marine 2400 gph slim overflow. I'll have a beananimal setup in the back. I plan to reuse my current lighting, with the exception of either adding one more set of T5's or going with LED bars. I am leaning towards LEDs, and found some pretty inexpensive ones on Ebay that my LFS uses on his ATI fixtures and really seems to like. He recommended I change out some of the blue diodes for some violets but otherwise he really likes them and they run about 50$ + the new diodes and a little soldering. To get the system up and running, I'll probably leave space for these, and purchase them later.

For the rock work, I was planning on making my own utilizing my old sand and some white Portland cement. However, my first attempt at this made me realize that for one thing, it was going to be hard to make realistic looking rock, and for another it wasn't going to save me a whole lot of money as I was going to need 2 more large bags of aragonite sand. Our second attempt came out much better, but there are still some concerns on durability and curing length.

So tried and true florida mined dry rock it is. I plan on removing my two main structures, acid cleaning them and building off of them using the pond foam/epoxy/sand method which has worked out great in the past.
One other concern I have with this upgrade is the size of my skimmer. I know it will be small for a system this size. However, I don't plan on adding many more fish, as I don't want to have any aggression issues with Annyeong. So I might add a larger group of anthias, or some more dartfish but that's probably it for a while. Enough typing for now, here are some pics of the new tank and stand.

Stand is to the left of the picture with the dog(for scale), not the dinky table right behind it. I just realized I didn't take any dedicated pictures of the stand yet.
 

Attachments

  • 0903180859b (Small).jpg
    0903180859b (Small).jpg
    65.6 KB · Views: 2
  • 0906180649d (Small).jpg
    0906180649d (Small).jpg
    60.5 KB · Views: 2
  • output.jpg
    output.jpg
    75.6 KB · Views: 1
So with this upgrade, we decided to rethink our strategy for the “tank room”. Our house is a split level, and the tank is on the lowest level, adjacent to our 2 car garage, where the sump, controller, etc all sit. The room is about 25’ long and around 10’ wide, and the tank currently sits at the far end of the room. There was a pellet stove sitting in the back left hand corner. It was up on a pedestal, and the current tank just barely fit between the pedestal and the wall. The new tank would fit as well, but we decided to yank the pellet stove out as the room gets too hot when it’s on anyways and the new tank will be centered on the back wall. With the old setup, you “can” view down the length of the tank through the left side panel, but it required squeezing between the stove and the stand. The new setup will allow side views on both sides. Also, better for tank maintenance.
I had assumed that the tile extended under the pedestal, but I was wrong… There is carpet. The previous owners left 5 or 6 tiles, but I’ll need a box or two. I have gone everywhere within an hour trying to match it, but no luck so far. I left one with a store and they are checking with their distributors. If that fails, I’ll have to pull some out of the closet, and I hope I don’t break any… I’ll have to be just about perfect to have enough. We talked about doing new tile, but that definitely breaks the budget…
The other major issue is that the last row of tile underneath the old tank is just barely a partial. So the old tank will have to come out for a few days while I do the tile work. That means a tear down and temporary setup. This is sort of a blessing in disguise as it means setup day won’t be crazy stressful on tearing the old tank down, moving it out, setting up the new tank and getting it filled all in a day. Only concern is temporary lighting.
Here are some pictures of before and after the stove tear out. This will definitely open up the room. Sorry for the dog crate, one of our dogs is in heat, so our male gets crated inside while she stays in the garage. We don't need any puppies...
 

Attachments

  • 0902181632a (Small).jpg
    0902181632a (Small).jpg
    68.9 KB · Views: 1
  • 0902181704 (Small).jpg
    0902181704 (Small).jpg
    55.9 KB · Views: 2
  • 0902181826 (Small).jpg
    0902181826 (Small).jpg
    52.4 KB · Views: 2
  • 0902181827 (Small).jpg
    0902181827 (Small).jpg
    55.4 KB · Views: 2
Nice find!
I was a bit worried when I read 1/2 inch glass on a tank that size and height.. I was happy to see the cross bracing on top.
Should be a very nice system!
 
Nice find!
I was a bit worried when I read 1/2 inch glass on a tank that size and height.. I was happy to see the cross bracing on top.
Should be a very nice system!
Thanks! Yeah I dont really know a whole lot about larger tank construction. I checked their website and they have several of their standard builds close to that size or larger using 1/2". The bracing is pretty beefy and there is some extra bracing around the inside bottom to reinforce that seam.

I'm hoping the build turns out at least close to as good as i imagine it :)

Short update.

I finished the canopy last week, but just now getting around to posting some pictures. Its a pretty basic design made out of 1/2" oak plywood. The top and front hinge together and it sits right on top of the tank. We were going to stain it red oak like some other furniture I built down in that room, but opted for a more modern look. The trim color matches the room trim and i really like the gray stain. The stand will of course be stained/painted to match

Pictures dont show it as well, but the canopy on the tank makes it look a whole lot bigger...

0d361e843d14811846f73b292b722e68.jpg
ca38e0e76225b2ea972a17ebb0e65917.jpg
d28632cdfa86eb224c44c5eab076d495.jpg
f5d59debc98b45164d8a4c19ff9e1a56.jpg
b0d08dbd204850fb6995e730bd6994e5.jpg


Sent from my VS988 using Tapatalk
 
Looking really good!
Thanks!

Slow on the updates, just got through our major maintenance outage at work. Lots of 12 hour days and not a lot of energy to do much on the upgrade when i get home.

Right before the outage, I found out that i was out of luck on matching the tile. I removed the same tile from the washer/dryer closet and amazingly didnt break a single tile!


I attached a picture of my process which included grinding the grout out with an angle grinder (aka making a gigantic mess that was mildly contained by plastic), pouring dilute hydrochloric acid between the tiles amd letting it sit, the pounding a scraper blade underneath the tile. This turned out to be very effective, and surprisingly little effort aside from the grinding. The end result is literally just enough tile to get the job done! Woohoo!

I also put a fresh coat of white paint in the closet, removed a bunch of junk from the shelves, cut a cat door in our bifold doors since thats where the litter box is, and remounted them (they have been off for a while). All in all, pretty productive "side project".

66805acf751aa891b9f6240d91273c20.jpg


Sent from my VS988 using Tapatalk
 
The next step i was really excited for was...
712acc7f3a8fad24d5a19fa3384b134f.jpg
2030ed4c9753f99eaaa5f12021140ca4.jpg
71dda08e2ebd021b3e634e5fa569af4a.jpg
9a74c9047b88652608d586f1043a4a6c.jpg


...painting and staining the stand!

A very satisfying step.

Sent from my VS988 using Tapatalk
 
Well I got home yesterday afternoon to find my overflow on my doorstep! A few unboxing photos. I will be drilling the tank t his weekend!
343f45399ef3dae4aa7cd1e7f256262c.jpg
dcc4c05a29d7a3f9c2c20bebd3ecd838.jpg
bd4998229b39449493f2d3689af73a9b.jpg
8f3c013ac8c5f8130956a0b22977c3ad.jpg


Sent from my VS988 using Tapatalk
 
Very nice build so far! That stand is a work of art


Sent from my iPhone using Tapatalk
Thanks! We are really happy with the colors we chose. It will be nice to have the stand compliment the room instead of being a bit of an eyesore like my current stand.

I got the tank drilled last night! Overflow is installed temporarily for the leak test.

One issue I may have is the water height. I had to put the overflow a little lower than i wanted due to the beefy cross bracing and i dont think my canopy will cover low enough down the tank. May need some modification.

Water going in for leak test!

5a6a9e15dda6d82b6b768c9129158cbb.jpg


Sent from my VS988 using Tapatalk
 
A lot has happened over the past weekend! My goal is to get this thing installed this weekend, but i have a decent laundry list of things to get done before that.

Here's the updated of what I got done this weekend

- Removed the coral from the main two rock structures, acid cleaned the rock and foamed together the new aquascaping (pictures - arrangement is close but not exact to what it will be in the tank, still one more smaller structure to come). The goal for the aquascaping was minimalist with lots of hiding places for fish. I have some aggression issues right now (not with the clown tang luckily), so I'm hoping that will help a lot.
- Laid the tile and grouted. (Picture)
- Cut the new trim for the corner.
- Plumbed the overflow box
- Leak test completed (no leaks!)


Still on the list: (Pre Tank Breakdown)
- Paint the trim
- Epoxy/sand coat the black foam on the rock structures
- Rinse the new sand. I'm going all TE Reef flakes, a little more than half of my current sand bed is reef flakes, so that will be moved over after being rinsed.
- Move LED's from current tank and mount them in new canopy. These are purely aesthetic so no harm in moving them early.

Post Tank Breakdown list (not including actual breakdown tasks like removing fish, relocating coral temporarily, etc.)
Friday Night
- Breakdown tank
- After moving the stand, break up 3 remaining partial tile, and lay new.
- touch up paint on wall behind the tank
Saturday
- Grout tile
- Install trim
- Move lighting over from old canopy to new (big project). I'll be remotely mounting the ballasts and power supplies inside the stand.

All that should be left Sunday is to move the new tank in. Then ill have to match up to my current plumbing that goes out to my garage, and all the other associated tasks of transferring materials and livestock to a new tank. Piece of cake!

Its a bit overwhelming, but I'm excited about it. This is all provided I can get enough help moving the tank in.

Any comments or tips?
e8ab7caf0cb6e56cf06f5358c80d62d4.jpg
2aa18d22a5d6eaabfae29457fdbdc94c.jpg
aaa6ee84b076f2a91dc745afcbf4edf9.jpg
5c007fb23bfb1d0017b0595372c7d843.jpg
3fb1cf9ac7f275b18437532536d24ace.jpg


Sent from my VS988 using Tapatalk
 
So a whirlwind weekend resulted in a successful tank move in. Install day got bumped up to Saturday due to help availability.

Luckily I was able to take half a day off of work on Thursday and Friday.

Thursday i was able to get the 125 broken down. We moved it out into my already packed garage, and I removed the 3 remaining tile and installed the new.

I also had a bit of an issue getting the alkalinity of my new salt mix down low enough. I was mixing up about 250 gallons of fresh salt water and had to add more muriatic acid on Thursday. I was worried about the pH coming back up in time for thw install so added some more agitation/aeration.

A few crappy pics of the 125 being broken down and the new tile in place. We didnt take that many due to the day being so packed.
a9460f96f216ae7679e7decd1d6b23c6.jpg
ae24a9b7fbc596895ea34722a69472a7.jpg


Sent from my VS988 using Tapatalk
 
Friday we touched up the paint behind the tank, tore out the plumbing, grouted the tile, painted the new trim, and installed the new trim.

I feel like there was more than that because it was a full day for sure.
af448c4296f2dc6e722e8d08a0b8ed56.jpg


Sent from my VS988 using Tapatalk
 
Saturday morning I installed the new return plumbing up to the union before it makes a 90 to the top of the tank. I also did some cord management which came out a lot better than what it was previously.

I also cleaned the inside and outside of the new tank in preparation for the install in the afternoon, and removed a bunch of the junk from the garage trying to make more room.
c2ee39385821ba1bfa229f956a6059b4.jpg


Sent from my VS988 using Tapatalk
 
Finally... The Install!

So I'm fortunate my wife has a large and friendly family, as they all came over to help us. We had 6 people lifting the tank, and slid a large cart that I had built for my QT tanks underneath it. This made getting it into the house easy.

Having leveled the stand earlier, we rolled the tank up to the stand and had 4 people on suction cups on the end of the tank to set it on the stand.

We did some final leveling on the tank before all the muscle left and got everything squared up and situated. Then i started work on matching up the plumbing to the overflow and return. We started filling around 5pm after setting the rocks and sand in. The tank was too deep to set the heavy structures in from a ladder, so I climbed in... Pictures below.

By the end of the day i had water recirculating through the whole system. Had one significant leak on a union that i got fixed, and have a very slow weep from one of the bulkheads on the tank. I need to support the overflow piping a little better I'm sure. Its slow enough that im not terribly worried yet.

Pics below
be35f965942313d847667a779e317d40.jpg
25ab88fcce65110268b4e48bf9ce2c45.jpg
43b3bd8fea2fadc9319c637cc8ebfad3.jpg
42e2f902e7732787e021ec7bdea71d70.jpg
aec02afaa6f428f738ac53cb570e78b3.jpg


Sent from my VS988 using Tapatalk
 
Next step was to get the lighting installed on the new canopy. There was some time pressure here as the coral have been without lights for 3.5 days.

That all went surprisingly well, and i had lights on the tank mid day Sunday.

Name of the game here was neat and orderly. I think it came out pretty well!
01d0078aa1b032087c80eb587876ad9c.jpg
a99e7c2b078059c003ac2fde8883dd38.jpg
51b40976dcc7b0e2b09a2205f35eb8ba.jpg
88b9910d932c74f1e79209491a55312e.jpg


Sent from my VS988 using Tapatalk
 
With the lights on, i got all the coral in the tank. Most of the old rock will come back out once things settle back down.
fcb5420214d470953fab5c4e4de71e10.jpg
e3ccf254dc31ece887a336ab4950a681.jpg
fce0daf85c761bf3e297fc1f50fff9a9.jpg
31d23a14b50b2b307b6885dfb2609cf1.jpg
e13a9a8eb9cbf53d611f78f11b15124e.jpg


Sent from my VS988 using Tapatalk
 
Back
Top