Anyone got spare parts for sale?

gonzalez78

New member
Hey guys, so after much deliberation about this big petco tank sale i finally decided to go and pick up a 40 breeder. My question is if anyone has any spare parts to turn the 20L i had into a sump? i am looking for some pumps, overflow and things like that unless someone has a glass cutting bit and would be willing to help me drill it at my own risk.

thanks,
Luis
 
I borrowed a 1" glass drilling bit from a guy a while back. Never used it since ended up getting a tank already drilled.

That said, I have various plumbing pieces from a coast to coast overflow I replaced. With a little work, it would be perfect for a 36" wide tank, with silent-beananimal style overflow drain.

Or I just have some generic overflow boxes. I'll grab pictures later for you to see.
 
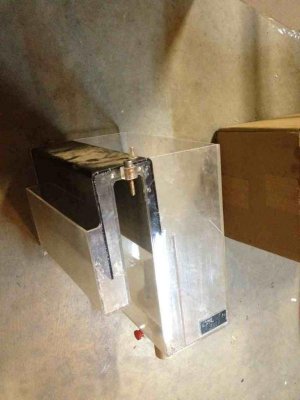
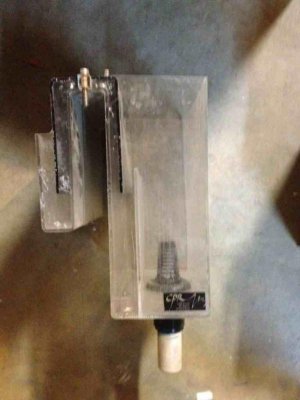
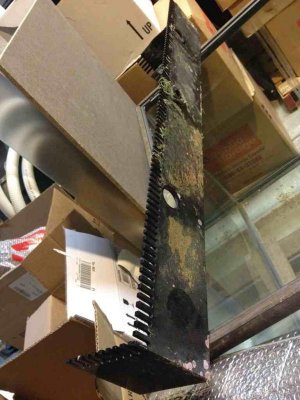
Overflow box. Weir style for thin surface skimming.
ImageUploadedByTapatalk1342499341.045682.jpgImageUploadedByTapatalk1342499365.702483.jpg

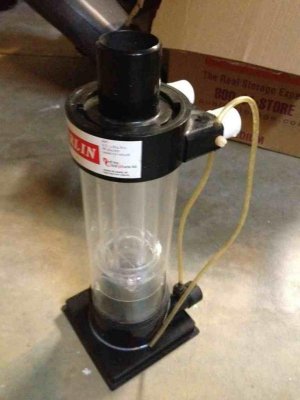
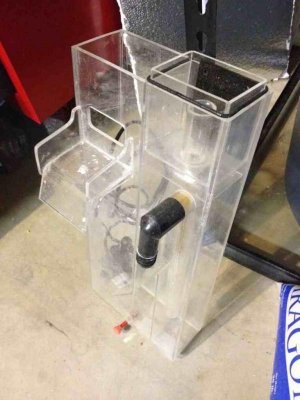
Red sea Berlin dual output skimmer, double chamber with Venturi driven input. No need for a skimmer pump, just any regular pump. Air sucked in by Venturi. Missing skimmer cup. Toucan DIY one.
ImageUploadedByTapatalk1342499380.236543.jpg

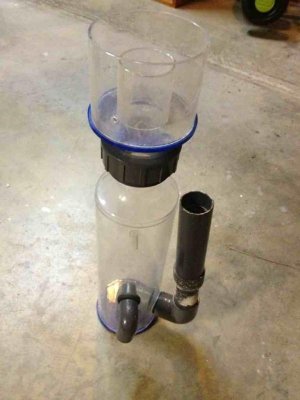
EuroReef skimmer. This needs a skimmer pump (needle wheel) and needs a cover for the skimmer cup.
ImageUploadedByTapatalk1342499484.412364.jpg

Coast to coast style overflow. Originally part of my 48" wide tank, but I redesigned my overflow box. This one was cut at one end to remove from tank. Can be fixed/retrofitted for 36" wide tank.
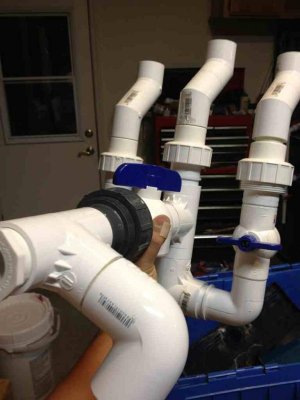
ImageUploadedByTapatalk1342499500.556072.jpg
 
my overflow drain design. It is modified silent bean animal configuration. It has three valves to control how much water drains into each of the three drains. This is because one is kept in constant siphon while one is kept at slow trickle, and last one for emergency drain/backup.
ImageUploadedByTapatalk1342499825.968615.jpg

Old model CPR bakpak with Rio Venturi pump.
ImageUploadedByTapatalk1342499850.634899.jpg
 
What would you recommend? If drilling is better then I'll wait to see who is brave enough to risk breaking my tank if not i like the overflow you got.
 
Bring ur tank and we can drill it at tom's. Ask Tom, of course.

Depends on how soon you want ur dream setup. I prefer and strong recommend side drilled tanks. Overflow boxes "could" break siphon... Reefready bottom drilled tanks "could" leak.... That's why I like coast to coast with side drill.

You will need to cut down the black overflow box thingy so I could be anoter two weeks before ur tank is running. So again, depends on if u have patience for dream tank or just want it up and running.
 
sounds good i do want to take my time with this tank so i am wanting to spend a little more money on it than the biocube but i also need to buy parts little by little. i hope Tom will be ok with me having it drilled at his house now about the price? how much for the set-up?
 
Here's my suggestion for your 40 gal breeder...
1) take my black overflow and cut/router plastic down to the right width (30~36"). Router/trim it narrower (down to maybe 3~4 inches).
Ideally, we should do a glass-holes type "overflow box with three holes, so we need to put a "back" on the box.
http://glass-holes.com/3000-Overflow-Box-Complete-Kit-gh3000kit.htm

2) drill three holes in back of tank for the "bean animal" overflow. (I have two 1" bulkheads)

3) install my "drain piping" setup


PRICING:

#1: give me $20 for the overflow box plastic (you'll need to buy another piece from Tap Plastics 35" wide by 6" high).

#2: give me $10 ($5 for each bulkhead)

#3: give me give me $20 for material (4 unions, 3 valves, T-fitting & drain piping from tank top to sump)
==============
You'll have to put in maybe $10~20 for the acrylic glue and the acrylic back panel, I mentioned.


Although, I would have said, you should have gone with a 55 gallon (if you were already going to a 40 gallon breeder). ^_^

As for skimmer, that will depend on how tall your stand is. (assuming you want one of my skimmers).
 
That sounds like a good price. What about if it was still drilled from the side or back then i can do a dyi corner overflow? I can try to make something that will drain the water from the overflow to the sump then drill maybe 1 or 2 more holes for the return. I'm thinking maybe one on each side of the tank. As for the 55 they did not have any at my local petco :(
 
I am not big fan of drilling bottom glass. You need to check that bottom glass is not tempered. Some tanks use untempered for sides and tempered for bottom glass for the strength.

As for corner overflows and piping in a return "up" through the corner overflow... I also don't like those setup, that's me. I like symmetry so if I ever move tank, I can still use it.

I saw a 55 at my local PetCo. I could buy it and bring it up of you want it. Realize that it is 48" vs 36" wide.
 
The new Aqueon/AGA 40Bs are not tempered on the bottom of the tank. You should double check yourself, but I just bought one and called Aqueon, they are no longer tempered on any part of the 40B.

That said, I'm basically following the BRS 40B overflow plumbing plan from this video:
http://www.youtube.com/watch?v=aaDDKNA4cn0&feature=player_embedded

I have a few extra Sch80 parts from my build (that I'm not done with yet) that I could get rid of. I also have the proper diamond drill bit and drill guide for 1" bulkheads, so if you decide to go that direction you can bring your tank down and I can help you drill it as well.
 
Also, I agree that avoiding drilling the bottom of the tank is probably a good idea. There's no reason to unless you're going super budget.

Another piece of advice:

The Edsal Premium 36" x 18" Heavy Duty shelving that Lowes in RP sells (and is in stock) fits a 40B like a glove, and only costs $80. It's by far the most cost effective stand alternative for a 40B/20L set up (which is what I'm setting up too). You need to make sure you get the model with the 1000 lb. shelf capacity.

I've done a lot of research on the same set up, and I might swap out the 20L for a taller sump (though the length of the 20L is nice, it's not quite as tall as I'd like), so keep that in mind too.
 
Or u can always DIY a stand made from 2by4 lumber. This will let you skin it with plywood. Or some people have done the acrylic skinning over metal frame.

I can also bring my glass hole diamond bit & tenplate, but sounds like Lucas has you covered.
 
No i also did not mean drilling the bottom on the tank or having the return come back up through an overflow. What i meant was drilling either the side or back glass of the aquarium and doing a drain throughan overflow and the returns just leave open and maybe adding lockline or a wavemaker tip. i was also thinking of having the overflow in the middle of the tank not the corner. As far as the stand i did want to make one since the tank will be in my room about a for away from my bed and i was going to add a night stand type build next to it so i can put my alarm clock and other things on top. I really want to minimize the use of real estate inside the tank so i can have more room for my babies to grow.
 
^^ Pricing out the lumber, ply, and hardware for something like that (using 3/4" ply) got me well above $50. Given the amount of time and effort required, $80 was cheaper for me.

^ Let me know if want any advice. I'm going to be drilling and finishing the plumbing on mine next week.
 
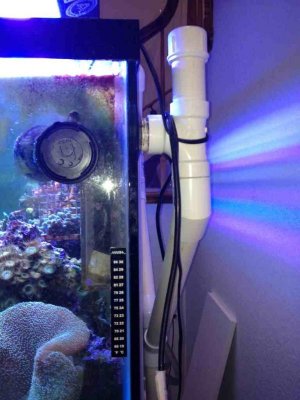
Ahh, you mean an external overflow setup. That is possible also. You just have to get an external glass overflow box cut/ made and silicone it to the back. I may eventually convert mine to that style since you already need to leave space in back for the piping anyways. May as well build it with a external overflow box and give more space inside.

That is why my overflow box is only 2.5" wide to minimize space used in my 24" front to back tank.ImageUploadedByTapatalk1342554141.797470.jpg
 
While that looks great on the outside i am not that capable at dyi'ng so i want to keep a small circular overflow inside the tank and plumb the drain through there then have lockline on the returns. Lucas, when do you think you would be able to help me? I'm expecting to get some more money today so i can buy the parts for the plumbing then.
 
How do you plan to make a circular overflow? Not sure what you mean. Circular corner acrylic will be more expensive than a acrylic overflow box.

If you plan to drill and just put an "elbow" drain, then it reduces your ability to surface skim and it may cause gurgling sounds which may not be what you want.

Also, with a 1" piping, a large snail "could" get clogged in there. So an overflow box also helps in that regard.
 
I have a piece of black pvc i think it's about 6"diameter that i want to use and cut teeth into the to of it.then i can always cut a small piece of acrylic to make a cover for the opening. For the gurgling i can make a small hole on the elbow to help stop it.
 
Back
Top