DIY 3D Printed Aquarium Upgrades

Alex114

Member
This thread will highlight the solutions I've come up with to some problems I've encountered while keeping saltwater tanks. Quick background on me, I'm nearly done with my electrical engineering degree at UA and have two 3D printers at home.

I'm posting this in the local forum for a couple reasons. The first is for feedback on whether or not anyone wants me to make them a similar 3D print as I am thinking about trying to sell them at frag swaps. I'm not really trying to make a lot of money from these, I think they'll generally help people out and eliminate some frustrating problems. The other reason is for input on improved design, if the project is not super practical for most tanks, or new problems that I might not have in my tanks that I could try and figure out. It's fun working on these and assembling the finished product

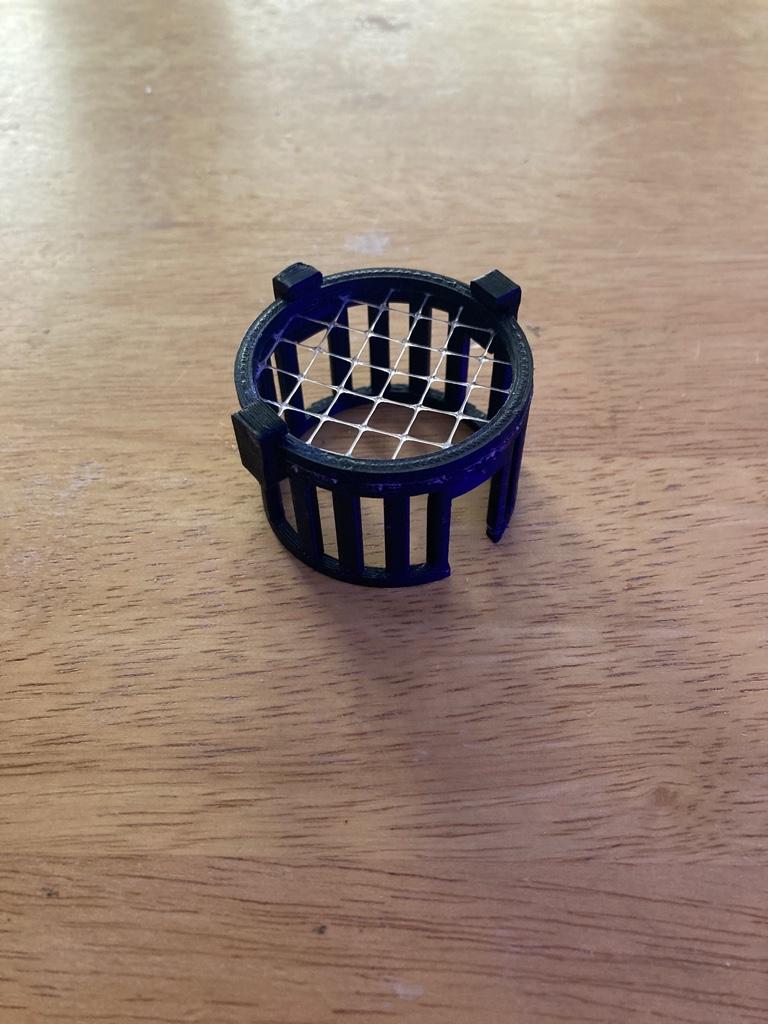
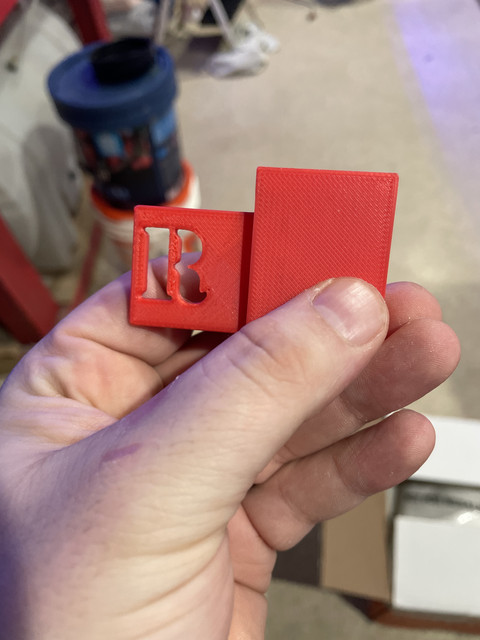
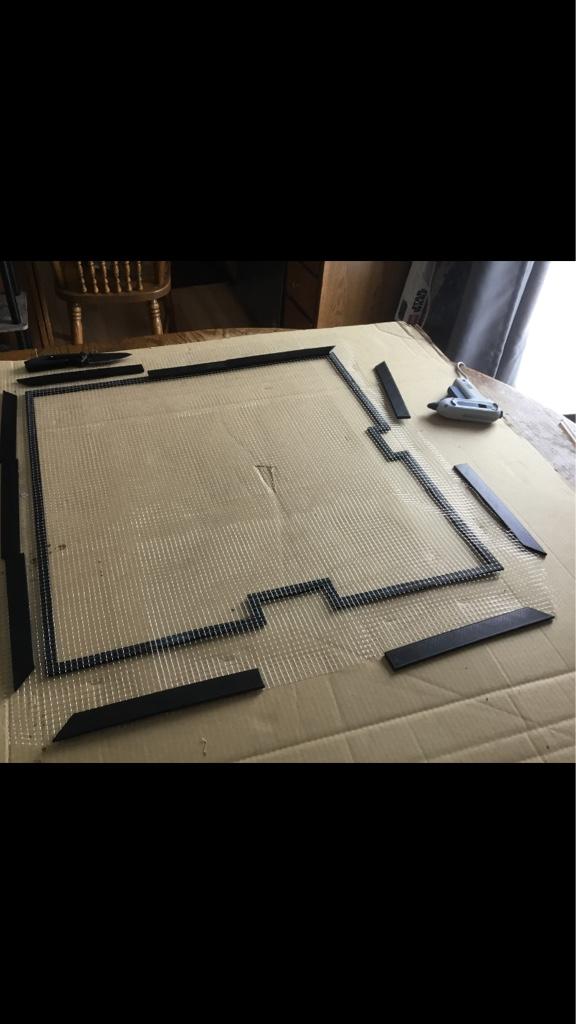
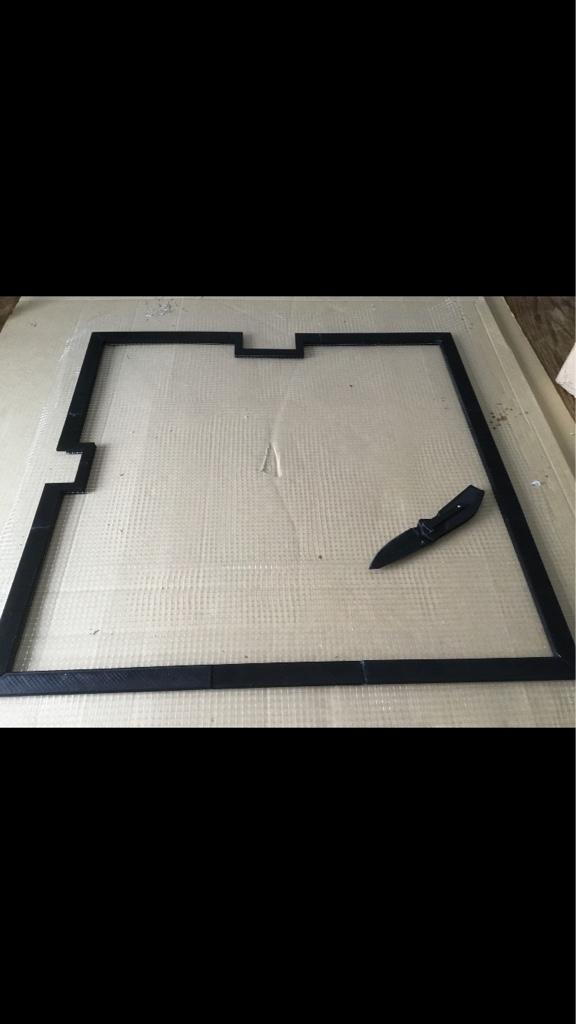
It's also important to note that I've tested the materials used in these projects and I'm confident everything is reef safe. I use black ABS plastic, gorilla glue gel for bonding, and standard mesh netting. The finished design is generally very strong and I've found the plastic is more likely to break then the super glue bond itself. I've made a couple mistakes with prototypes and getting two pieces of plastic apart once the glue is settled is near impossible without destroying both pieces entirely. When going over each project I'll also talk about how it's put together and the best practices I've found so if anyone else has access to a 3D printer they can build it themselves.
 
Frag Rack Mesh Cage

So lots of people like angelfish, and dwarf angels are common for many reef tanks. I've always wanted one myself but didn't want to risk them eating any of my expensive zoas or acros. Yesterday I couldn't resist a coral beauty. I have room for one and decided to give it a try. To keep some of the zoas in the tank safe I designed and printed what is essentially a mesh cage to cover up the frags. It was important to design something that had little effect on flow and light as well as still letting me see the zoas, but keeps the angelfish out. So if he decides to eat something I know it won't be a 50$ frag. Below is a picture of the first prototype that I'll put in the tank after the glue dries.

To make this I printed 10 frames, 2 for each Wall/top (the bottom is empty). I sandwiched the mesh between 2 frames to create a wall and then glued all 4 walls together. Afterwards I put the top on and then put a brace around the bottom to make everything appear uniform. The design is significantly stronger then I thought. The cage is roughly 4 inches tall by 9 inches wide by 6 inches deep

Prototype two will be a little more advanced then just a simple box. I'll find a way to easily remove the top and add egg crate to the bottom so that the frag rack is incorporated into the cage. Prototype three will look at a way to secure the frag rack cage to the glass using magnets so it's not resting on the sand bed

7876802B-E851-41B2-91F6-051F11A14440.jpg
 
This is great for people like me. I have an emperor that I suspect eats LPS, but I've never seen him do it. I could buy 2 cheap LPS frags - something I know I can't keep, and put one inside the cage and 1 outside the cage. If both frags die, I know something is wrong with my tank or water chemistry. If the frag in the cage is fully expanded and doing great, then I know why.
 
This is great for people like me. I have an emperor that I suspect eats LPS, but I've never seen him do it. I could buy 2 cheap LPS frags - something I know I can't keep, and put one inside the cage and 1 outside the cage. If both frags die, I know something is wrong with my tank or water chemistry. If the frag in the cage is fully expanded and doing great, then I know why.

Exactly. I use brs 1/4 inch mesh but the smaller size (1/8?) could be just as easily used and nothing should be able to reach through the mesh. Here's an updated pic below. Problem I've run into is that this thing floats because each frame is hollow. I could make them solid pieces but that increases the material by 50%+ as well as a lot longer print time. I tried attaching frag plugs to hold it down which didn't work, will try glass marbles when I find some around the house lol. If those don't work I will try 3/8 rubber encased magnet cubes from K&J magnetics (B666BR-N52) which should definitely be able to hold the cage down. Currently the bottom frame is buried in the sand but is a hassle to get to the coral but has kept it down all day. If anyone has anymore reef safe weight ideas let me know

D30C2757-47C7-4E83-9123-DA49FB666C2B.jpg
554172A7-B05B-4FA2-86D0-0EB709D29439.jpg
 
Custom fit mesh lid

I think the most useful thing I've made so far is a mesh screen lid. In a year before putting this on my tank I had two blennies jump out and a clownfish. Losing fish that way sucks, pretty sure we can all agree there. I wanted to use mesh because I think it looks the best and more importantly let's nearly all light through the lid. After looking online I found kits that I could buy but they were somewhat expensive and didn't have any spots for a light stand or wires running into the tank. To get them I would need to buy more parts to a mesh kit and for my 75 gallon tank it would have been around 120$ I estimate. Why pay that much when I can build one for less?

Again using reef safe ABS plastic, gorilla glue gel, and 1/4 inch mesh from brs I put everything together in a similar way as before. A bottom and top frame with the mesh sandwiched in the middle. But I don't have a 2 ft by 2ft printer so everything is printed in sections. They all fit together like a puzzle using triangular edges so it's easy to line up. Once the bottom frame is built I print the top frame and glue it piece by piece to the bottom frame which has the mesh on top of it. The mesh is stapled to cardboard to get it as tight as possible. Once everything is together I cut off the excess mesh with a pocket knife and measure demensions one last time to make sure everything will fit when I put it on the tank

Below are pictures of a lid I'm building right now for a 60 rimless cube. I'll post pics as it gets built. I've had two 2 ft by 1.5 ft lids on my 75 gallon, both of which have been there for 9 months and still holding up great. I expect at least 3 Year's out of them and if they do break all it should take to fix is some gorilla glue.

My tank, you can see slots for wires and the Radion lights on the left. Mesh isn't too tight on my tank, it was the first prototype and I've found better ways to tighten it since then. But the lids slide in real easy and have absolutely no areas where a fish could possibly jump through
View attachment 409120

And the beginning of the 60 cube rimless lid
image.jpg
 
So here's updated pics on building the lid. Unfortunately I forgot to get a pic of the lid on the tank but I think it turned out well


cid:2FDC8B19-83C4-4DEE-86B9-B2101BEBB037


cid:B6FB5A33-1446-4CEA-BF47-AA6A0A81241E
 
Hey can you make me something similar to this for my skimmer?
https://www.thingiverse.com/thing:868257

I have a BUBBLE BLASTER HY-5000 PIN WHEEL WATER PUMP Seen here and my goal would be to put some filer so snails cant get into the intake park you think you can make me something that you just slide over the intake that has a cross pattern in it. Last night at 6am my skimmer was going crazy come to find out a snail made it inside.

Im thikning Something that would just slide right over my intake would solve this issue. I would be extremely grateful if you could help me out save me a pump lol


Let me know if we can work something out :) or if you need any additonal information from me.

:fish1: Thanks in advance :fish1:
 
Yeah for sure! Looking at it I just need a few measurements from you. I’ll pm you my phone number so we can talk a little easier.

When I’m finished I’ll post a pic of what it looks like when I’m done
 
Finished this awhile ago but haven't posted a pic yet, here is that cover for the pump. Small but should work, has space to slide in around the air house and then be secured with a zip tie
d7294421e366e53beefe459b7a3ab1c0.jpg


Sent from my iPhone using Tapatalk
 
Also finished this mesh lid for a coralife biocube 29/32 gallon. Normal 1/2 inch wide frame. This was interesting because I've never made a lid with a curved front and funny enough the sides are not at a perfect 90° angle. Took a minute to realize that when I swore my measurements were correct but the front and back were different sizes after printing. This also sits somewhat deep in the tank frame itself so I've printed small tabs that can be added on top to make it easier to remove.
e29250df920c2bcdd357da1f5562c350.jpg


Sent from my iPhone using Tapatalk
 
Thank yo uso much

Thank yo uso much

I want to give a HUGE shoutout to Alex, he is the man!! I had an issue with my skimmer and within a matter of minutes Alex had a part ready to go. Dimensions are prefect. I also sent him a bunch of other things I have wanted to have printed and he killed it.

Hes also got an amazing couple fish tanks! He was nice enough to hook me up with some coral too!!! Thanks again Alex any time your in North Olmsted feel free to swing by!! :beer:

Thanks again

Battery Holder


Press


One of those flexible measuring things just need some screws:


Record Organization Tabs


Put these on your headrest and you can put your purse or bags on it so it hangs on the back of the seat.


Clips


GoXLR Mini Stand

 
Just realized I never posted pics of this. This is a 35x17" size mesh lid for my 40 breeder tank I finished last week. I added a corner cutout that's barely visible for a wire and 3 cutouts for the lights. This is the first lid that I have done using a 0.7" wide rim. I've tried making a lid for a tank that was wider then 30" and didn't feel the 0.5" wide rim I had been using was strong enough. This size feels much stronger and I think the extra material needed is worth the extra strength. If you notice in the picture the mesh is almost completely tight but you can still see a crease where it was folded. I've come up with a design to try and eliminate that and will test it out on the next lid I make. Personally I don't mind but I still want it to look as tight as possible

9187dd2f3d7b749f975ff69cd005093d.jpg

aac844402bca47b9ccfd74e268d56b45.jpg


Sent from my iPhone using Tapatalk
 
Do you make a channel to use the cord for the mesh tops or are printing 2 pieces that snap together sandwiching the mesh?

Sent from my Pixel 4 XL using Tapatalk
 
Back
Top