Dj Turna's 50g Cubist Build!!!

Djturna4thakidz

New member
Hello All,

My name is Ryan and this is my first major aquarium system build. I have been into reefing since I was a kid and had numerous tanks over the years but never built one myself. So this is a big milestone. I bought the tank in October 2014 and planned to have it done by my birthday, which was June 2014. As with most things in life, my plan has been delayed. Everything you can think of has happened since then, planning a wedding, vet bills, car maintenance, everything, but in the last several weeks I have really buckled down and started seeing the light at the end of the tunnel.

A little background... A couple years ago, I was into breeding chameleons and really liked them and their husbandry, but something was missing. At some point I just wondered into a local fish store and boom it hit me, I had to get back into reefing. All the new products were amazing, LEDs and Vortechs, where had I been. I got a little IM Nuvo 8 to feed the addiction, it only worked for a little while and then I was planning this tank.

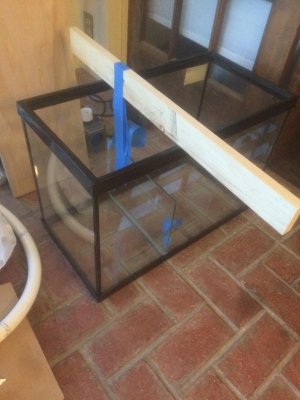
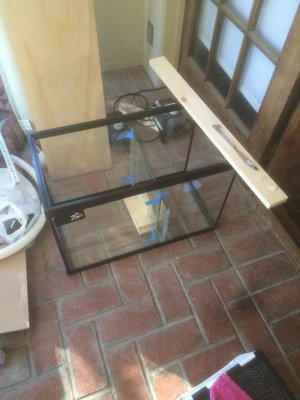
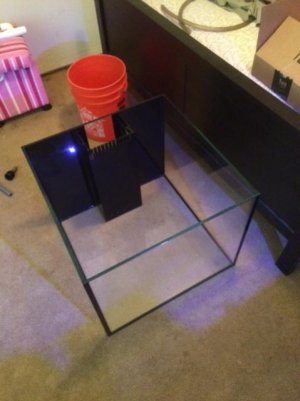
I wanted to go with something small and manageable, which may be a mistake since I have plans of something north of 150 gallons, but that is far in the future. I really like SPS coral and I have been researching it for about a year. I have never cultivated SPS, but I would like to use this tank to get into it. The tank is a SC Aquariums 50 gallon cube. It is the one they sell as a package deal, I just bought the tank by itself. The build quality is really good.
IMG_0419.jpg

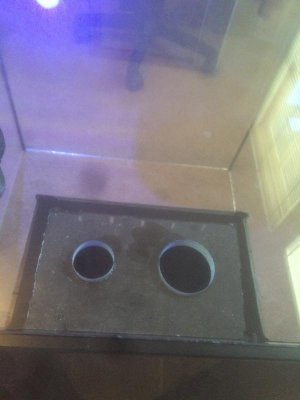
The only thing I did not find ideal was the return plumbing. I removed the stock plumbing and I am going to drill out the smaller hole and go with a herbie full siphon setup. Here is a picture of the stock formation.
IMG_3975.jpg

I have not drilled the tank yet because of fear but it will be taken care of this week.

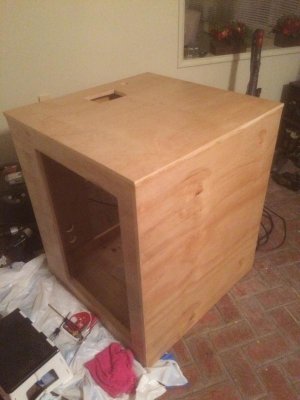
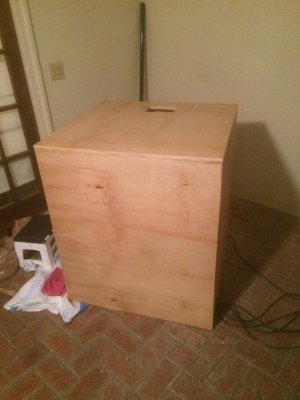
I have also been constructing my own custom wooden stand. This was probably the biggest challenge for me during the build. I see so many build threads that have beautiful stands. The OP says something like, "just whipped out this stand in a couple hours", and it is a really nice furniture grade piece. For me, it did not go as planned. Since I had limited carpentry skills and tools it made it very tough. Only by being patient and taking my time was I able to complete a stand. At some points I was very impressed with my stand, other times I was mad, but all in all I think it looks ok and will hold the tank which is the most important thing.
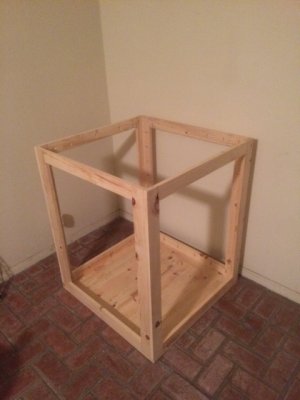
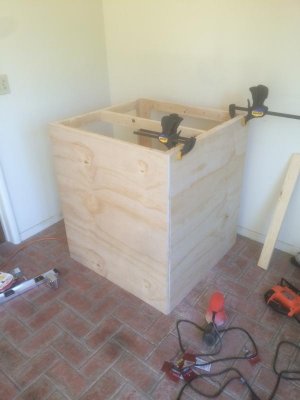
IMG_1369.JPG

IMG_3854.jpg

Here is what it will look like with the tank. I wanted to build a stand that was larger than the tank to hold all the components without having things outside the stand.
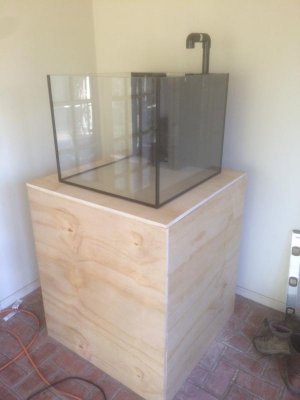
IMG_4352.jpg

I tried several minwax stains on the wood but did not like the final look of any. I did really like the look of the natural pine though, so I decided to just finish it with water-based Minwax Helmsmann polyurethane. I applied 3 coats to the whole stand and 6 coats to the top and bottom, areas that would come into contact with water.
 
IMG_5302.jpg

IMG_5300.jpg

That is what the stand looks like currently. Tonight, I am going to sand the whole stand down and caulk the inside seams. This should pretty much complete the stand and boy am I glad.

This last weekend I also finished converting a basic 20 gallon tall tank into a sump. I chose the 20g tall because of the 24" total length, which I thought would originally fit in the stand better but ends up either would have probably fit. I looked at going with a 40g breeder but it was to long. The 20g tall also has room for back-siphoning of the return when power goes out to pumps.

IMG_5426.jpg

IMG_5428.jpg

I got the glass cut from a local shop here in Los Angeles for $20. I had them cut three pieces of 1/4" thick glass. I read that 1/8" is pretty thin but when I got the 1/4" glass it was very thick, much more so than I had expected. The tank is 12" wide, so I had the baffles cut at 11 5/8". It left a good amount of room for caulk, although if I did it again I may go with 11 3/4, just to get a closer seam. I used 100% silicone caulk with no fungicides or other added chemicals. It was made for doors and windows not bathrooms. Securing the baffles was much easier than I thought and seems pretty strong.
 
Now that the sump and stand are almost done, I just need to plump and then I should be ready to go for water testing.

Let me tell you a little about the aquarium components. The tank is a SCA 50g (24x24x20) with a 20g custom sump.

Return Pump: Eheim 1260
Manifold pump: Eheim 1262

I have finally decided to go with two pumps in the sump. I have plenty of room for both, no problem. I was going to drill the sump to put either one or both of the pumps outside the sump but I decided that it was more trouble than it was worth and having both pumps in the sump minimizes chances of leaks. I could have used the 1262 as return and to power the manifold but people I talked to said this was a hassle because everytime they fine-tuned their manifold the drain siphon was effected and required further tuning. I want to be able to run the pumps independently.

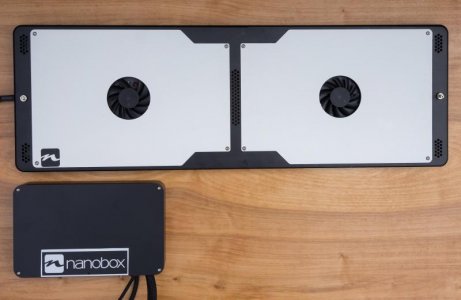
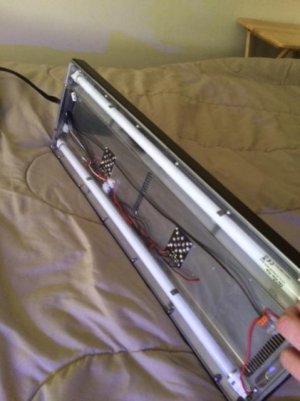
Lighting: Nano Box Hybrid

IMG_0924.jpg

IMG_0945.jpg

Thank you Dave for this masterpiece! I am a big fan of Nano Box. I used the mini Tide on some of my smaller tanks and the build quality and customer service is unparalleled. Dave has been asking me for pics of it with the tank so he should be happy to see that it will be put to use soon.

Skimmer: Aquamaxx ConeS CO-1

I originally had an Avast CO-1 pegleg skimmer but the pump was massive and was just too big for my sump. I read tons of reviews and decided on the Aquamaxx. I have not gotten to see it work yet but cannot wait.

Controller: Reef Keeper Lite

I have had this controller for years and it works pretty good. The interface is pretty complicated but it has been reliable. I am going to go ahead and set it up on this tank. If I had my way, I would scrap it and get a Apex. They look so easy to use. If anybody has a head unit and base for cheap, please let me know. I would love to go Apex.
 
I will keep posting updates as I move along. Please feel free to follow along this crazy journey. Also, please chime in with comments/questions. This is a learning experience and I could use a lot of help.
 
I got the stand sanded and caulked and now I just have to drill the tank and plumb. I will hopefully get to that later today. Pictures to follow
 
I have the same tank, and am in the process of rebuilding it. Going to change the plumbing as well. I'v seen a lot do the over the top returns, I'm probably going to drill the back.

I'm on the fence about building a new stand, probably stick with what the one provided. Your stand came out great.
 
Thanks so much! I'm going to do the over the back. I thought about drilling it, but the thought of breaking the tank scares me. Hopefully I will get to drilling the tank today and it will be no issue. Please post pics of your progress, would love to see how it turns out!
 
Got the tank drilled!!! I made a template out of a 3x1 and it was no big deal. It did take longer than I thought. All the posts I read said it would be pretty quick, approx. 5 minutes. It took me about 15 minutes. Maybe the diamond coated hole saw I got off amazon was not the best.
58c4c0eb95370c04d0610e9a59d07416.jpg


a928ddf05882f1ffb3a56b83a404e95d.jpg
 
The actual drilling process was very easy. I turned the torque down, and let the weight of the drill do the work. I have been hesitant to drill the tank for so long. After doing it, it's no big deal. No reason to be afraid if you are thinking of doing your own mods.
 
Yep, drilling glass is a breeze once you have done it. Got 1 inch herbie drains, and a 1 inch return on the back wall. Yeah, I'll get some pictures soon once everything is plumbed. Plumbing will be a breeze I went with reinforced tubing for drains and returns. I also pulled off the black acrylic overflow leaving just the glass underneath. Going to keep it this way toothless. With the stock overflow cover on, the teeth restricted the flow more than I liked leaving the water level a little higher than I want, and that with only a DC3000 pump (800gph @ no head pressure) ao

I also painted the stand white, the setup will be bare bottom and white reflects more light than black.

I'm planning to run a lot of flow through the sump contrary to how most setups are now a days but since the tank will be bare bottom again and I plan to scrub the bottom when I do the glass once or twice a week I want as much overflow flow as possible to take that filth to the filter sock.

With a full siphon Iv calculated 2000 to 2500 gph, and even though there is gate valve I want to run it wide open, or nearly wide open. So going to upgrade return pump from the dc3000 to the dc15000.
 
Last edited:
Yep, drilling glass is a breeze once you have done it. Got 1 inch herbie drains, and a 1 inch return on the back wall. Yeah, I'll get some pictures soon once everything is plumbed. Plumbing will be a breeze I went with reinforced tubing for drains and returns.

I also painted the stand white, the setup will be bare bottom and white reflects more light than black.

I'm planning to run a lot of flow through the sump, contrary to how most setups are now a days but since the tank will be bare bottom again and I plan to scrub the bottom when I do the glass once or twice a week I want as much overflow flow as possible to take that filth to the filter sock.


That's awesome! I thought through the exact same mods. Crazy! Yes please keep me posted, I'm really interested to see your build.
 
That's awesome! I thought through the exact same mods. Crazy! Yes please keep me posted, I'm really interested to see your build.

Yep planning to upgrade my return pump to match the siphon speed. Considering upgrading the lighting from an led to T5 or halide.

I have a few ideas for this tank, but more than ever I want it to be my most successful one yet, so im leaning to the tried and true lighting options we have. My current fixture is a 120w Chinese Black box, it has two channels, a blue channel, and a full spectrum. The problem is to get the level of blue I like, I need to run the full spectrum level very low and the blue channel high, the net result is since the white channel is turned way down, im probably lighting the tank with more like 60-80w's instead of the 120w.

A 250w Halide or T5 would be much more intense lighting.
 
Dj Turna's 50g Cubist Build!!!

Yep planning to upgrade my return pump to match the siphon speed. Considering upgrading the lighting from an led to T5 or halide.


I have a few ideas for this tank, but more than ever I want it to be my most successful one yet, so im leaning to the tried and true lighting options we have. My current fixture is a 120w Chinese Black box, it has two channels, a blue channel, and a full spectrum. The problem is to get the level of blue I like, I need to run the full spectrum level very low and the blue channel high, the net result is since the white channel is turned way down, im probably lighting the tank with more like 60-80w's instead of the 120w.


A 250w Halide or T5 would be much more intense lighting.


Good stuff! Sounds like we can learn a lot from each other with what works and what does not. I will do an in-depth write up of my lighting once I get it up. Hopefully it will help you make a great decision. I would love to see some halides! I bet you would get great growth. Is heat an issue?
 
So I have been hard at work trying to get this tank up. I started by installing the herbie siphon.

2ba4a69f010282eee544226f566bcd56.jpg


419906240b45b0a3d07c6a6f2631835b.jpg


af8250ab740988286c615082ae240cba.jpg


Here is what the plumbing looks like finished.

29da2dd19fc87c4a234039d69ec94380.jpg


I used 1" pvc for everything. All cuts were made using a mitre saw. I also used to cement everything together.

57c065bcc556170d1aa587aa63ebc17e.jpg
 
I have also been messing around with aquascaping. Let me know how this looks

fecb89ddfbf7998bdb9ec8c7186a0954.jpg


7f789ea33cd5b5498b3fb72656eafae3.jpg


1866dd2d57456eceb099ab287a8f6f14.jpg


95bc1dd540af2fffcf4155a2d2885898.jpg


I think I may go bare bottom, so I can crank up the flow. What does everybody think?
 
Back
Top