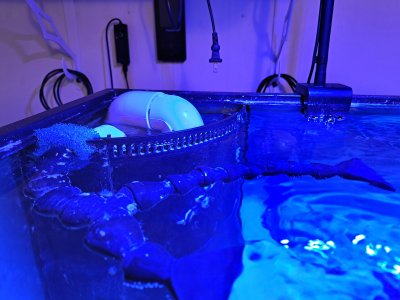
Last week I finished a total start-over of my 75-gallon Marineland corner overflow marine tank. Along with the complete cleanout of the sand (concreted) and rock covered with GHA came new hard plumbing and new equipment. I really wanted to ditch the filter socks and go modern, so I got a Trigger Platinum 26 with the V.2 roller fleece system, and a Hydros Launch to replace my ancient Digital Aquatics control system (that's right, old school).
With the new sump and hard plumbing in place, 60# of Carib-Sea Bahamas Oolite and lots of Life-Rock and base rock, I mixed and added 78 gallons of Tropic Marin Pro salt water (RO DI) and added it to the tank which filled the tank and the sump to safe levels, no leaks either.
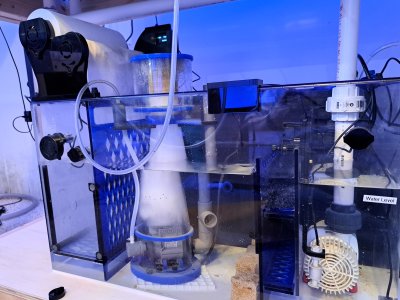
Then the troubles started. It is obvious that it is much easier to thread the fleece into this roller dry than wet, maybe the fleece roller would not even be needed in a brand-new set up at all or a skimmer either. I'd installed my Octo Varios 4 in the return area of the sump, so I set it to max and turned everything on. I'd set up the V.2 roller fleece with the optical sensors set to activate when the fleece area water was rising to advance the fleece and to shut off when the return pump shut off, all good.
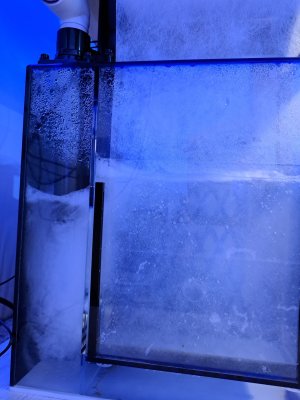
Nope, as the fleece holds back water as it "clogs" and before it advances, it lowers the water in the adjustable-depth skimmer section and therefore the water going into the return pump. The return pump area water drops as the pump fills the DT to almost overflowing. My most confusing thing is at tank water has stopped going drown the overflow assembly in the corner overflow until the tank water is WAY high. I've tried reducing the flow of the return pump, adjusting the depth to the skimmer section "overflow gate", and have removed several gallons of water. Nothing has really worked on a permanent basis. I certainly can't consider any kind of ATO system with this going on. Also, I've gone through an entire roll of fleece in 5 days! This fleece is hard to find and expensive. Help, I guess, I'm looking for quick solutions.
Thanks.
With the new sump and hard plumbing in place, 60# of Carib-Sea Bahamas Oolite and lots of Life-Rock and base rock, I mixed and added 78 gallons of Tropic Marin Pro salt water (RO DI) and added it to the tank which filled the tank and the sump to safe levels, no leaks either.
Then the troubles started. It is obvious that it is much easier to thread the fleece into this roller dry than wet, maybe the fleece roller would not even be needed in a brand-new set up at all or a skimmer either. I'd installed my Octo Varios 4 in the return area of the sump, so I set it to max and turned everything on. I'd set up the V.2 roller fleece with the optical sensors set to activate when the fleece area water was rising to advance the fleece and to shut off when the return pump shut off, all good.
Nope, as the fleece holds back water as it "clogs" and before it advances, it lowers the water in the adjustable-depth skimmer section and therefore the water going into the return pump. The return pump area water drops as the pump fills the DT to almost overflowing. My most confusing thing is at tank water has stopped going drown the overflow assembly in the corner overflow until the tank water is WAY high. I've tried reducing the flow of the return pump, adjusting the depth to the skimmer section "overflow gate", and have removed several gallons of water. Nothing has really worked on a permanent basis. I certainly can't consider any kind of ATO system with this going on. Also, I've gone through an entire roll of fleece in 5 days! This fleece is hard to find and expensive. Help, I guess, I'm looking for quick solutions.
Thanks.