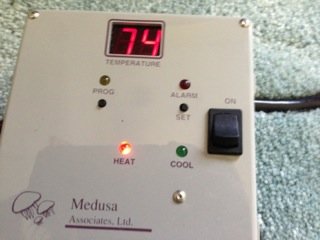
Medusa Dual Stage Temp Controller for sale Paid $180, asking $90
works great for keeping temp in check
thanks fishgal
Medusa temperature controllers accurately control either air or water temperatures between the range of 32 degrees Fahrenheit to 90 degrees Fahrenheit (0C-32C). The temperature range of the TC-200 make it especially suitable for aquarium use. The TC-200 controls a heater and a chiller while giving a continuous digital readout of the temperature. An audible alarm sounds when the temperature varies 3 degrees above or below the set point or if the temperature sensor fails. This feature sets Medusa controllers apart from other controllers by warning you before serious damage from high or low temperature occurs. Medusa controllers are simple to install. Just plug your heater and/or chiller into the receptacle on the bottom of the controller and program the desired aquarium temperature for complete temperature control.
Display Type: 2-digit .54 inch high red LED
Display Resolution: ±1 degree F/C
Display Units: Degrees F or degrees C, selectable
Temperature Range: 32F-90F, 0C-32C
Alarm: ±3F of set point deviation to activate audible alarm
Sensor Type: Semiconductor type on 6 ft. cord. Cord extendable (with A-50 below)
Control: 1.2F differential preset
Outputs: Chiller 1/2hp. Heater 1,200 watts
Power: 115volts/60hertz, 12 amps maximum
Line Cord: 8 feet in length with grounded plug
Programming the Medusa HC-100 Temperature Controller (Single Stage)
Programming the controller involves setting the desired temperature, the temperature units (degrees C. or F.), and, if required, calibrating the temperature. Prior to programming, turn the HC-100 on and let it warm up for 10 minutes.
NOTE: To prevent damage to the controller and to reduce the risk of shock, never press programming buttons when your hands are wet.
1. To enter the programming mode remove the clear plastic cover and press the PROG button. The display will show the current set temperature and the PROG light will come on.
2. To change the set or desired temperature press the ALARM/SET button. Pressing it once will cause the set temperature to increase by one degree. If the ALARM/SET button is held in, the set temperature will increase at a one degree per second rate. When the set temperature reaches 90° F. or 32° C., it will “roll overâ€? to 32ºF or 0° C. When the desired temperature is displayed, press the PROG button to go to the next programming function, temperature units (ºC. or ºF.).
3. The display shows the temperature units. Pressing the ALARM/SET button will cause the units to change between ºC and ºF.
4. When the desired temperature units are shown, press the PROG button.
--------------------------------------------------------------------------------
Programming the Medusa TC-200 Temperature Controller (Dual Stage)
Programming the controller involves setting the desired temperature, the temperature units (degrees C. or F.), selecting the heat or the chill mode and, if required, calibrating the temperature. Prior to programming, turn the TC-200 on and let it warm up for 10 minutes.
NOTE: To prevent damage to the controller and to reduce the risk of shock, never press programming buttons when your hands are wet.
1. To enter the programming mode remove the clear plastic cover and press the PROG button. The display will show the current set temperature and the PROG light will come on.
2. To change the set or desired temperature press the ALARM/SET button. Pressing it once will cause the set temperature to increase by one degree. If the ALARM/SET button is held in, the set temperature will increase at a one degree per second rate. When the set temperature reaches 90° F. or 32° C., it will “roll overâ€? to 32ºF or 0° C. When the desired temperature is displayed, press the PROG button to go to the next programming function, temperature units (ºC. or ºF.).
3. The display shows the temperature units. Pressing the ALARM/SET button will cause the units to change between ºC and ºF. When the desired temperature units are shown, press the PROG button to move to the next programming function, selection of heat or cool operation.
5. The display shows the control function. Pressing the ALARM/SET button will cause the function to change between HE for heat and CO for cool.
6. When the desired control function is shown, press the PROG button.
Calibration Instructions
If the sensor is replaced, the unit must be calibrated. First measure the actual tank temperature with an accurate thermometer accurate to at least ±1 degree. It should be noted that inexpensive digital and small floating thermometers are only accurate to at best 2 degrees and that liquid crystal stick- on thermometers are only good to ±5 degrees. Accurate calibration thermometers are available from your Medusa dealer.
To calibrate:
1. Press the PROG button to enter the programming mode
2. Adjust the set point temperature to be the same as the actual tank temperature. 3. Press the PROG button two times. The display should now read "CU".
4. Press the ALARM/SET button and, while holding it down, press the PROG button. Release both buttons. The display should show the measured aquarium temperature. Now the unit is calibrated but the set temperature needs to be reset to the desired tank maintenance temperature.
Attachments
Last edited: