Need help with skinning a stand please

powder_blue

New member
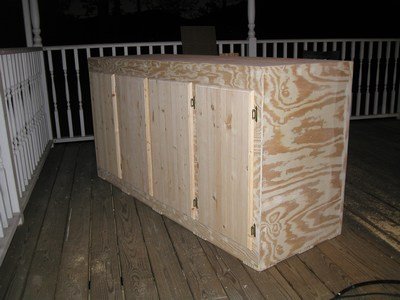
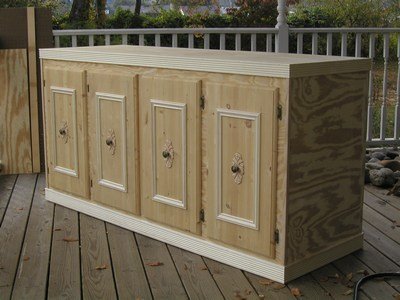
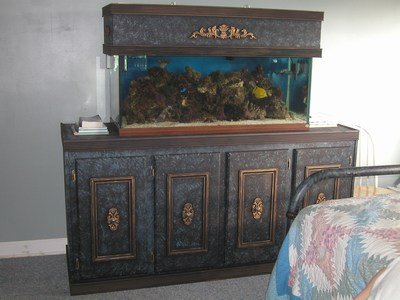
I am building a stand for my new rimless 60x24x18 (floating bottom) using rocket's design. I will be using a 3/4" birch top and I want to skin it with 3/4" birch as well. How do you guys attach the 3/4" top to the stand? Also, do you guys just glue the sides on or do you attach with screws or nails?
 
Do you mean birch faced plywood or solid? Makes a difference because in the case of the latter, you must account for expansion of the wood. Frankly, solid wood would be a poor choice for the top.
 
Birch plywood. Sorry this is a double post. Now im just trying to decide whether to use 3/4 or 1/2 to skin it. Doing an elos style stand and painting high gloss white.
 
Skin = thin

Skin = thin

I would use ply for the top. I used Tight Bond II or you can use TB III. I used pocket holes for my top (build thread on the way) and I'm sure you can use a variety of methods to secure. I wouldn't just drive screws in from top (just me) but I'm sure that will be fine as long as the top stays flat as possible and you don't over do it. 3/4" is probably overkill but it won't hurt.

I'd almost think ply on the top is superflous with RE's design as well as long as the 2x4's are planed or jointed straight and the butt ends are really flush.

For skinning I think 3/4 is way overkill, personally. 1/4 would be fine I'm sure. Typically the skin doesn't really hold weight or do much for structure. But it DOES help keep the frame stable and adds some stability. Most applications like this I've seen 1/4 is fine. Glue the ply on and you can use some finish nails (16 guage is what I use, but 18 would be fine I'm sure). Then cover the nail holes with trim OR if painting be sure they are below surface of wood and fill with wood putty before painting.
 
Birch plywood. Sorry this is a double post. Now im just trying to decide whether to use 3/4 or 1/2 to skin it. Doing an elos style stand and painting high gloss white.

I'd use 1/2" - cheaper, if you can find it. I actually used a combination of birch ply and solid wood to skin my stand, but I couldn't find 1/2" so I used 3/4".


Now that I look at the photos, I think I actually used solid pine for the front face, but birch ply for the sides and the inside cabinet. With solid wood, you need to account for dimensional movement.
 
Thanks. I'm a charter member of overbuilders anonymous. An extra $50 in wood buys a whole lot of peace of mind. Good luck with yours!
 
I glued my top. I have my tank recessed. I screwed the sides but the trim covers it. I didn't do the euro style.

ImageUploadedByTapatalk1402028260.880058.jpg

ImageUploadedByTapatalk1402028281.262854.jpg

ImageUploadedByTapatalk1402028337.615197.jpg
 
Thanks. I'm a charter member of overbuilders anonymous. An extra $50 in wood buys a whole lot of peace of mind. Good luck with yours!

While true, the plywood skin doesn't carry the load. It acts as a stiffener to prevent racking of the stand. The only thing to worry about is transfer of the shear load to the plywood. Use the 1/2" stuff and make sure it's secure. I'd clue and nail it. If you are going to paint it, then you can use some hefty screws, fill the holes, and paint. If you are going to stain, then use finish nails and fill with the appropriate wood filler.
 
If you glue the plywood on with construction adhesive it will add quite a bit of strength and stability to the whole assembly. You could use pocket screws or fasten from within the frame so they were concealed. Or you could simply nail the birch on and putty the holes. Post some pics!
 
Why do you even need a top ??? The last two that I built, I left it open. If you skin it, go thin. No need for the 3/4" over a frame. Heck, I made my stand for my 75 with 3/4" plywood. Just made a frame for the base, stuck the skin on the sides. Glued and air nailed it. That is plenty strong. The wood would be destroyed if you tried to take it apart the next day. So many people on here way over-build their stands. I have a couple of pics of some that I have built if you'd like to see them, PM me. HTTHY
 
One of mine,,,

One of mine,,,

I think that this was the last one that I built with a top. It was way over-built w/ 2x4 frame. Not needed just made it heavy. I only used 1/4" for the skin to make it lighter. I used it with my 75 gal for awhile till I upgraded to a 220gal. Sloppyj, love the way you recessed the tank, that looks clean, slick !!! Very nicely done !!!
 

Attachments

  • Large Tank Stand Build 1.jpg
    Large Tank Stand Build 1.jpg
    29 KB · Views: 7
  • Large Tank Stand Build 2.jpg
    Large Tank Stand Build 2.jpg
    33.3 KB · Views: 7
  • First Large Tank Stand.jpg
    First Large Tank Stand.jpg
    29.6 KB · Views: 6
Why do you even need a top ??? The last two that I built, I left it open. If you skin it, go thin. No need for the 3/4" over a frame. Heck, I made my stand for my 75 with 3/4" plywood. Just made a frame for the base, stuck the skin on the sides. Glued and air nailed it. That is plenty strong. The wood would be destroyed if you tried to take it apart the next day. So many people on here way over-build their stands. I have a couple of pics of some that I have built if you'd like to see them, PM me. HTTHY

I need a top because the aquarium is rimless and Reef Savvy says at least 3/4 top. I won't need foam because it's got a floating bottom. I'll probably just glue the sides and nail. I don't have a kregg jig so I can't do pocket holes for the top. I may just countersink and fill with putty but I would love to find a way to screw the top on from underneath. I will def post pics. Thanks to all!
 
For the top just glue should be fine, really. Put in some gussets for a bit more stability under the cab if you wish. Titebond 2 or 3 would be good.

Screws wouldn't hurt but you'd need to be careful with how screws crush wood around the holes for flushness so if you are just driving from the top where the aquarium sits be careful that you don't wind up having an uneven surface around the screws.

Can be sanded down but you'll have divots around the screw holes, potentially, and then it just seems to me could be a lot of work for little benefit....I'm really good at that.

For the sides you are on the right track.

Really, for RE's design the 2x4's really carry the weight - the skin is just that - skin. The finish nails help hold the ply in place until the glue dries but does help hold them in a bit more than glue, but not much. Pulling ply out from finish nails only is pretty easy.

I wouldn't hesitate to use 1/8" ply for skin myself. Trim out as you see it. Even thin ply like that secured with glue is pretty strong for shear loads.
 
Buy the Kregg jig, also the clamp. Worth it, you'll use them for other projects down the road. Just stick gussets in the top corners and screw into the top thru them.
 
Back
Top