New 150 Gallon Build

zeminabr

New member
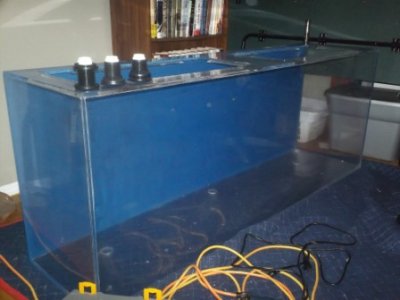
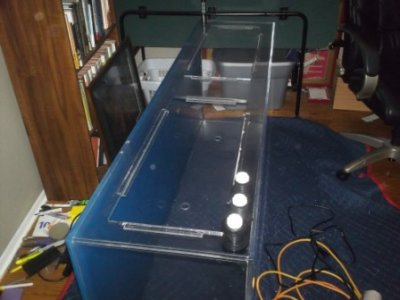
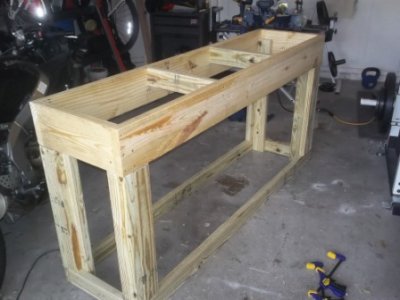
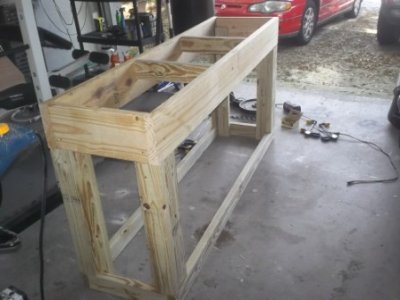
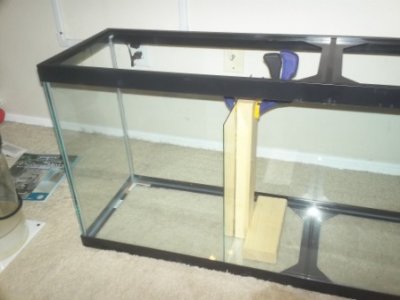
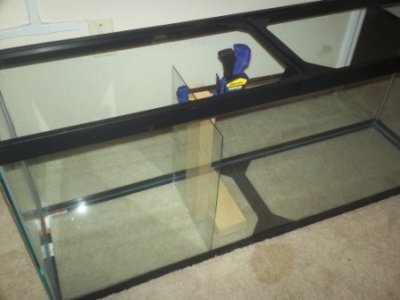
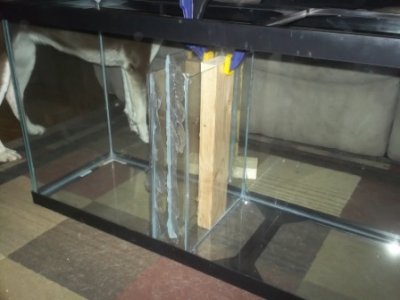
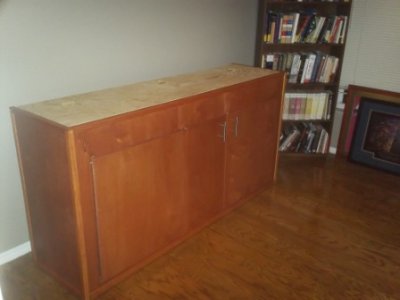
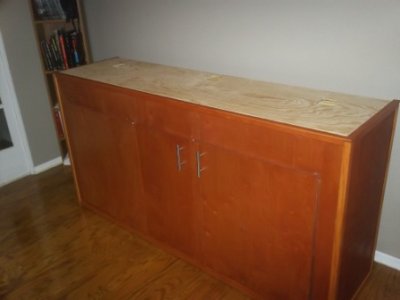
I am getting ready for some serious picture-quality action on my tank build. I recently picked-up a 150 gallon acrylic tank and I have sanded and buffed the scratches out of it. Now all that is needed is to plug the existing holes, drill new returns, cut slots for overflow, build my sump, build the external overflow box, plumb the siphon/durso/emergency overflow system, build the stand and finish it, pick up the equipment, and then finally add water! It all seems so simple when spelled out like that lol. I just picked up the lumber needed to build a stand per RocketEngineer's template; guess that's a good start to the list :hmm3:. I will post the pics this weekend of the progress on the stand and continue to update this post. I have attached pictures of the tank so that you all can use your imagination as to what can be once everything is said and done!

I love this forum; it is an awesome source of information. Thanks to everyone on here!
 

Attachments

  • 100_0680.JPG
    100_0680.JPG
    62.1 KB · Views: 21
  • 100_0678.JPG
    100_0678.JPG
    61.3 KB · Views: 20
  • 100_0676.JPG
    100_0676.JPG
    61.1 KB · Views: 23
  • 100_0679.JPG
    100_0679.JPG
    65.5 KB · Views: 23
Not that u should listen to me but those holes on the bottom could be very useful with a closed loop system and having some flow come up thru your rocks.
 
emilypres: I've been debating putting a closed loop system in, but I cannot decide if I think that is better than having individual powerheads in the tank. In your opinion, do you think it is worth it to go through the trouble of a closed loop system as opposed to powerheads?

And thanks for the compliments, guys. Got the tank for a great deal, so I'm definitely happy so far!
 
Update: I have built the frame for the stand this morning. I am quite pleased with how it turned out overall. Now I need my roommate to get home and help me test this thing out!
 

Attachments

  • 100_0684.JPG
    100_0684.JPG
    69.6 KB · Views: 27
  • 100_0683.JPG
    100_0683.JPG
    68.4 KB · Views: 25
  • 100_0682.JPG
    100_0682.JPG
    80.4 KB · Views: 22
  • 100_0681.JPG
    100_0681.JPG
    67.6 KB · Views: 31
Nice looking tank.

I would use the holes for a closed-loop (I would have 4x on the bottom). AND have some power heads. The closed loop lets you get lots of flow down low in the tank to drive waterflow up to the surface where it can be skimmed via your overflow.

I would read up on Herbie or Bean Animal on your overflow/drain design (sounds like you may already be going this route - full siphon).

On the stand you should add a 3/4" plywood base to the top of the stand for acrylic tanks.

FYI, once your tank is filled and running I find that Magic Eraser works great with a magnet for cleaning. I filet the Magic Eraser 4x and attach to the inside magnet. The ME is dense so it doesnt pickup sand an put scratches in the acrylic.

http://i300.photobucket.com/albums/nn10/Indymann99/Basement52009.jpg

http://i300.photobucket.com/albums/nn10/Indymann99/mrcleanmagnet.jpg

http://i300.photobucket.com/albums/nn10/Indymann99/TankCabOpen.jpg
 
Indymann, I do plan on adding a plywood top to my stand, but thanks for the advice. I will have to read up on closed loop systems to determine if I want to go that route. Don't I want some areas in my tank with lower flow?

And yes, I will be utilizing the thread by Bean Animal to design my siphon system. It sounds like a great route to go.

I added water to the tank to test my plugs on the bottom yesterday, and got very minimal leaking in 2 of the 3 bulkheads (unacceptable, obviously). So I need to redo the ones that leaked. Instead of just using threaded plugs with teflon tape, can I add silicon on the inside of the bulkhead as well to ensure no leakage? Either that or I will go with the closed loop system; that is yet to be determined.
 
Very nice man. I love to hear new build stories. That looks like an excellent tank!

I will be following this build! What do you have planned for the tank? Do you have an existing one your upgrading from?
 
No, I am not upgrading anything. This is my "getting back into it" tank. I had a 29 gallon reef for years, but that fell apart when I went to college. I have always wanted to have a large tank that schools of tangs can swim around in, and I am on my way. I will keep updating this thread as I progress. Thanks for the compliments, and hopefully my trials and tribulations will help someone else out in the future.
 
Well, I look forward to watching your build. The 55 I mentioned is my first marine tank but I'm in the process of getting a new job so until then, funding for the tank is on hold. I see you live in Tampa, what part if you don't mind me asking? Also, do you buy anything locally and where??
 
Kyle, I live in Temple Terrace, right near 301 and I-75. I haven't had a tank up and running in a while, but I will be a regular at Marine Warehouse and Creative Aquariums once everything comes together. I plan on getting my jig put together for drilling my overflow slots this weekend, and potentially drilling the overflows as well. I will definitely be posting pictures of this!
 
Update: Currently building the baffles for my sump (55 long). Only two miscues so far: I was dumb enough to silicone my 2x4 divider holder in between two baffles, so I had to remove one to get it out, and I over-tightened my clamp on a pane of glass and cracked it. Besides that, I am pretty happy with how this is going. I have uploaded some pics of my progress.
 

Attachments

  • 100_0688.JPG
    100_0688.JPG
    66.4 KB · Views: 26
  • 100_0687.JPG
    100_0687.JPG
    73.9 KB · Views: 30
  • 100_0692.JPG
    100_0692.JPG
    65.7 KB · Views: 25
Sump baffles are complete and the strainers on either side of the fuge section are drying right now. Sump = Complete! :dance:
 
Kyle, I live in Temple Terrace, right near 301 and I-75. I haven't had a tank up and running in a while, but I will be a regular at Marine Warehouse and Creative Aquariums once everything comes together. I plan on getting my jig put together for drilling my overflow slots this weekend, and potentially drilling the overflows as well. I will definitely be posting pictures of this!

I know where your at then. I'm over in the Westchase area not even 5 minutes off veterans exit 9. Marine warehouse is nice. Haven't been to creative yet but heard good things about it more than once.

Good news though, I have another job so my build will be back in action soon enough! Are you making a template to follow for the overflow teeth or freehand??
 
Are you making a template to follow for the overflow teeth or freehand??

I am planning on making a template to follow. I picked up a nice router and I will get some quality carbide bits (as suggested by so many fellow DIYers on here). I think I can make the template out of 1x4's and clamp it to my tank lip to hold it firmly while I cut. Shouldn't be too difficult to make the template, but then again, nothing ever SEEMS that tough lol. Hopefully I will get into the overflow teeth cutting this weekend.
 
Update: I have been working on the stand on and off (in my free time) for a while, and I have officially moved it into its new home tonight! I am quite happy with the results so far. I am still going to build shelving inside to house my ATO and misc. storage. Just thought I would update this with some final stand shots and show how I have designed my doors to have a full 5'+ of opening for access to my sump, etc.
 

Attachments

  • 100_0703.JPG
    100_0703.JPG
    57.4 KB · Views: 24
  • 100_0704.JPG
    100_0704.JPG
    56.9 KB · Views: 25
  • 100_0705.JPG
    100_0705.JPG
    57.7 KB · Views: 22
  • 100_0706.JPG
    100_0706.JPG
    62.3 KB · Views: 23
Back
Top