New House / New 180g Tank Build

TACoraled

New member
I figured I would put this together to share my thoughts, ideas, and plans for my new tank build. Not all of the ideas are mine, but knowledge sharing is key to success, so feel free to ask/comment away.

Background:
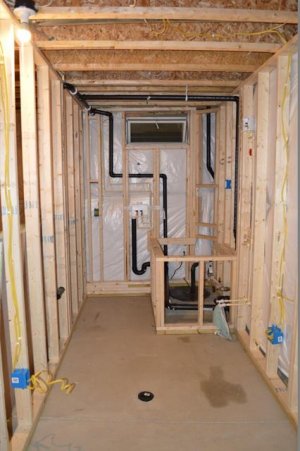
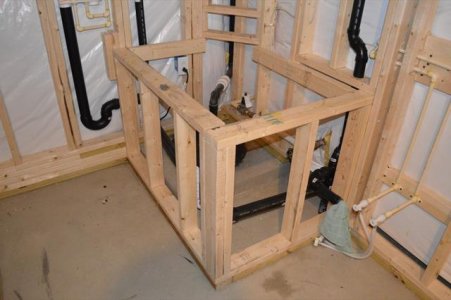
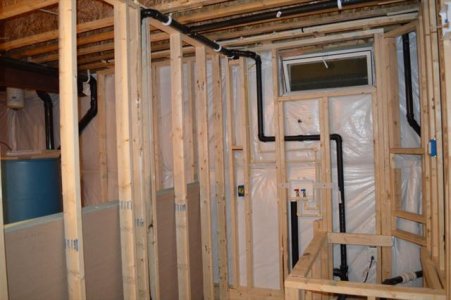
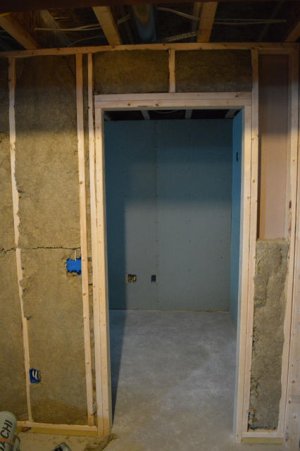
My wife and I decided to build a new house (our first) and in the design, there were obviously certain things I required, such as a place for a larg(er) reef tank and a dedicated sump room. I started in the hobby 3yrs ago with a reef ready AGA 90g which quickly morphed into a small sump room with remote sump and frag tank. We decided since we were moving, no better time than the present to setup a new tank. Unfortunately, not everything goes as planned and I couldn't find the tank I wanted so we moved and my livestock sat in a rubbermaid container, and has for the last 7 months.

Tank:
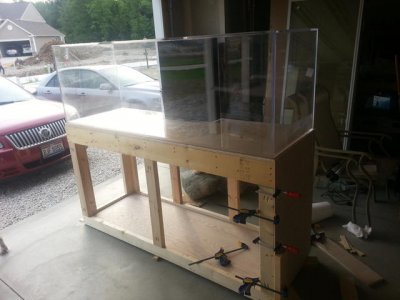
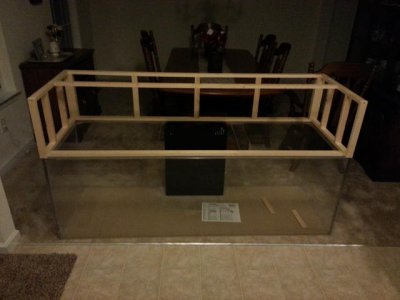
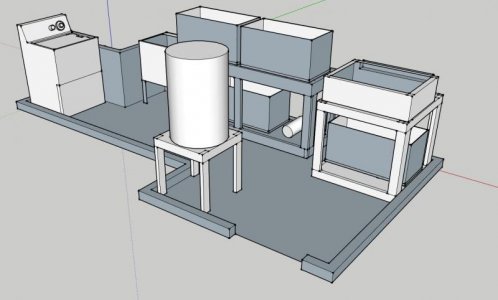
Since I couldn't find a decently priced used glass tank that was reef ready and didn't have a bunch of scratches, I decided to look to getting an acrylic tank made to my specifications. Sure, I could have purchased a brand new glass tank, but I wanted something that would be extra strong as my buddy's 200g recently blew a seam and left a mess to deal with. I had a tank made by an acrylic shop north of Pittsburgh. The tank isn't anything too fancy, standard 72x24x24 footprint with a center overflow. I didn't do a true eurobrace because I wanted the added strength for a wavemaker, so I have two cross braces which are fine by me. The overflow has 2 drain pipes with 1.5" bulkheads and two return pipes with 1" bulkheads. I plan on using a dual durso setup because the noise will be in the basement and I've had good luck with all of the durso setups I've used. Since I wanted to have a wavemaker, I elected to upgrade from the standard 3/8" acrylic to 3/4" acrylic on all sides and 1/2" on top and bottom. It's surprising how much 3/4" acrylic adds to the weight of an acrylic tank.

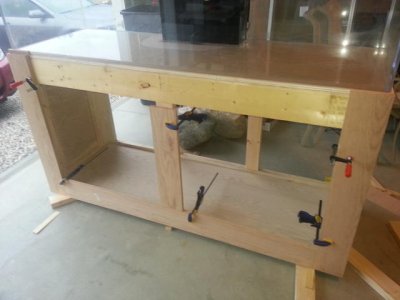
For the stand, I decided to build one myself (photos to follow) for a few reasons. One, I wanted a nice Oak design that I could stain to match the stained items throughout the house and two, I wanted to try my hand at skinning a stand with something other than plywood.
 

Attachments

  • stand01.jpg
    stand01.jpg
    47.8 KB · Views: 6
  • stand02.jpg
    stand02.jpg
    39 KB · Views: 6
  • canopy01.jpg
    canopy01.jpg
    39.9 KB · Views: 5
Last edited:
Sump Room:
As I stated before, one of the must-haves in this new house was a dedicated sump room where I could house all of my equipment, keep the door closed and not have to worry about it affecting anyone or anything else in the house. Luckily the basement below the tank was the perfect spot.

Last weekend I started the task of framing it out according to the plans I drew up in sketch-up prior to us building the house.

Here you can see the design ideas behind the sump room.

This room will incorporate a water tank for RODI storage to the left when you walk in, a 45g acrylic shallow frag tank in the right corner, and then a stand to house my various sump tanks.

The room will also have a laundry tub and our old washing machine I can use to wash filter socks and towels. This was a must as the wife hated when I used the washer in the past. But since we purchased a new set for upstairs, this now became the dedicated fish washing machine :)

On the stand, I plan to have a dedicated 40b tank as a return section feeding the Reeflo Hammerhead/Barracuda hybrid pump on the bottom. The top left will be a 40b tank which will be divided for filter socks and then skimmer section. This will then drain down into the return tank below. To the right of this tank will be another 40b which I plan to use as a fuge / rock tank. This tank will receive slow flow from the return pump. Under the frag tank will be a 40b QT tank which will use an emperor filter with bio-wheel seeded from the main system.
 

Attachments

  • Sump01.jpg
    Sump01.jpg
    39.2 KB · Views: 6
  • Sump02.jpg
    Sump02.jpg
    31.3 KB · Views: 5
Framing Room:
This was my first attempt at framing a room, so I enlisted my brother in law who was one step up from me, but we managed with much thought and measuring to get the room framed up. I decided to leave the builder installed insulation in place and move the studs out a few inches to not compress the insulation. I figured this would allow me to 'double insulate' the outside walls

The back corner was going to stay 'unfinished' where the sump pump and piping was, but after much consideration, I've decided to box in the unit and put a top to use it as somewhere to set items since I'll have almost no counter space.
 

Attachments

  • Framing01.jpg
    Framing01.jpg
    35.2 KB · Views: 5
  • framing02.jpg
    framing02.jpg
    48.5 KB · Views: 5
  • framing03.jpg
    framing03.jpg
    52.1 KB · Views: 6
  • framing04.jpg
    framing04.jpg
    53.4 KB · Views: 5
Framing (cont):
I've also attached the initial designs of the room. Again, this isn't a room meant to be luxurious our posh, just somewhere to house all of my equipment.
 

Attachments

  • framing05.jpg
    framing05.jpg
    46.5 KB · Views: 6
  • framing06.jpg
    framing06.jpg
    53.9 KB · Views: 6
  • Basement_Final.JPG
    Basement_Final.JPG
    48.6 KB · Views: 6
Question, how are you draining your sink in the basement? I hope to do a similar basement sump, but drainage is a problem I need to figure out.

I'm enjoying your build. The wood color gets an A+
 
Very nice, love the stand, color is beautiful

Tagging along !

Thank you. It's Sherwin Williams Traditional Cherry I believe. It matches the stain throughout the rest of our house which is why we chose it.

Question, how are you draining your sink in the basement? I hope to do a similar basement sump, but drainage is a problem I need to figure out.

I'm enjoying your build. The wood color gets an A+

Thanks.

I'm not sure on the sink question. Are you talking about my laundry tub? If so, I had the builder rough-in a drain for a laundry tub during the build process. I'm tapping off of this drain to add in a washing machine drain.

Not much progress the last few days. I shutoff the water so I could re-route some of the water lines for the laundry tub and for an RODI hookup. Also did some more framing around the sump and its associated pipes and started running electrical for the outlets.

I went back to working on the canopy and decided on door sizes. Cut some 1/4" oak plywood and started attaching the skin to the canopy. Hope to have it completely skinned by tomorrow.
 
So many nice comments to make here.
Nice job on the stand. Upsizing the tank walls was smart. The tank layout is great. It has a long overflow for good surface skimming but doesnt stick out very far into the tank robbing space and good sized access holes on top.

I assume there will be a foam board between the tank n stand.? [didnt see one]

Thank you for the kind words.

Yes there is a 1/2" foam board between the tank and stand. In the photo I didn't have one as I was lining up the tank to drill out the stand for the overflow pipes. I put a larger 'lip' on the stand with the crown moulding to offset the added height of the foam board and also the height of the eggcrate I use on the bottom to stabilize and prevent scratching of the rocks on the bottom pane.

I probably could have saved much time and effort shoudl I just hired someone to come in and do the plumbing, but what fun is that? Almost finished adding in the plumbing and electrical, just need to tie in the vent stacks in the ceiling and of course the local lowes is out of 10' 1.5" ABS pipes :( 
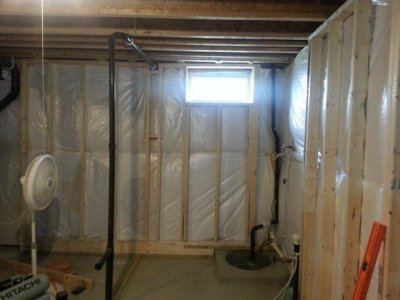
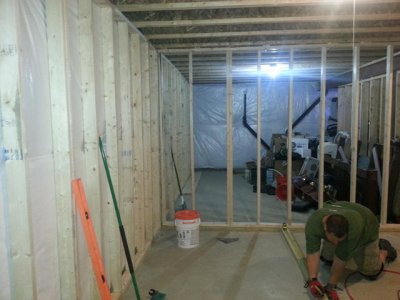
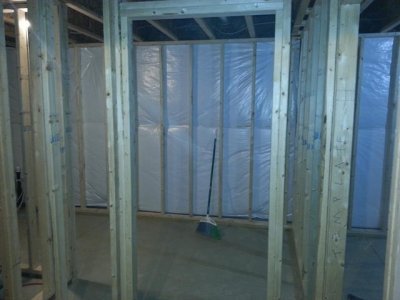
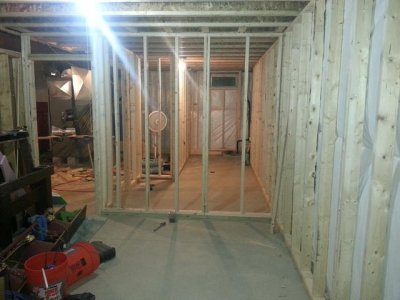
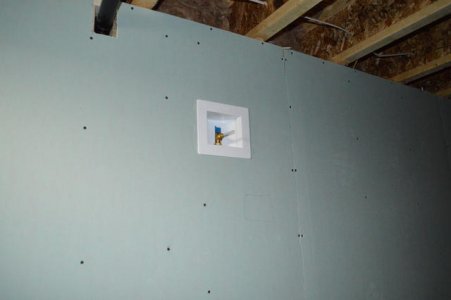
Once those are tied in, I have just one more outlet to wire up before I can start hanging the drywall.
 
Was a busy week/weekend for me, but this week I was able to finish the plumbing, electrical, insulation, and hang the drywall.

I ended up using Roxul insulation for its water resistance properties, plus no need to staple anything to hold it up. This week I'll tape and mud and hope to get the flooring in next weekend.

I picked out a nice lighter color to hopefully make the room not feel so small.
 

Attachments

  • DSC_0405.JPG
    DSC_0405.JPG
    62 KB · Views: 3
  • DSC_0394.JPG
    DSC_0394.JPG
    64 KB · Views: 6
  • DSC_0396.JPG
    DSC_0396.JPG
    41 KB · Views: 5
A few more photos.
 

Attachments

  • DSC_0400.JPG
    DSC_0400.JPG
    40.6 KB · Views: 6
  • DSC_0402.JPG
    DSC_0402.JPG
    47 KB · Views: 6
  • 228802_lalt.jpg
    228802_lalt.jpg
    57.2 KB · Views: 6
  • DSC_0525.JPG
    DSC_0525.JPG
    38.1 KB · Views: 6
Drywall Photos including my ice maker / RODI hookup :)
 

Attachments

  • DSC_0524.JPG
    DSC_0524.JPG
    48.2 KB · Views: 5
  • DSC_0526.JPG
    DSC_0526.JPG
    43 KB · Views: 5
  • DSC_0529.JPG
    DSC_0529.JPG
    36.9 KB · Views: 5
Can you please tell me who built your tank? And are you happy with the overall quality of it?


Acrylic Creations in Butler, PA built my tank. I'm very happy with the results. He was very open to suggestions and had no issues with the requests I wanted for my tank. Plus the price was fantastic. Took about 3 weeks to complete.

I had him upgrade the sides to 3/4" which he said he normally doesn't do for a standard 180, but with a wavebox, I wanted to be absolutely sure it was strong.

I was thinking about ordering a tank from Dave. His prices seem pretty incredible compared to all of the quotes I have got for a 96" tank. I was wondering if you were still happy with the workmanship or if you had any issues. Thanks!
 
Following.. Everything looks great! I plan on doing my fist basement sump/fish room myself. I'm also in a new house. We just put in the yard/ landscape .. Hopefully I can upgrade my tank soon. I can't wait to see your finished product.
 
Back
Top