Oceanic BioCube 29 Replacement Splash Guard (how to)

Thank you for this post it was extremely helpful. I made a few adjustments to the hardware and such to make it easier on myself personally, but the measurements were extremely accurate. It fits very well and is a night and day difference from where I was with a splash guard that has not been replaced since it was new in 2008. It was disintegrating to say the least.

Glad it worked out. I actually got my inspiration to do this from jcreefer, a poster on Nano - Reef. It took some trial and error but I think the end product turns out quite nicely. As with all DIY, at least for me anyway, initially it seems vey intimidating but when you get down to it and get it done, it's not too bad and is definitely quite rewarding!
 
LQT, thanks for this, i was thinking if i had an extra fist full of cash i would do this and then add another puck or two to my setup to remove a shady spot
 
Yeah, I've got all the pieces together to add another puck... just a little apprehensive about soldering is all. :D
 
Oceanic BC29 owner here. Guessing auto headlight polish has been tried to clean up lenses? What products and what results? Are they acrylic or polycarb?
 
I believe the stock splash guard is polycarbonate, hence the yellowing over time and degradation due to UV exposure. Not really sure how to polish it. The headlight polisher seems like a really good idea though. The replacement splash guard I fabricated is built from UV resistant extruded acrylic sheet I bought from TAP plastics and almost a year later, it looks as good as new.
 
I am going to make LTQ's splash guard; thanks for great plans. Has anyone thought about a gasket or silicone to seal the guard to the cover? I have always gotten a lot of salt stain and muck under the guard.
 
A gasket would be tough, as the DIY splash guard doesn't fit into the channel groove meant for the stock splash guard. The DIY splash guard locks snuggly over the outer edge of the raised channel groove. However, because the corners are square and the stock ones are round, there is a tiny gap on each of the corners. If you intend to semi permanently keep the DIY shield attached, I guess you could kinda seal the corners with clear packing tape. I've kept mine as is because I like to have access to my lights if needed and haven't had any issues with moisture intrusion.
 
A gasket would be tough, as the DIY splash guard doesn't fit into the channel groove meant for the stock splash guard. The DIY splash guard locks snuggly over the outer edge of the raised channel groove. However, because the corners are square and the stock ones are round, there is a tiny gap on each of the corners. If you intend to semi permanently keep the DIY shield attached, I guess you could kinda seal the corners with clear packing tape. I've kept mine as is because I like to have access to my lights if needed and haven't had any issues with moisture intrusion.

Let me know if you come across more acrylic sheets that size. I'd be interested in cutting one to fit my stock splashguard (and cutting/removing the stock material in there). Could be a worthwhile project, especially since Soulpatch gave me his old splashguard as a backup.
 
Just room for thought.

What if...
You buy an extra top sheet, It could give a seal with the stock O-ring.

http://www.wikihow.com/Easily-Mold-Acrylic-Plastic-Sheets

thoughts.
Thanks for the info. I think it would be easier for me just to use LQT's plans especially since I have a buddy who has the equipment to cut the sheets to within 1/32" and straight, something I could never do. I think I'll try a foam strip gasket or rubber window seal. I really want to get it moisture tight. I'm excited to have a clear lens again; it will be like getting a new light.
 
Let me know if you come across more acrylic sheets that size. I'd be interested in cutting one to fit my stock splashguard (and cutting/removing the stock material in there). Could be a worthwhile project, especially since Soulpatch gave me his old splashguard as a backup.

Unfortunately since I had the acrylic custom cut by Tap Plastics, I don't have any extra pieces laying around. :( The exact repair you want to do however is detailed on Nano - Reef dot com in a thread entitled "Repairing a Fogged Biocube Splash Shield". The author of that thread had specific spots of damage where the UV diodes were. He cut out the small section of the damaged shield and welded a square piece of acrylic to patch it up. Turned out very well.
 
I'll have to check that out, thanks. Sounds exactly like what I'm looking for. The problem is shipping the plastics. All good though.

Sent from my Nexus 5X using Tapatalk
 
Okay Guys,

I debated putting this in the DIY forum, but I think it would be better served here in the Nano Forum. For all of you Oceanic BioCube 29 owners left out there, this is my solution to replacing the beat up, cracked, yellowed and foggy splash guards that we can't seem to get replacements for since CoraLife changed the hood design.

I ordered the following items from Tap Plastics, but you could probably find these things in any acrylic shop.

Some weld-on with applicator bottle

1/8" thick clear extruded acrylic sheet, edge routed for ease of welding in the following sizes

1 @ 18.5" x 10.5"
2 @ 18.5" x 1 3/8"
2 @ 10 1/4" x 1 3/8"

5/32" acrylic drill bit

From Bolt Depot, I ordered 6 @ 2" x #6 pan head machine screws and their appropriate washers.

I apologize for the crappy cellphone pictures, but here you go...

Here are the pieces all laid out.


Taped and ready to be welded.


Here it is, welded together. Not the best welding job, but it works!


Here is the original splash guard with a crack down the middle. It was actually a lot worse, yellowed and clouded, but Dave of Nanobox was kind enough to give it a good buffing to clear it up a bit when he installed my Nanobox Retro. Still, I felt that Dave's lights deserved better...


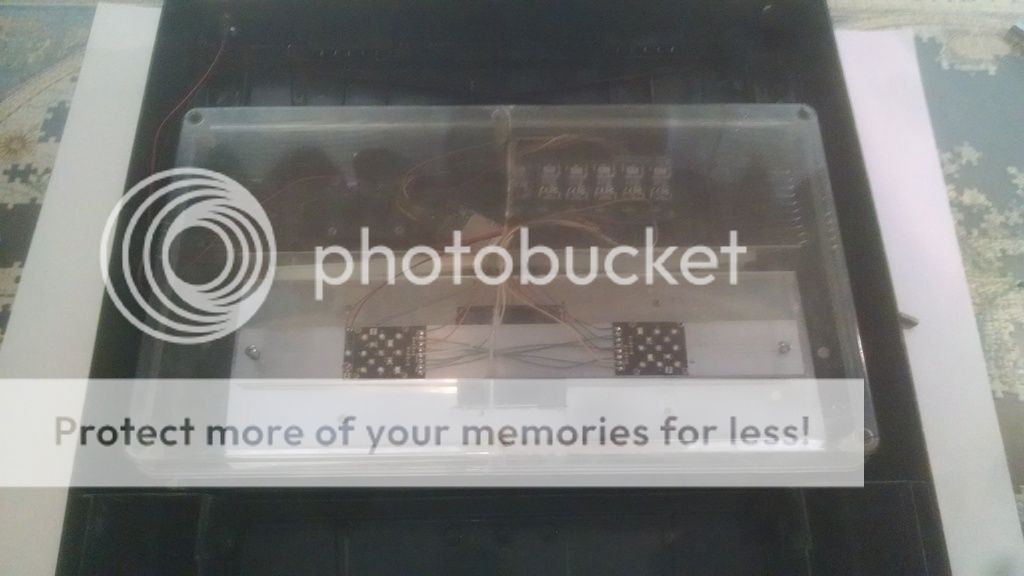
Here it is mounted, before screwing it in. It actually locks perfectly around the outer perimeter of the raised ridge where the old splash guard locks into.


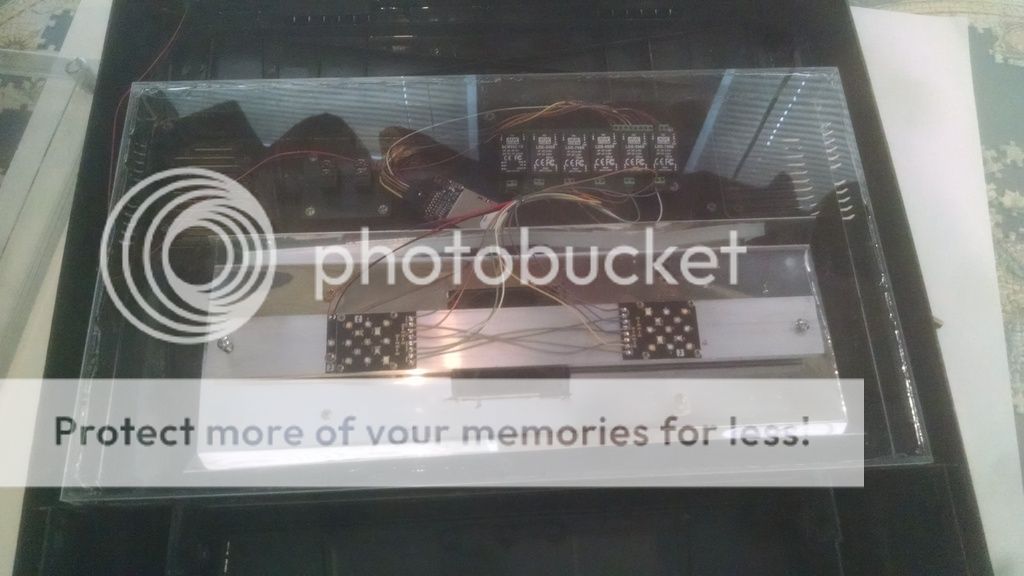
Here it is, screwed on with the 2" #6 screws and washers. Now my Nanobox Retro has a proper splash guard!


Here is a FTS of my BioCube. It's still cycling so it's just dry rock, dry sand and a rotting piece of shrimp. :D With the new splash guard, the tank seems much brighter and the shimmer is more pronounced.


I hope someone out there can find this helpful!
 
splash guard

splash guard

I forget the member that made a DIY splash guard And I would also know if I can polish mine with headlight cleaner?
 
I forget the member that made a DIY splash guard And I would also know if I can polish mine with headlight cleaner?

I'm sure it would work. However, over time, it may get hazy again, especially under the violet LED diodes. That's why I went with the DIY acrylic route, as it supposedly has better UV resistance over time.
 
Back
Top