PH Module for Arduino controllers

You guys might want to PM terahz if he doesn't see this thread.

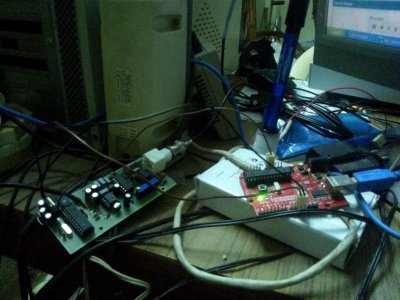
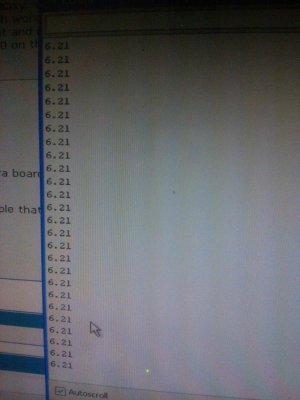
FWIW I have one of his first modules and it still works great (assuming you calibrate it and are using a probe that's not dead). I do not have it in constant operation, though, just spot checks here and there.

FWIW We based the design of the pH amp on the Hydra mainboard on this design and I haven't heard anyone complaining about longterm problems with it, either.
 
Ugh, I had lost this thread somehow... better late then never:

matiLanza, yes, the board works just fine with arduino.

1RJ, the circuit appears to be working. I do not use it standalone anymore since I use the Hydra controller, which uses pretty much the same circuit, as DWZM said.

jedidog1, I haven't done scientific comparison with other monitors so I guess I can't say for certain how accurate it is. I also do not check the calibration unless I start getting numbers like 5pH which so far has meant that I need a new probe. I recalibrate every time I change the probe and usually don't need much of adjustment. I can't say if that is due to different probe or because the circuit is drifting. Overall I think it is performing quite well and as DWZM nobody has complained yet so I guess that's a good sign :).
 
Lemme say this - I have a few local friends with commercially produced meters that drift like crazy, eat probes, and need super-frequent calibration adjustments. This design appears to blow those units out of the water in terms of stability.

terahz, what's your probe life like for constant monitoring?
 
thanks terhz and der it sounds like a winner does anyone have any extra boards? if not ill just order some where did you guys order from ?
 
thanks terhz and der it sounds like a winner does anyone have any extra boards? if not ill just order some where did you guys order from ?

I am about to make an order for some boards so i can sell you one PM me if still intereseted? I didnt check how old your post is now that i think of it lol, can anyone help with the coding?
 
I am about to make an order for some boards so i can sell you one PM me if still intereseted? I didnt check how old your post is now that i think of it lol, can anyone help with the coding?

I just ordered PCBs and will have a few spares, PM me if interested - $7 shipped.
 
Terahz and der when I get my total posts I've got questions for u two I have been following you two for a while. Can't wait
 
pH with on board Arduino UART

pH with on board Arduino UART

Thanks a lot TeraHz for posting.

I have made little adjustment to add in the on board UART, so that I can increase the wire lengths to my main Arduino controller.

Just thought to share so that I can get any corrections and suggestions, and we have things at one place.


(I wish you could add the diodes in your list, I missed to order them:frog:)
Cheers!
 

Attachments

Works beautifully this one.:bounce3: goes smooth. Can extend my wiring to 5m appx.

Many thanks to Georgi for the quick debug of circuit. There is a bad connection to the 7809 in above PCB, need to cut and reroute it.

IMPORTANT note on calibration
RV1 is used when you are working on the 10pH fluid. Basically, you use RV2 for your lower calibration value and RV1 for the higher one.- terahz


This is the code at Arduino on pH PCB
Code:
#include <EasyTransfer.h>


//The pins 2=Rx,3=Tx


//create object
EasyTransfer ET; 
struct SEND_DATA_STRUCTURE{
  //put your variable definitions here for the data you want to send
  //THIS MUST BE EXACTLY THE SAME ON THE OTHER ARDUINO
  int val_ph_a;
  int val_ph_b;
};

//give a name to the group 
SEND_DATA_STRUCTURE mydata;

int analogPin = 5;     // potentiometer wiper (middle terminal) connected to analog pin 3
                       // outside leads to ground and +5V
int val = 0;           // variable to store the analog value read

float val_ph=0;        //store the float multipled value
int i=0,j;

float val_ph_array[5]={0,0,0,0,0};
void setup()
{
  Serial.begin(9600);          //  setup serial
  //start the library, pass in the data details and the name of the serial port. Can be Serial, Serial1, Serial2, etc.
  ET.begin(details(mydata), &Serial);


  for(j=0; j<20;j++)//run a few times before sending over serial, so that array is not blank
  {
  val = analogRead(analogPin);    // read the input pin
  if (i>4)
  i=0;
  val_ph_array[i]=val * 0.02;// calculate WRT voltage
  val_ph=float (val_ph_array[0] + val_ph_array[1] + val_ph_array[2] + val_ph_array[3] + val_ph_array[4])/5;//normalizing any of the error data
  i++;
  }
  

}
void loop()
{  

  val = analogRead(analogPin);    // read the input pin
  
  if (i>4)
  i=0;
  val_ph_array[i]=val * 0.02;// calculate WRT voltage
  val_ph=float (val_ph_array[0] + val_ph_array[1] + val_ph_array[2] + val_ph_array[3] + val_ph_array[4])/5;//normalizing any of the error data
  i++;
  
  mydata.val_ph_a=val_ph;
  mydata.val_ph_b=(val_ph- mydata.val_ph_a)*100;  
  Serial.println(val);     // debug value 
  ET.sendData(); 
  delay(1000); //send pH every 1sec to mother Arduino
}

This is the code at the mother Arduino
Code:
#include <SoftEasyTransfer.h>

/*   For Arduino 1.0 and newer, do this:   */
#include <SoftwareSerial.h>
SoftwareSerial mySerial(10, 11); //RX TX hard coded, not the main UARTs

/*   For Arduino 22 and older, do this:   */
//#include <NewSoftSerial.h>
//NewSoftSerial mySerial(2, 3);


//create object
SoftEasyTransfer ET; 

struct RECEIVE_DATA_STRUCTURE{
  //put your variable definitions here for the data you want to receive
  //THIS MUST BE EXACTLY THE SAME ON THE OTHER ARDUINO
  int tens_part;
  int deci_part;
};

//give a name to the group of data
RECEIVE_DATA_STRUCTURE mydata;

void setup(){
  mySerial.begin(9600);
  Serial.begin(9600);
  //start the library, pass in the data details and the name of the serial port.
  ET.begin(details(mydata), &mySerial);
  
  pinMode(13, OUTPUT);
  Serial.println("sjklads ghewre");
}

void loop(){
  //check and see if a data packet has come in. 
  if(ET.receiveData())
    {
      //this is how you access the variables. [name of the group].[variable name]
    //since we have data, we will blink it out. 
    /*for(int i = mydata.blinks; i>0; i--){
      digitalWrite(13, HIGH);
      delay(mydata.pause * 100);
      digitalWrite(13, LOW);
      delay(mydata.pause * 100);
    }*/
    
    Serial.print(mydata.tens_part);
    Serial.print(".");
    Serial.print(mydata.deci_part);
    Serial.println("");
  }
  //you should make this delay shorter then your transmit delay or else messages could be lost
  delay(250);
}

Attaching the pics as well.

Cheers and have a great time.
 

Attachments

  • WP_000032 (2).jpg
    WP_000032 (2).jpg
    70.1 KB · Views: 10
  • WP_000029 (2).jpg
    WP_000029 (2).jpg
    40.1 KB · Views: 9
Last edited:
Back
Top