redtop's Ferduino controller

Me and my dad started to build the jarduino but we just kept getting a white screen. That's when it came across this post and it think its a little more complete for what it want.

the white screen is a library issue if I had to guess, the Jarduino is an awesome program, I've had it running for a couple years and not a single issue with the code, my LCD shield has been a PITA though....

I wanted a little more from the controller too, Jamie has done a remarkable job with the Jarduino but with a recent move to a new home and not one but 2 new additions to his family, and I don't think the 1st toddler much over 1 year old until the 2nd came along, but needless to say, Jamie has his hands full with life and the Jarduino has to take a back seat for now LOL I'll be keeping an eye out for his newest update too :)

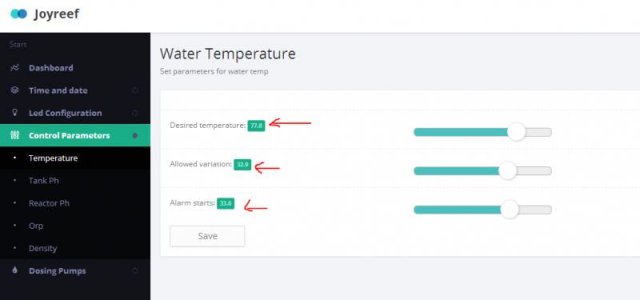
you'll need a different screen for this controller than the Jarduino screen, the 3.2S (320 x 240) will only display the left most, roughly 80% of the program, you'll not see the far right side of the Ferduino code on that screen and therefore, you'll not see the save button as well as other vital buttons to be able to set it up, I tinkered with it for a couple weeks to maybe a month with my old 3.2Sscreen, I finally broke down and ordered the correct screen :)

this code requires the 3.2WD screen (400 x 240) and I found a dealer in NY that has them as cheap as anybody else on Ebay, but you can have it at your home a few weeks sooner from him rather most other Ebay vendors :)

here's the screen you'll need http://www.ebay.com/itm/3-2-Widescr...h-Screen-Module-For-Arduino-AVR-/221343348573

this guy ships fast and you'll likely have your order in less than 4 days, I go there for all my Arduino needs first now, if he don't have what I need, then I look elsewhere :)
 
Yes it was referring to led channels. I'm currently building a diy led system as well. It's broken in to two fixtures each with 3 channels ch1 royal blue ch2 white and ch3 uv, red, and green

you'll have 2 lights with 3 channels each of LEDs, but you'll still only need 3 channels on the controller, the blues will both share a channel, the whites will both share a channel, and so on

what I did on my DIY LED was add green LEDs to a string of blue and gave them the green channel, I mixed red LEDs with White LEDs and gave them the red channel, I have 2 strings of all blue and one string of all white, whenever I add the UV LEDs I'll either do a full string of UV or mix them with blue

and just in case you didn't know it, Fernando doesn't have a green channel in this controller, he had a regular blue and a royal blue, I renamed the blue channel for my greens :)
 
So would you not recommended that power strip you bought

not unless you are willing to do some extensive reworking to it

I like mine now, mostly for the fact that it has 9 outlets, (8 of which are relay controlled) and blue back lit switches and most of all, it has the USB charger built in, which is perfect for the relay power...

but it had circuit boards on both the array of outlets and switches, both PCBs have to be removed for this and you'll have to replace most of the wiring inside, what few piece that are in there will be too short to reach the relays.....

go with a 14AWG wire if you do, it had what looked like maybe 16 gauge in it, it has a 15 amp rating on it but I wouldn't trust a full 15 amp pull on the 16 gauge wire, but then again, I overkill everything I do, the relays are only rated for 10 amps so 16 gauge wire is probable perfect for that LOL
 
Do you have anything more on how to do the wiring and also where did you get the components for the float switches
 
Do you have anything more on how to do the wiring and also where did you get the components for the float switches

the wiring for the relays ?

they're just basically wired like you would a normal electrical light circuit,you have 3 wires coming in from the power supply, in this case that would be your wall outlet.....

those 3 wires are a 120 VAC positive (usually black wire) a 120VAC common or neutral (usually white wire) and a ground wire (normally green)

the black wire or 12VAC positive wire passes through the toggle switch before connecting to the outlet, the white and green wires connect directly to the outlet.....

you're basically just clipping the black wire before it enters the toggle switch and adding an electronic relay switch before the toggle switch...

do that 8 times and you got it, and just so you know ahead of time, from the factory, this power strip uses red wires instead of black and black wires instead of white,that happens sometimes in electronics...but they did use green for the ground LOL

the standard in 120VAC house wiring is to use black for positive, white for neutral, and green for ground

I don't have the float switches yet, but I'll order them from Ebay most likely
 
Don't forget Fernandos site has a lot of info and links to where to order parts.

I am not allowed to post links yet.

But google ferduino and you will find it.
 
redtop03

Thank you for starting this thread by the way, Fernando's program is exactly what I was looking for.
My question is, where did you get the ribbon cable that goes between your TFT and shield?
Also since you have converted the code with English notations, would it be possible to get a copy ( preferably with deg C version). I started doing it myself and realized it is going to take some time.

Great job on the controller you built and thank you for the link to the mega shield proto board. I bought 2 of them from adafruit ( 1 spare in case I mess up the first one) very handy board, should make connecting devices much easier.
Thanks
Z

the ribbon cable I found on Amazon here

http://www.amazon.com/40-Pin-Male-F...ch+40-pin+male+to+female+ide+extension+cable,

you can probable find these on Ebay too, maybe even cheaper, just be sure it has all 40 pins, some of the newer IDE cables look just like these but only have 39 pins


I'm still working on the translating, I had most of the older code translated but then Fernando came out with the new web control version and I've started all over again, and some sections may not get translated...

I'm really just translating the areas that I'm most interested in learning how they work and since you've already been in there looking at it, you know it's gonna take some time translating all of it, there's a lot of code there LOL
 
Willie
I can help with that.
If you give me a section to work on I can help you with the translatation as well.
Just let me know where you want me to start.
Z
 
I'm still working on the translating, I had most of the older code translated but then Fernando came out with the new web control version and I've started all over again, and some sections may not get translated...

I'm really just translating the areas that I'm most interested in learning how they work and since you've already been in there looking at it, you know it's gonna take some time translating all of it, there's a lot of code there LOL

Hi!

You don't need translate all again.

The core of the code is the same.

If you have difficult with some text let me know and I'll translate for you.

Best regards.
 
Hi!

You don't need translate all again.

The core of the code is the same.

If you have difficult with some text let me know and I'll translate for you.

Best regards.

LOL I've just been translating it for a pass time, it's not at all a necessity just something for me to do while I'm looking at the code, I'll keep messing with it a little at a time but it's not something that I'll bother you with or anything too important
 
Hi!

Now you can change the temperature control on joyreef. :thumbsup:
 

Attachments

  • joytemp.jpg
    joytemp.jpg
    20.5 KB · Views: 14
Amazing Job

Amazing Job

Fernando
You have done an incredible Job on this program.
I had a chance to look over some of the code and I am amazed at all the features you have already included in it.
I see you have even reserved room for future wireless connection.
Thank you for allowing us to use your program.:dance:
God Bless
Donato
 
Hi!

Thank you by praise!

I love share knowledge.

If you have any suggestion let me know.

I'm waiting your topic in my forum.

Best regards.
 
Back
Top