ReefNation 300DD Main Show tank build

ReefNation

New member
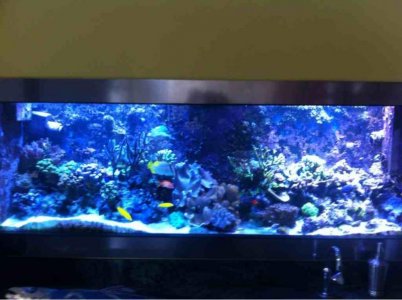
The planning for this new tank started a few years ago, but the logistics, costs, and layout have definitely slowed the timeline. The tank that is being replaced is a 135 oceanic which is also plumbed in to our main aquaculture system that has 4 other tanks containing about 700 coral frags and colonies. Part of the delay was definitely due to logistics to make sure that none of those corals are effected by the breakdown of the main tank. That being said. we are excited to finally get started on this tank build. I'll put pictures up as we progress.
 
Here is a shot from the rear of the main tank. You can see one of the frag tanks as well as the glow on the right from the others.
 
Tank before I emptied
photo-1.jpg


Back of Tank
photo.jpg


Everything removed
photo-2.jpg
 
Temporary Tanks

Temporary Tanks

I setup 2 temporary tanks to house all the inhabitants of the main during construction. These are still plumbed into the main which I have a cover over since the stand is being built right over it. I'll try to keep uploading these as progress continues. If anyone has any words of wisdom, i'd love to hear as well!

photo-7.jpg
 
Last edited:
ImageUploadedByTapatalk1343475491.600969.jpg
Got the tank in and added sand. Thinking about just keeping a very shallow bottom on this tank. Just enough to have wrasses. Anyone know how deep that needs to be?
 
Added the Primo Reefs rock I had shipped in. This stuff is pretty cool. Its mined inland so its 100% sustainable and has no pests on it. I figured since I'm mixing the 350 pounds with about 150 that I have from the old tank, the bacteria and inverts should spread to it pretty quickly.
img_4366.jpg
 
Here are some more shots from friday. Filled the tank and then threw the valve to start it circulating with all 750 gallons from our other tanks. I have to admit I was a bit nervous with the water still being cloudy, but nothing some carbon and filter socks couldn't fix.
img_4369.jpg

img_4374.jpg

img_4378.jpg
 
The one you see there is more for look than structure. I just lag bolted it in as I had a few left over. The structure of the frame is assembled with 6 4x6 posts with 2x6 saddled through connecting them. The cross supports are 2x6 like you see as the endcap, but tied in on both sides of each 4x6. Then the one closest to the wall is lag bolted in to the wall structure. Had to make this thing a monster with all the weight it has to hold, plus the wave action of the Tunze Wavebox! :)
 
Got the water circulating and clearer. Moved the corals and then fish in this am. Still have some rock and coral scaping to do, but so far everyone looks like they made the move safely.

photo-1_0.jpg
 
Sweet. Kinda has me thinking that when I upgrade from my 225 to my 475, Should I move everyone at once or just the fish first then the corals. What do you think?
 
For me, I was fortunate to have the space in the garage to setup the temporary tanks. This allowed me to weed out fish I didn't want to put back in new tank ( clown tang, damsels, fielfish).
If you can, I would get the chemistry of the new tank to match where the corals are temporarily being housed, then put them in before the fish. Sounds like an awesome size tank though!
 
Back
Top