mprygh
New member
Yippee! Finally decided to take the plunge with a BIG tank. :celeb1:
Got the plan, approval from the wife, and everything.
The plan is to do it backwards, with the little pieces first, tank last.
The fiddly bits seem to take forever, and I don't want the pressure of a big empty tank sitting there waiting for me.
GENERAL OVERVIEW
This is the general plan.
Most of these items need a lot more detail of course. That will follow in time.
This will go SLOWLY. I am pretty busy, and not really in any hurry.
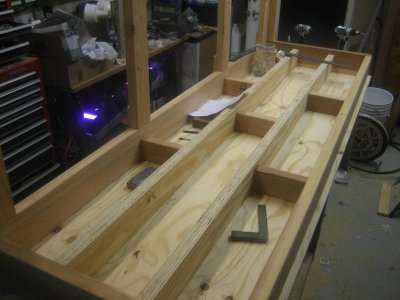
But it is real now. I have started on some of the pieces.
Some of the decisions below are not entirely standard, but power efficiency and a natural approach are important to me.
Almost everything will be DIY. I see that to be as much fun as the aquarium itself.
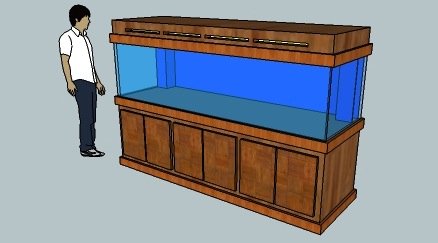
TANK SIZE: 8 foot, 300 Gallon
(Thanks to those that helped me make the size decision)
Length = 96" = 8'
Width = 30" = 2.5'
Height = 24" = 2'
Likely buy TRUVU Acrylic 300-W. Upgrade front to 3/4". Dual overflow.
Note that real calculated volume is more like 263 gallons.
Roughly 300 pounds
This is one of the few things I am buying. Needs to be perfect, and big heavy acrylic is tough.
FISH+REEF
This will be a combination fish/reef. Slightly more emphasis on the fish than on corals.
It will be a peaceful tank. No overly aggressive fish. All reef safe.
There will be a couple of large tangs. Exact TBD
Probably one large school of small fish. Dither-fish.
Quite a few small individual species, darting in/out of rock.
It will be a large random mixture of coral types/ SPS/LPS/softies.
Probably more softies. I like the motion.
LIGHTLY LOADED, LOTS OF SWIMMING ROOM, OPEN WATER DESIGN
This is a personal preference of mine.
I really do not like the look of a tank absolutely jam-packed with fish and coral.
So no expecations of winning tank of the month here.
I like an expanse of sand and a fair amount of simple open water.
That said, it will hardly be bare.
I do have the willpower (won't power) to keep it fairly lightly loaded.
As a bonus, it reduces maintenence and emergency problems hugely.
This does require moving a fair bit of live rock to sump.
AQUASCAPING
As above, it will be fairly open.
The concept is to have a center shallow shelf like area, and few pillar like formations on the ends.
The center shelf will have the hard corals, and be brighter/shallower.
About 3' wide or so. Sloping from sand very near front, up toward back, against the wall.
Hard corals will be higher in the water, so less lighting needs.
The pillars will have softer corals, and have caves/such for the fish.
Lots of swimming area for the fish.
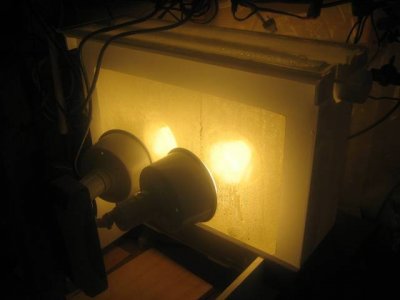
LIGHTING
The concept is to be bright in the center of the tank, and less bright on each end, but not dark.
This focuses the intense lighting on the corals that need it.
This also is combined with the auqascaping to emphasize shallow center, deeper darker ends.
Should focus vision to center of the tank. Perhaps too much?
Lighting will be LED based. I am experienced in that.
It will be a bit less blue, and a bit yellower more natural color. I like that.
With LEDs, I can add really deep purple to make other colors pop.
FILTRATION
Filtration will be algae turf scrubber based. Good experience with that on my smaller tank.
Yes, no skimmer, no ozone, no filter socks, no denitrators. I actually have all those, sitting in a box.
Lots of advantages when done right.
Very natural approach. Eliminates a ton of hassles.
Dual 400 square inch screens with 900 GPH pumps. LED based red/blue lighting.
Gravity flow back to tank, for pods.
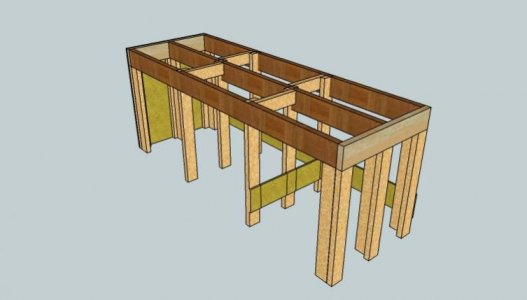
TANK STAND
Height TBD : 30-36" ??
Oak veneer, stained fairly dark
Three sets of doors
Nothing really underneath. Sump and everything is in fish room.
Built in two parts : Base + Tank support.
Waterproof plastic/formica to protect floor and drywall. Hidden.
SUMP
Always dark. 75 gallon box
900 GPH return pump. Internal powerhead
Shelves of live rock rubble
No need for a huge sump with algae-turf-scrubber filtration.
REFUGIUM
Shallow 25G box
Sand bottom on part, baffles, some live rock
Wide for gentle flow
Goes between tank and sump.
Weak LED lighting, red/blue for algae
EQUIPMENT ROOM
Outside shed.
Scary hole in the wall of the living room for all pipes and such.
Simply buy a plastic pre-fab garden shed. Probably 6 x 8 or so.
ADDITIVES
The plan is to use kalwasser + individual additives, not a calc reactor.
Section one is automatic kalk. Pumps rodi into stirrer module, timer based.
This will be adjusted to less than full needs.
Section two is automatic calcium/alk/mag
Individual dosing tanks, really just for final tweaking.
Section three is automatic top off
From rodi tank. Yes, separate from kalk, deliberately.
Water from RODI, same as now.
Water changes will be largely manual.
One 35G trash bucket for RODI water
One 35G trash bucket for mixed salt
One 35G trash bucket for drain water
Change 35G, once every 2 months, in one batch. Less is needed on an ATS system.
CIRCULATION
To be honest, this is the part I am most uncertain about. Very tricky.
Two 900 GPH pumps from ATS, exit near top, facing forward. Low velocity.
One 900 GPH sump return, exit underneath central shelf. Lots of small jets
LOTS of powerheads for the rest of the circulation.
Likely a series of smaller ones along the back. A couple at the ends.
The concept is to have a forward Gyre.
Circulates from top back, forward on top, down front, back along sand, and up.
CONTROLLER
Uses Arduino microcontroller.
Controls lighting, dosing, chiller.
Already on my small tank, but needs updating.
CHILLER
This will use the algae turf scrubber screens and evaporative cooling.
A simple fan accross the screen results in huge evaporation and cooling.
Like a swamp-cooler.
Cheap and easy. Works great in california low humidity.
Controlled by microcontroller.
TANK VENTILATION
Tank and lighting will be vented outside, pulling air from living room.
Set of pipes from top-back of tank, to 4" pipe.
Fans outside. (Salt air concern)
Ventilation is meant to be moderate. Some air will vent to living room.
Big living room, but still want to keep humidty and heat down.
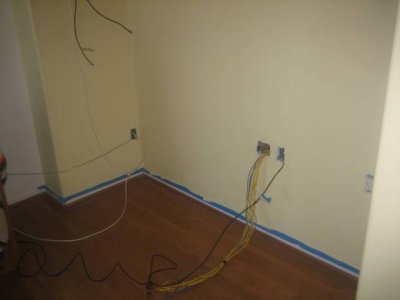
ELECTRICAL
One 30A main dedicated line.
Need to add wire + conduit from main breaker.
Battery backup on 1 tank power head, and 1 turf-scrubber pump
8 plugs under tank, for powerheads, etc
8 plugs in equipment room.
8 relay controlled plugs in equipment room
Probably a GFCI + 10A breaker on each set of 4 plugs
Got the plan, approval from the wife, and everything.
The plan is to do it backwards, with the little pieces first, tank last.
The fiddly bits seem to take forever, and I don't want the pressure of a big empty tank sitting there waiting for me.
GENERAL OVERVIEW
This is the general plan.
Most of these items need a lot more detail of course. That will follow in time.
This will go SLOWLY. I am pretty busy, and not really in any hurry.
But it is real now. I have started on some of the pieces.
Some of the decisions below are not entirely standard, but power efficiency and a natural approach are important to me.
Almost everything will be DIY. I see that to be as much fun as the aquarium itself.
TANK SIZE: 8 foot, 300 Gallon
(Thanks to those that helped me make the size decision)
Length = 96" = 8'
Width = 30" = 2.5'
Height = 24" = 2'
Likely buy TRUVU Acrylic 300-W. Upgrade front to 3/4". Dual overflow.
Note that real calculated volume is more like 263 gallons.
Roughly 300 pounds
This is one of the few things I am buying. Needs to be perfect, and big heavy acrylic is tough.
FISH+REEF
This will be a combination fish/reef. Slightly more emphasis on the fish than on corals.
It will be a peaceful tank. No overly aggressive fish. All reef safe.
There will be a couple of large tangs. Exact TBD
Probably one large school of small fish. Dither-fish.
Quite a few small individual species, darting in/out of rock.
It will be a large random mixture of coral types/ SPS/LPS/softies.
Probably more softies. I like the motion.
LIGHTLY LOADED, LOTS OF SWIMMING ROOM, OPEN WATER DESIGN
This is a personal preference of mine.
I really do not like the look of a tank absolutely jam-packed with fish and coral.
So no expecations of winning tank of the month here.
I like an expanse of sand and a fair amount of simple open water.
That said, it will hardly be bare.
I do have the willpower (won't power) to keep it fairly lightly loaded.
As a bonus, it reduces maintenence and emergency problems hugely.
This does require moving a fair bit of live rock to sump.
AQUASCAPING
As above, it will be fairly open.
The concept is to have a center shallow shelf like area, and few pillar like formations on the ends.
The center shelf will have the hard corals, and be brighter/shallower.
About 3' wide or so. Sloping from sand very near front, up toward back, against the wall.
Hard corals will be higher in the water, so less lighting needs.
The pillars will have softer corals, and have caves/such for the fish.
Lots of swimming area for the fish.
LIGHTING
The concept is to be bright in the center of the tank, and less bright on each end, but not dark.
This focuses the intense lighting on the corals that need it.
This also is combined with the auqascaping to emphasize shallow center, deeper darker ends.
Should focus vision to center of the tank. Perhaps too much?
Lighting will be LED based. I am experienced in that.
It will be a bit less blue, and a bit yellower more natural color. I like that.
With LEDs, I can add really deep purple to make other colors pop.
FILTRATION
Filtration will be algae turf scrubber based. Good experience with that on my smaller tank.
Yes, no skimmer, no ozone, no filter socks, no denitrators. I actually have all those, sitting in a box.
Lots of advantages when done right.
Very natural approach. Eliminates a ton of hassles.
Dual 400 square inch screens with 900 GPH pumps. LED based red/blue lighting.
Gravity flow back to tank, for pods.
TANK STAND
Height TBD : 30-36" ??
Oak veneer, stained fairly dark
Three sets of doors
Nothing really underneath. Sump and everything is in fish room.
Built in two parts : Base + Tank support.
Waterproof plastic/formica to protect floor and drywall. Hidden.
SUMP
Always dark. 75 gallon box
900 GPH return pump. Internal powerhead
Shelves of live rock rubble
No need for a huge sump with algae-turf-scrubber filtration.
REFUGIUM
Shallow 25G box
Sand bottom on part, baffles, some live rock
Wide for gentle flow
Goes between tank and sump.
Weak LED lighting, red/blue for algae
EQUIPMENT ROOM
Outside shed.
Scary hole in the wall of the living room for all pipes and such.
Simply buy a plastic pre-fab garden shed. Probably 6 x 8 or so.
ADDITIVES
The plan is to use kalwasser + individual additives, not a calc reactor.
Section one is automatic kalk. Pumps rodi into stirrer module, timer based.
This will be adjusted to less than full needs.
Section two is automatic calcium/alk/mag
Individual dosing tanks, really just for final tweaking.
Section three is automatic top off
From rodi tank. Yes, separate from kalk, deliberately.
Water from RODI, same as now.
Water changes will be largely manual.
One 35G trash bucket for RODI water
One 35G trash bucket for mixed salt
One 35G trash bucket for drain water
Change 35G, once every 2 months, in one batch. Less is needed on an ATS system.
CIRCULATION
To be honest, this is the part I am most uncertain about. Very tricky.
Two 900 GPH pumps from ATS, exit near top, facing forward. Low velocity.
One 900 GPH sump return, exit underneath central shelf. Lots of small jets
LOTS of powerheads for the rest of the circulation.
Likely a series of smaller ones along the back. A couple at the ends.
The concept is to have a forward Gyre.
Circulates from top back, forward on top, down front, back along sand, and up.
CONTROLLER
Uses Arduino microcontroller.
Controls lighting, dosing, chiller.
Already on my small tank, but needs updating.
CHILLER
This will use the algae turf scrubber screens and evaporative cooling.
A simple fan accross the screen results in huge evaporation and cooling.
Like a swamp-cooler.
Cheap and easy. Works great in california low humidity.
Controlled by microcontroller.
TANK VENTILATION
Tank and lighting will be vented outside, pulling air from living room.
Set of pipes from top-back of tank, to 4" pipe.
Fans outside. (Salt air concern)
Ventilation is meant to be moderate. Some air will vent to living room.
Big living room, but still want to keep humidty and heat down.
ELECTRICAL
One 30A main dedicated line.
Need to add wire + conduit from main breaker.
Battery backup on 1 tank power head, and 1 turf-scrubber pump
8 plugs under tank, for powerheads, etc
8 plugs in equipment room.
8 relay controlled plugs in equipment room
Probably a GFCI + 10A breaker on each set of 4 plugs
") Where are you currently at with this two page list? We will need lots of pictures along the way and I'll be tagging along. Any timeline you have in mind?
Where are you currently at with this two page list? We will need lots of pictures along the way and I'll be tagging along. Any timeline you have in mind?