Sealing and bonding corner acrylic crack in 1 1/2 inch acrylic

beligra

New member
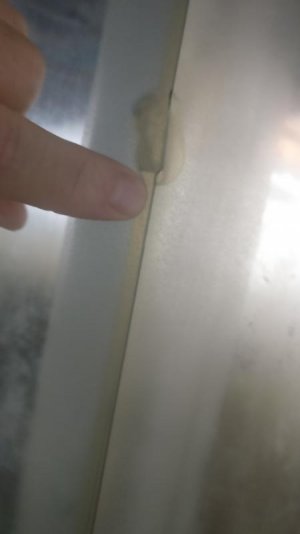
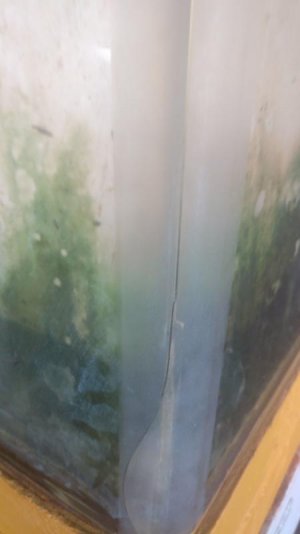
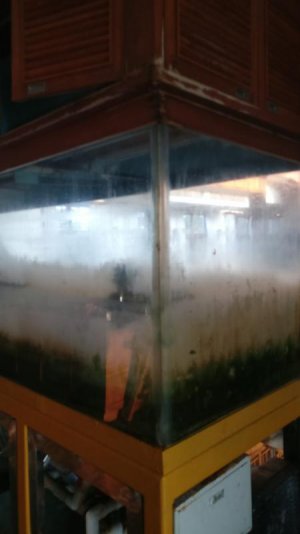
I've had my 16' x 4' x 4' tank for 16 years. It was custom made with 1.5 inch acrylic sheets. Now I see in one corner of the tank, there is a vertical crack running the whole length from top to bottom aboyt a fingernail in width. The depth varies from 1/2 inch to 1/16 of an inch.

My plan was to first fill with weld-on 4, then a few days later use weld-on 40. Is this the best approach, or are there better solutions out there?

Keep in mind that I have no way to move the tank and put it on it's side after applying, and there really isn't a clamp that will be able to apply pressure to this seam that I know of.

Any advice from DIY acrylic experts would be appreciated.
 

Attachments

  • IMG_20190919_154144.jpg
    IMG_20190919_154144.jpg
    15.2 KB · Views: 5
  • IMG_20190919_154155.jpg
    IMG_20190919_154155.jpg
    17.7 KB · Views: 3
  • IMG_20190919_154231.jpg
    IMG_20190919_154231.jpg
    22.2 KB · Views: 4
  • IMG_20190919_154239.jpg
    IMG_20190919_154239.jpg
    23.5 KB · Views: 7
I would PM "acrylics" here on RC for his opinion.

Thank you.

Unfortunately software set up on this forum doesn't allow any pm's until a certain number of posts have been reached. I was a member here over 15 years ago and had a large number of posts, but I can't get the pw reset working, so I had to register as a new user.
 
sucks to see this.. Looks like the joint split at the cast line and then veered at the bottom. With a gap that size - solvents will do nothing to help and could only hurt at this point. The solvent will further stress the area and if it bonds anything at all - that bond will block the flow of 40 which you will have to do anyway.

The only way I would even attempt it would be 40 in an hypodermic needle - something fat like 18ga. You *could* try basically flooding it with 40/42 and hope it sinks down, but.. Otherwise, I'd look at machining off the corner and casting a new strip in place.

If trying the fat hypo - I'm not sure I would even try 42 with the static mixing tips as that solution could easily be too hot and may not give you the time to flow that amount of 40. Weld-on 42 is a 10:1 ratio of monomer to catalyst while 42 is "user controllable" with a recommended solution of 20:1 which may be too hot as well. With 40, you'll have to run a vacuum pump on it or centrifuge to remove bubbles. With that time plus the application time the solution could start to set. I've never tried to block part of the catalyst side on a 42 cartridge, but may be worth trying on an experimental piece.

Obviously, you'll want to practice a bit. You only get one shot to do it well.

Best of luck, I know this sucks..
James

Thanks James. I don't think it is even possible to move the tank at all as it is a 2000 gallon tank and with 1.5 inch thick acrylic, it is extremely heavy and pretty much built in with no where to move it.

I will try flooding the whole crack with 40 and seeing how that goes as the first step. Any insight as to how I would see if this was effective would be very helpful.

>>Otherwise, I'd look at machining off the corner and casting a new strip in place.

How can this be done? I have no knowledge, skill or experience in working with acrylic. The top and bottom of the actual acrylic tank is also surrounded by steel for reinforcement.

Thanks
 

Attachments

  • IMG_20190926_065813.jpg
    IMG_20190926_065813.jpg
    26 KB · Views: 5
I have no knowledge, skill or experience in working with acrylic.
I would say with this statement that *you* can't fix this, someone else perhaps.

2000 gallon tank? Yikes. At that size I would call around for professionals to see how much it would cost to fix.
 
Back
Top