Stand construction plans inside- no 2x4's

countertopguy

New member
It seems that there is always a thread on here where somebody is asking about stand plans. It is very difficult to create a ââ"šÂ¬Ã…"œcookie cutterââ"šÂ¬Ã‚ plan that will satisfy all needs and tank sizes. I have attempted to put together a step-by-step guide that can be adapted for use with other size tanks as well as be ââ"šÂ¬Ã…"œdressed upââ"šÂ¬Ã‚ with molding or other details.

I have tried to use a design that is relatively simple, requires few tools, uses no 2x4ââ"šÂ¬Ã¢"žÂ¢s and is strong. Like reefkeeping there are many ways to build a stand. Please share if you have suggestions or plans of your own.

Obligitory Disclaimer- I am not a professional woodworker. I have built cabinets, aquarium stands and furniture but I am not an engineer. Use the following information at your own RISK. And donââ"šÂ¬Ã¢"žÂ¢t forget your safety glasses!

Letââ"šÂ¬Ã¢"žÂ¢s get to it!

I sized this for a 90 gal AGA tank (48.5ââ"šÂ¬Ã‚ x 18.5ââ"šÂ¬Ã‚ including the trim). It can be adapted to fit any size tank. I made it 39ââ"šÂ¬Ã‚ tall but again you can modify that to fit your needs. It is made entirely of plywood and hardwood. I will include a cut list and a cutting diagram later.
Tools needed include drill, miter saw and table saw. If you donââ"šÂ¬Ã¢"žÂ¢t have a table saw a circular saw will do but you will need to use a clamped straight edge to make sure your cuts are straight. I also highly recommend investing in a Kreg pocket screw jig, You can get them at Lowes for about $20.

First step is to cut out the back and side panels
frontsides.jpg

These are Ã"šÃ‚¾Ã¢â"šÂ¬Ã‚ plywood.

Next, cut out the internal supports.
internalsupports.jpg

These are Ã"šÃ‚¾Ã¢â"šÂ¬Ã‚ plywood cut into 2ââ"šÂ¬Ã‚ rips. It is important that these be straight and square. Pre-drill these with pocket screws to make the assembly easier.
These will carry the load of the aquarium.

Attach the internal supports to the back and side panels
sidewsupports.jpg

backpanelwsupports.jpg

Note the spacing. This may vary depending on the thickness of the plywood you use. Attach the internal supports with glue and screws.
 
Cont.

Cont.

Join the sides to the back with screws and glue.
sidesbackattached.jpg


note the corner
closeupofbackcorner.jpg

The sides cover the rough plywood edge of the back panel. Use screws at the top and bottom ( cover w/trim later) and use pocket screws on the inside.

Cut the top and bottom shelf
topbottomshelf.jpg

These are Ã"šÃ‚¾ plywood. (Make 2) Measure and cut once the sides are assembled to ensure a good fit. Care should be taken to make sure these are perfectly square.

Install the shelves
sidesbackwithshelves.jpg


Install the front supports
frontsupports.jpg


Now begin work on the face frame.
faceframe.jpg

Again pocket screw these together.

Attach to supports using glue and screw from the inside ,
standwfaceframe2.jpg

standwfaceframe.jpg


To cover the exposed plywood edges and give the stand a finished look I recommend mounting trim on top. There are many options for this. I chose a simple piece of bull-nose trim. You could also use square stock if you donââ"šÂ¬Ã¢"žÂ¢t have a router.
bullnosetrim.jpg


Here is the trim laid out with mitered corners
bullnosetrimexploded.jpg
 
cont.

cont.

Install the trim on top of the stand
standcomplete.jpg

The easiest way to do this is with glue and brads. If you donââ"šÂ¬Ã¢"žÂ¢t have a nail gun pre-drill holes and use small finish nails.

Now to work on the doors
Doors are pretty easy If you have the tools you can make some nice ones using a router table and a set of matched door making bits. If you donââ"šÂ¬Ã¢"žÂ¢t have the router you can still make nice doors.

Size the rail (top and bottom) and stile(sides) and cut a Ã"šÃ‚¼Ã¢â"šÂ¬Ã‚ groove in the bottom (this will receive a Ã"šÃ‚¼Ã¢â"šÂ¬Ã‚ panel. Also miter the ends. I made these doors Ã"šÃ‚½Ã¢â"šÂ¬Ã‚ larger than the opening on all 4 sides.
doorrailwdado.jpg

doorexploded.jpg


Next cut out the panel
doorpanel.jpg

This is Ã"šÃ‚¼Ã¢â"šÂ¬Ã‚ plywood

Assemble the doors using glue on the miters and pocket screws.
door.jpg


Attach the doors using the hinge of you choice
standwdoors.jpg

standwdoorsopen.jpg


Like I mentioned, molding can be used to dress this up (crown, base, etc) The sides can be covered with panels made the same way as the doors. The only limitation is imaginationââ"šÂ¬Ã‚¦ and tools!

Next up is a hood. And then Iââ"šÂ¬Ã¢"žÂ¢ll do modification for a full access cabinet (no center support).

I hope this is helpful. Let me know if you have any questions or comments.

Steve
 
Steve, that is great. Now if you could produce a calculator to go with that plan, it would be super! Then, one could just punch in there specific dimensions and viola, a cut sheet appears. Then they could follow the basic plans here fpr assembly.

Nice work! Is the drawing done by CAD software?
 
<a href=showthread.php?s=&postid=6922304#post6922304 target=_blank>Originally posted</a> by billyzbear
Very nice post, I like the pictures. What's wrong with using 2x4's?

I agree on both accounts. I would use 2x4's, cheap and safe. Though I don't doubt that can hold vertical loads I am very wary of lateral loads or torsion. Especially in CA. A single 2x4 is only 1.5 inches thick, so you'll lose an ich of space in the sump, but you'll gain the knowledge that your stand will not fail.

Great looking drawings though
 
cerreta I have thought about a calculator and was going to try to put something together when I make the cut list.

This was done using Sketchup:)

danskim Good eye :)

billyzbear Nothing wrong with 2x4's In fact my own tank has a 2x4 frame, but people are always asking if they "have to use 2x4's" and I wanted to show that you did not.

kalare I agree that 2x4's add to the overall stability but the plywood stand is plenty strong and once the internal shelves are installed it will resist pretty intense racking forces.

gmatt Thanks :o
 
Love your instructions and dynamite illustrations!!! Way cool. I do want to get that software program.
 
Coutertopguy
thank you for posting this thead .It will help a lot of folks from over building and give them an idea as to how most well made stands are made.

will you be making a plan for a canopy?
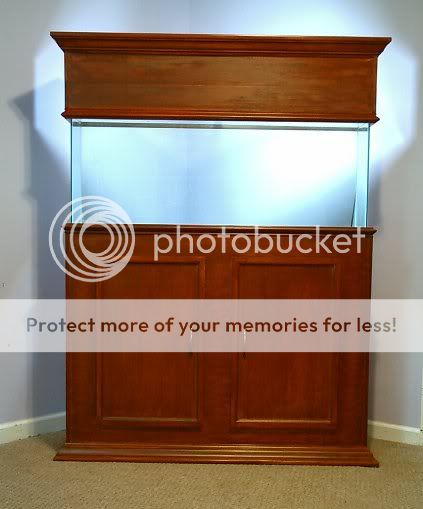
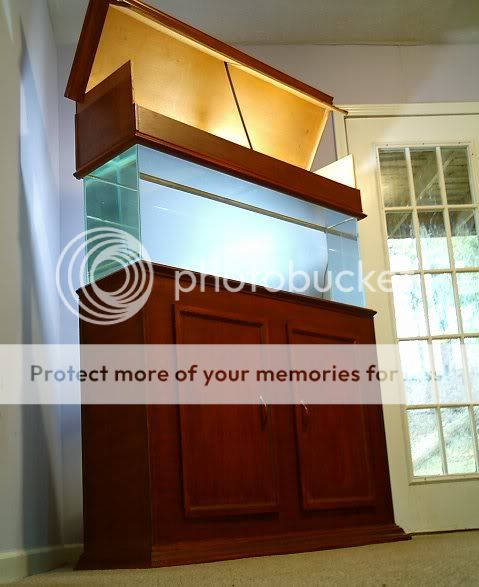
here is a pic of a stand build with the same construction method
for a 55 gallon
the copleate stand and hood
PICT0010.jpg

the hood open
PICT0024.jpg

and corner detail
LEFTCORNERDETAIL.jpg

from the back inside the stand
818_1103152308_pict0001.jpg
 
Though his plans are much better than mine here is my input on canopy design:

Building the Canopy

The front panel
I started out with some 1x4ââ"šÂ¬Ã¢"žÂ¢s and some 1x8ââ"šÂ¬Ã¢"žÂ¢s for the front panel. If youââ"šÂ¬Ã¢"žÂ¢ve paid close attention to the images you will see where I actually messed up. The initial images had the wood on the sides of the front panel running vertically. After I got the whole thing together it dawned on the that the grain on the main part of the canopy runs horizontally. So, I had to redo that part.

IMG_0973.jpg


I simply pocket jointed the 1x4ââ"šÂ¬Ã¢"žÂ¢s to the 1x8ââ"šÂ¬Ã¢"žÂ¢s and then used corner clamps to line up the side pieces and then used the same pocket jig on those. I then measured the entire opening on the front panel to find the mid point and cut the 1x4 to fit in that opening to box off the door openings.
After that was done I cut the length of the 1x8 pine to form the top of the front panel. Since the measurement of the sides of the front panel is 6 Ã"šÃ‚¼Ã¢â"šÂ¬Ã‚ and a 1x8 is actually .75 x 7 Ã"šÃ‚¼Ã¢â"šÂ¬Ã‚ I had to cut an inch off the long end. I just used a circular saw for that and went slow to keep the line as straight as possible. A table saw would have made it much easier but I donââ"šÂ¬Ã¢"žÂ¢t have one.

IMG_0974.jpg


This image shows all the pocket joints displaying how it is all held together

IMG_0975.jpg


The main shell
The main part of the canopy is assembled just like the front panel. I made the canopy 14.5ââ"šÂ¬Ã‚ tall so that two 1x8ââ"šÂ¬Ã¢"žÂ¢s glued and screwed together would make that height perfectly. You can see in the following image that the two pieces were clamped and glued together then screwed using the same jig as before.

IMG_0976.jpg


I then cut a 1x2 piece of red oak to length and screwed it to the two side panels. I used oak here since the wood is so small and the front panel will be stressing this part as it is opened and closed.
The clamp in the following picture is because my side panel split the wood when I put the screw in.

IMG_0977.jpg


This is where I didnââ"šÂ¬Ã¢"žÂ¢t do many pictures but should have. Here is the image:

IMG_0978.jpg


I used a piece of 1x 3 oak on the top rear of the canopy for the halide door to be mounted. On the inside of the canopy, beneath the 1x2 and 1x3 I just mentioned I also glued and screwed a 1x3.

IMG_0998.jpg
 
This has two benefits.
1) Added strength to the door mounts
2) It provides a lip for the halide door to rest against which is visible below

IMG_0999.jpg


After mounting the two 1x3ââ"šÂ¬Ã¢"žÂ¢s I simply got two 1x8 pieces of pine, cut them to length and mounted the first one. The second one needed 3/4ââ"šÂ¬Ã‚ cut off to make it flush on the bottom.
The halide door was assembled just like the front panel. The openings in the door are for heat escape and to allow me to mount the halide pendants through them if I wanted.
I then lined up the front panel and then attached the piano hinge.

IMG_0979.jpg


IMG_0980.jpg


For the halide door I simply set it in the hole and attached the piano hinge.

IMG_0981.jpg


You can see in a previous image that the fan holes were cut out using a jigsaw because I donââ"šÂ¬Ã¢"žÂ¢t have a hole saw. The next steps are deciding how to mount the halides and finding appropriate trim and mounting it. Then mount the two doors as well as lots of sanding and staining/painting.

Just to draw this to a close, for those that don't know what a pocket jig is, it looks like this:

mini-kreg-jig.jpg
You can get them for $20 at your local Lowes Hardware Store.
 
I created an excell spreadsheet to calculate the sizes of the various parts based on the size of the tank and the height of the stand. Thrlride generously offered to host it for me. It can be found here Basic Stand Calculator

Thanks Thrlride!

If anybody has any problems with or questions about the cut list, PM me and I will try and take care of it.

Steve
 
Back
Top