Upgrading nano

andrewq

New member
I have a 12 gallon mr aqua bowfront thats overcrowded with corals. I had a 6 gallon fluval edge that was doing extremely well, and unfortunately the tank broke while cleaning the house one day. I took everything I could save and threw it in my 12gallon. Luckily I only lost a couple snails.

CORALS in 12gal right now

Alot of GSP (growing quick)
Alot of xenia (spreading everywhere)
Frogspawn
2 torch corals
superman mushrooms
various zoas
and a few other corals, to many to name.

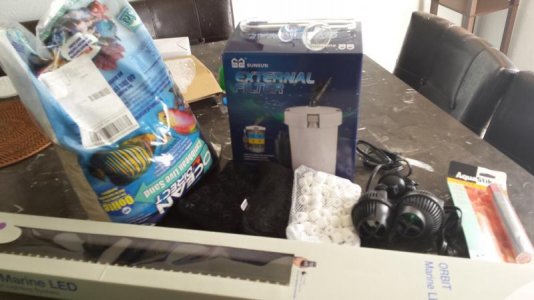
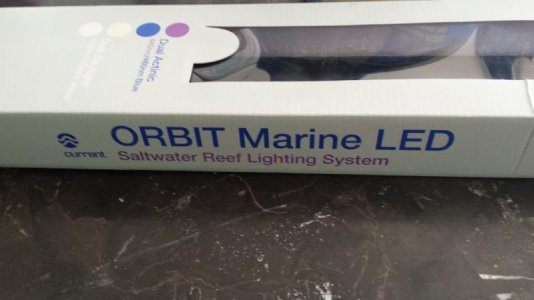
Im putting together a shopping list for the new tank, and im thinking no bigger then 50gallons. I have no experience with a sumps, never needed one. I do have a hob refugium, and skimmer on my 12 gallon. Both work great and are effective. I dont mind the hob look, but im finding hob's on a larger tank are much more expensive then setting up a sump. I dont feel like building anything. Id rather just buy a premade sump, and buy whatever equipment is needed to run the sump/refugium. Or just get a hob skimmer and refugium.

My question to you good folks is......Whats better hobs or sump?


I'll post some pictures of my 12 gallon later today. Thanks for looking!
 
Get a drilled tank with a sump. Standard reef ready tanks can be had in 65g which is close to your size. Same footprint as a 40breeder but just taller.

Also, request for the thread to be moved to reef discussion.
 
I have a 40B right now and I absolutely love the dimensions. You can aquascape any way you want and still have plenty of room around the sides for easy cleaning. I don't have a sump right now, but I am building one out of a 30B with a refuge. I just need to get my tank drilled.
 
Nothing needs a sump. But it makes things easier and better looking. You can get away without a sump and skimmer on a 12g just fine if you keep up your water changes and dont let detritus settle in the sand and rocks.

This is a 6g reef but he does a really interesting system with a big flower pot next to the main tank that he grows his mangrove in. http://glassbox-design.com/2009/the-remarkable-pico-reef-of-marcello/ But he also has a sump underneath.

I was going to go with 12gallon long...................then I went to my lfs and fell in love. I saw a 33gallon long fish tank! I have never seen one of these tanks for sale, but it was amazing! The love the dimensions. I was thinking 3 circulation pumps, skimmer, and hob refugium and 48in current usa orbit led. I do have experience with the hob refugium, and they actually work really well in my opinion.
 
Have you thought about a DIY all in one compartment, instead of a HOB? Those 33 long tanks are pretty cool, have fun!
 
Have you thought about a DIY all in one compartment, instead of a HOB? Those 33 long tanks are pretty cool, have fun!

The dimensions on this tank are so different and uncommon. Im going to have to custom build a stand. I have built stands before, so this should be fun.

I want to add a sump/refugium, but never drilled glass before. I think for now I will just use my existing equipment, and then worry about the sump later.

Gonna pick up the tank this week, and start the build this weekend. Will post pictures of progress.
 
So I started working on the stand, and I had an idea about the location of it. My wife had wanted to build a partition wall to show some separation from our living room and dining room. I figured why not put a fish tank! Awesome idea, and she agreed to it.

So I added an extra 2 feet to the stand, and it was relatively easy to add on to the existing stand. Right now Im debating on how to secure the stand to the wall, and im a little worried about stability. Might just use a L bracket to attach to a stud in the wall, or run a 2x4 down the entire tank length and attach to stud in the wall. Either way I want to make sure this tank dosent get knocked over by accident. I do have small children, and safety is important.

Now i know the stand isnt pretty. Mostly due to all the wood filler. I want the wall to look as great as a wall can. So yes it looks plain, but wait till its painted!
 

Attachments

  • 20160212_164420.jpg
    20160212_164420.jpg
    32 KB · Views: 4
  • 20160212_164618(1).jpg
    20160212_164618(1).jpg
    47.4 KB · Views: 4
  • 20160212_164338(1).jpg
    20160212_164338(1).jpg
    41.6 KB · Views: 4
  • 20160213_221813.jpg
    20160213_221813.jpg
    29.7 KB · Views: 6
Another picture. House was a little messy, but this gives you the full shot.
 

Attachments

  • 20160213_221840.jpg
    20160213_221840.jpg
    37.6 KB · Views: 4
Couple of updates. Painted, and added trim to the bottom and top. Pictures only show top trim. Will add more pictures later. Also today Im going to fill the tank, and add the rock, sand, and equipment. FUN!!!!
 

Attachments

  • 20160216_151459(1).jpg
    20160216_151459(1).jpg
    21.3 KB · Views: 3
  • 20160216_155430(1).jpg
    20160216_155430(1).jpg
    34.4 KB · Views: 4
  • 20160216_155704.jpg
    20160216_155704.jpg
    30.2 KB · Views: 4
  • 20160216_155515.jpg
    20160216_155515.jpg
    27.7 KB · Views: 3
So everything hooked up, and running smooth. Tank is super cloudy, but that was to be expected. I know the tank dosent run the entire length of the wall, and that was done intentionally. Im not sure if I like how the tank looks in its place. I do have a backup spot, but need some opinions on placement.

Tank cant be moved to the edge of the wall. The wall was made to support the tank in its current spot. Maybe some decorations on the wall might help.

Enjoy the pictures, let me know what you think. Tank size is 33 gallon long
 

Attachments

  • 20160218_143803.jpg
    20160218_143803.jpg
    48.1 KB · Views: 4
  • 20160218_143812.jpg
    20160218_143812.jpg
    32.7 KB · Views: 4
  • 20160218_143819.jpg
    20160218_143819.jpg
    44.2 KB · Views: 4
  • 20160218_171101.jpg
    20160218_171101.jpg
    33.6 KB · Views: 4
  • 20160218_171310.jpg
    20160218_171310.jpg
    25.3 KB · Views: 5
More pictures, and feedback is appreciated.
 

Attachments

  • 20160218_171713.jpg
    20160218_171713.jpg
    36.2 KB · Views: 4
  • 20160218_171259.jpg
    20160218_171259.jpg
    26.1 KB · Views: 4
  • 20160218_171237.jpg
    20160218_171237.jpg
    30.2 KB · Views: 3
Tanks up and running smoothly, and water is just about clear. Going to let this tank cycle for a few weeks, before I transfer all the rocks, corals, fish, and invertebrates to the new tank. Im guessing cycling should be quick, since I used live sand, and already established live rock. I did transfer a good amount of live rock from my 13gallon, and also filled the tank with pre-made saltwater from my lfs.

Will post pictures later!

Day 3 test results

ammonia 1.0
nitrite 0
nitrate 5.0
ph 8.0
salinity 1.26
 
Back
Top