jesdiscus
New member
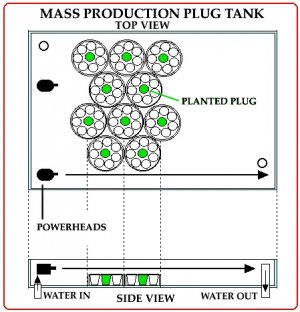
The first rings that we made were cut from a piece of 4 inch clear Plexiglass pipe. Each ring was cut so it was one inch long. These rings hold 7 plugs. We place one Zoanthid plug in the center with 6 empty plugs around it. As the Zoathids grow they move onto the empty plugs. When all of the plugs are full we break them apart. We have been using these new plugs to start new rings.
SIMPLE PLASTIC PLUG RING
1. Make or purchase your aragocrete plugs
2. Place the plugs so they form a ring with one in the middle.
3. Secure the plugs with a rubber band so they stay together.
4. Try different sizes of plastic pipe or containers to find the one that will support the plugs.
5. Cut the plastic into rings just long enough to allow the tops of the plugs to rest above the plastic.
6. Replace the center plug with a Zoanthid plug .
7. Place the plastic plug ring under bright lighting in good water flow.
This set of plugs is growing in the bottom half of a plastic cup. We fill the cup with live sand so the plugs will set in it. Less than 8 weeks ago plug number one had only about 12 Zoanthid polyps glued to it.
Note how the polyps are now spreading out onto the other plugs. This method saves time because we only have to make one cutting.
We have learned that all of the Zoanthids grow much faster when we feed them. We have been using green water and rotifers in our Zoanthid tanks and they are growing very fast. Zoanthids seem to do better in systems that we do not skim. They also grow faster in systems that have fish. All of the types of Protopalythoa that we are growing do much better if they are fed several times a week. You can see that this group is a more active feeder because the polyps fold in very fast when any food touches them. The use of the right mixture of Reef JanitorsTM in the grow-out systems allows us to feed the corals and still keep the unwanted algae from growing.
-

