Acrylic fabrication questions? I can help!

Hey all...its been a long time since i have been last on... but I finally am getting back into the fish. i just picked up a 240 gallon acrylic tank, and have never worked with acrylic before so i thought i would post in here to get some answers

the tank is a 240gallon 2ftx2ftx8ft made out of 1/2in on the sides, and 3/8in on the front back top and bottom. it has a one piece euro brace top with two overflows on the back. the bottom is drilled with 4 holes.

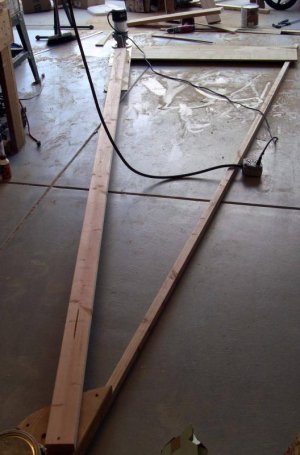
i will be building the stand out of 2x4, plywood and foam for the top.

the tank has scratches, some deep, so i will be using this 1,2,3 formula (3 separate bottles cant remember the name) that is supposed to 1 take out deep scratches, then 2 is for fine scratches and 3 is a shine and buff paste.

it was used for salt water before, and i think the guy dropped some rock work and had it heat buffed or had a heater melt it a little in one spot (about 4-6inches long) i did try to get a picture, but i cannot get it to show up on any camera. there is what looks like two tiny (nail head size) spider web type crack things in the acrylic at that point

-can this tank be used?
-would you modify it?
-is a 2x4 stand ok with a plywood with thin foam top ok?
-i was thinking about closing off the holes in the bottom... should i just acrylic plates down or put in bulk heads with ball valves... etc.

any other ideas...questions...comments?

Regarding the tank dimensions/specs...understand that the top eurobracing is a very important part of the tank. This was clearly a custom built tank because I don't know of any manufacturers that would mix acrylic in that particular way. Of course the only remotely reasonable thickness acrylic there is on the sides...the area that needed them the least, but the smallest area so likely why they ended up there...cost. I would personally be worried about this tank quite a bit.

The scratches were also likely caused by scratching the tank while cleaning it with a scraper. This is compounded when a tank has a substantial bow...bowed acrylic and flat scraper don't mix very well. And I can imagine that this tank bows A LOT!

The spider web cracks also concern me as its doubtful to be crazing how you are describing them and these in themselves could grow and compromise the tank. The compromised melted section may also be another issue.

As for the drilled holes you could use a bulkhead and a threaded cap to close them off, but would need to add holes in the stand so they don't create a stress point. You could also use Weld On and acrylic plates to seal them as well. Hell you could use acrylic plates and silicone if you wanted to as the water pressure would keep them secure almost indefinitely.

IF you are dead set on using this tank..big IF..I would strongly suggest you set it up in a garage or somewhere similar and water test it first. Use a long straight level or other known straight board and lay it horizontally across the front panel and check how much it bows on the ends. Measure this number and let us know. I wouldn't be surprised to see this bowing at well over 1/2" (depending on the configuration of top eurobracing and cross braces) which begins to get a too scary for me personally...especially with the other compromises you mention.

Look at it this way...if you are setting this thing up as a reef tank...even if it lasts for a year or two...I firmly believe it will fail at some point. It may not be a catastrophic blow out and you may be able to save some or most of your livestock when it does happen, but how much money will you lose when that does happen?....Likely more than the cost of the tank.

Also, if you decide to keep it and fix it up...regarding your scratches since you say there are a lot and many are deep the Novus 1,2,3 (thats the one you were trying to mention) may not handle, at least not quick enough, some of the deeper scratches. I would get an orbital sander and some micro mesh. Start with regular wet/dry sandpaper (use it wet) at 320 on the deeper scratches till they are gone. Use a higher grade for the shallow ones....maybe starting at 1000 and work down if necessary till you see progress to know what step you should be using without creating extra work. Work your way up to 1000 then use the micro mesh kit. If you buy the kit it will take you all the way up to 12000 grit which creates scratches so small the human eye can't even see them....this will give you the optical clarity you should be aiming for on the tank.
 
hey adam and james

thanks for the input. it was bought used... a gift from my wife... which makes it that much harder to just give up.

since the thickness of the panels is the biggest issue... i will start by covering the holes and filling it in the garage. probably be a week since we are leaving for labor day. i will get you the numbers when it does bow. i guess everything else depends on where to go from here...(fixing scratches and building stands)

is there a way to fix this? replace the front/back? would i need to replace top and bottom too? cut the tank in half? ...just pulling straws out of a hat

thanks
 
Oh goodness, you just opened a whole new can of worms. A 230g tank that is 36" tall AND 72" long with only 3/8" acrylic on top?!?!? Whats the rest made from???

That is just plain SCARRRYYYYYY!!! I would never ever ever ever build a tank that big with 3/8" acrylic. For 36" height I would recommend to my customers 1" acrylic for AT LEAST the front and back panels and 3/4" everywhere else. 1" all the way around and 3/4" on the bottom would be the "best bang for the buck" in the long run of happiness in my opinion.

If someone asked me to build a tank to that spec I simply would kindly decline...not worth the dig to my reputation. If they were on a serious budget the absolute minimum I would build that tank with and put my name on it would be 3/4" for the sides and top and 1/2" for the bottom.

Naturally, at 20" height things would be substantially different, but its not currently that height...

Its no wonder it has a crack in the top. Who made this thing???

It doesn't have a manufacturer stamped or printed anywhere on it. It's 3/8" all the way around and that probably is the reason the eurobracing cracked on the top in the first place. I have never filled it, but the guy I got it from said that the crack doesn't widen when filled, but who knows. So, that's the whole story of why I wanted to lay it down on the 36x72 side and use a fresh piece of acrylic to replace the current cracked piece. I already spent a solid two weeks buffing/sanding the thing when I first got it so I hate to not use it, but it sounds a little beyond my abilities to fix it. I'll probably partition the inside of it and use it 1/2 filled for a sump.
 
Paul,
As for temps, even 150F in a hot car will help quite a bit without adding any mark-off. Take a note from how they do airplane windows; cut pieces and lay them over forms in a warehouse in Arizona. In not too much time, the pieces will "relax" on the form and naturally anneal themselves while taking the form of an airplane window. You can do this in an oven as well, just heat the material over a longer period of time at a temp low enough so the material doesn't become pliable or "plastic" at all. This will keep mark-off from occurring :) Maybe try some test pieces at 200F or so and see how it goes.

Hope I didn't confuse the matter more :)
James

James,
Thanks for the advice! I will take it and plan to build a form this weekend that will fit in my oven. I will let you know how it goes. It will probably be a few weeks as I have to build the form and install a 220V outlet for my oven since I moved since I used it last.
Thanks again for the help!
-Paul
 
400g square

400g square

Well I got a few things done. I made a 161" router jig to cut the shape of the form and I started assembling the form.

Here a a few pics of the jig, the form and my oven.

The last time I used the oven I heated the material inside the oven at ~300 degrees on that removable shelf. Then I removed the shelf and draped the plastic over a half cylinder form.
This time I will try to remove the shelf and put the form inside the oven. I am thinking I'll heating the plastic for 2 hours at 180~200 degrees and cooling it for 2 hours.

Please comment if you see anything that sounds like it may be a problem.

Thanks,
Paul
 

Attachments

  • jig1.jpg
    jig1.jpg
    57.2 KB · Views: 7
  • form1.jpg
    form1.jpg
    31.8 KB · Views: 7
  • form2.jpg
    form2.jpg
    30.9 KB · Views: 6
  • oven1.jpg
    oven1.jpg
    59.1 KB · Views: 7
here are the pictures if the 240 gal tank filled on the stand i built. it did bow 3/8 inch but the overflows hold the back in really well. My garage is a little slopped so once its inside it will be level. My idea was to attach acrylic square rods to the middle of the front vertically and also on the inside seems. There are no leaks just want extra support. What do you think of putting rods on the front middle will that help stop it from bowing? and should i put them on the inside or outside? also what thickness should i use?
383344_972019967169_218120796_n.jpg
253005_972020012079_1510300489_n.jpg
554763_972020066969_1603555951_n.jpg
538808_972020141819_2111316948_n.jpg
284496_972020211679_38391531_n.jpg
579849_972020311479_80152121_n.jpg
 
John,

That is some scary deflection.. I understand if you feel like you kinda have to use it, but ask yourself what you do/say if something bad were to happen.. :(

Sorry if I crossed the line there, but safety first..

James
 
John, am I looking at this pic right? There is a center overflow in the back, and you're putting the level across that? That means that there is a double-bow along the backside, with the center overflow acting as a 'divider' between the 2 bowed sections? That is scary bow BTW. But I'm 100% sure I've got one that beats it, and it's been in place for years. I keep forgetting to bring my level and camera but I will soon...
 
here are the pictures if the 240 gal tank filled on the stand i built. it did bow 3/8 inch but the overflows hold the back in really well. My garage is a little slopped so once its inside it will be level. My idea was to attach acrylic square rods to the middle of the front vertically and also on the inside seems. There are no leaks just want extra support. What do you think of putting rods on the front middle will that help stop it from bowing? and should i put them on the inside or outside? also what thickness should i use?
383344_972019967169_218120796_n.jpg
253005_972020012079_1510300489_n.jpg
554763_972020066969_1603555951_n.jpg
538808_972020141819_2111316948_n.jpg
284496_972020211679_38391531_n.jpg
579849_972020311479_80152121_n.jpg


WOW!!!! I wouldnt put that in my house.
That needs more than square rods to keep it from bowing!!
IMO it could be cut down and made into a great sump.
 
Changing the topic. How do you guys make acrylic safe to touch. I just routed out some 1" acrylic and just carrying it I cut the #(&$#^! out of my fingers. I tried a deburring tool but all it did was chatter it's way along. Sand paper? Sander?
 
Nothing. You want a sharp edge, if you round it off before bonding, it sucks in bubbles. After you're done with the part/tank, the simplest thing is to take a razor blade and scrape it along the edge to make a 45 degree chamfer. 3 passes and you're hand-slicin' free. With a handheld router you can use a 1/8" roundover or chamfer bit.

Sharp edge will cut sandpaper just like a razor blade, at least on the first pass, unless you go across the edge instead of along it, and even then...
 
John, am I looking at this pic right? There is a center overflow in the back, and you're putting the level across that? That means that there is a double-bow along the backside, with the center overflow acting as a 'divider' between the 2 bowed sections? That is scary bow BTW. But I'm 100% sure I've got one that beats it, and it's been in place for years. I keep forgetting to bring my level and camera but I will soon...

there is actually two overflows on the back... thats just one of them

and thanks all for the help
 
Razor blade will do fine then, as will propane torch (but it will craze if you try to bond a flame polished edge or clean it with alcohol/windex).
 
Back
Top