CenterConsole
New member
Sounds like I’m in over my head on this project. The tank isn’t definitely older and used, I’m sure it has bowed some especially given it’s tall dimensions.
Upcut bit means the chips are pulled toward the router. So when the router is installed facing up in a table, up is down. The chips get pulled "up" relative to the router which is down.
When you have a template and are using a flush trimming bit (which has the bearing on the tip) then you will want the template on top of the material.
Now the big trick is making the template. I made an overflow template out of 3/8" scrap and that took several hours. What I did was tape a piece down as the depth stop, then tape a piece down that was perpendicular to that and make one notch. Then move the perpendicular stop 1/2" and make another cut. Repeat for as long of a template as you need. Mine is 48" so that took a while.
But now you can take that template and stick it down to your work and making an overflow takes just a few minutes.
I use 2 pieces of wood (I think 3/4" plywood) that I put a few heavy bolts through (with washers) to hold a standard box cutter razor blade in between, tighten the bolts and it holds it nice and tight.
I use this for the specific thing you are describing. When you bond 2 panels together, it's rare that you get it 100% perfect on both ends of the joint. Inevitably, you end up with a tiny lip that you can feel with your fingernail. But usually, I end up with a smudgey little area there anyways because as I'm lining things up after pulling the pins, using my fingernails to feel how things are lining up, this wicks some solvent over to the edge and I end up with some dried up solvent on the surface of the corner that will eventually be part of the top/bottom joint. You need to take this off anyways or you will end up with bubbles in the corner, usually.
So I take the scraper and position the blade so that it is across both pieces of the joint, give it a slight angle toward the corner of the joint, and scrape. Here is where another trick I've learned comes into play - do this BEFORE you flush trim the vertical joint. The reason is that the downward pressure you apply when scraping across the assembly is fine until you get to the outer corner, where all your pressure is now right on that point and this tends to result in a bit more material being removed with each pass. The result is that you essentially will end up rounding off that corner and you will have a gap in the joint. If you leave the lip on while scraping, this area will get flush trimmed off so you don't care if it gets rounded.
I leave all the lips on until the tank is fully assembled. Leaving the lips on the side/front & side/back joints results in a little more material right at that outside corner, and this further reduces the tendency for air to get into the joint at the corner (which are prone to it, since there are 2 sides for the solvent to evap out of). Then if it does you just trim it off and you're usually ok
On the MAPP gas. No flame polishing, IMO. The happy medium that I have found is using a roundover bit (usually only 1/8" on material less than 1/2" thick, 1/4" past that) and then wet sanding. On vertical outer seams you can get away with a bit less than you would for a scratch removal on a flat panel. I use 600, 800, 1200, then 1500. Sometimes 400 depending on how good the corner round bit worked (not always perfect). But all you need to know is that the first pass/grit, do this one well enough to make everything smooth (take out the router bit pattern, completely) and then all the progressive passes are pretty much smooth sailing. When you are done with the 1500 pass, then make a pass with Meguair's Ultra Cut and a Black & Decker random orbital buffer ($35 at lowes) with the blue sponge pad, and then if you want another pass with the Swirl Free polish. Use lots of blue tape to protect the areas you don't want scuffed up by sanding or polishing. Takes a bit of practice.
Alternatively you can go straight to the polisher, if you don't care about seeing the router marks. The polisher will diminish the rough-cut look of a router-trimmed edge, it will shine it up pretty well actually. You can also achieve this by using a 3-stitch wheel on an arbor bit & drill at high speed. Using the Meguiars, or another plastic polish usually is OK too (on outside of tank, can use about anything because it never gets in contact with tank water). Again, use plenty of blue tape to protect the area you don't want hit with the buffing wheel.
I think ive seen pics, and their probably in this thread, but curious if you mind showing your razor setup again?
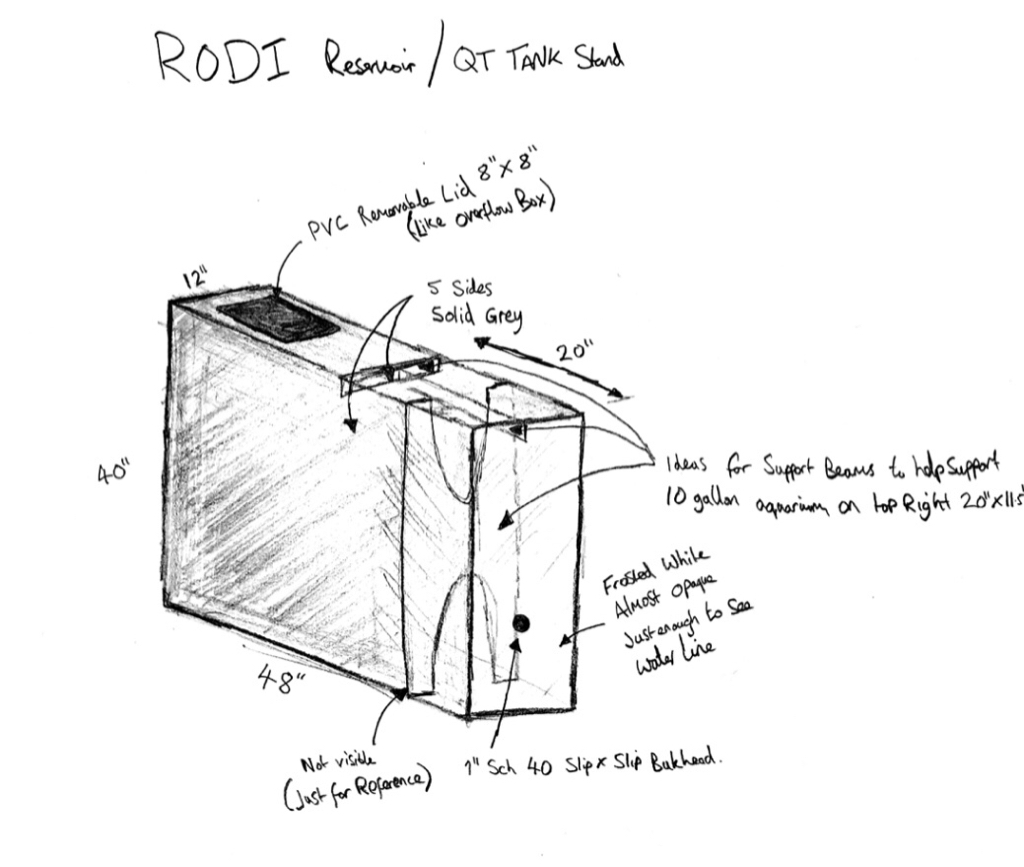
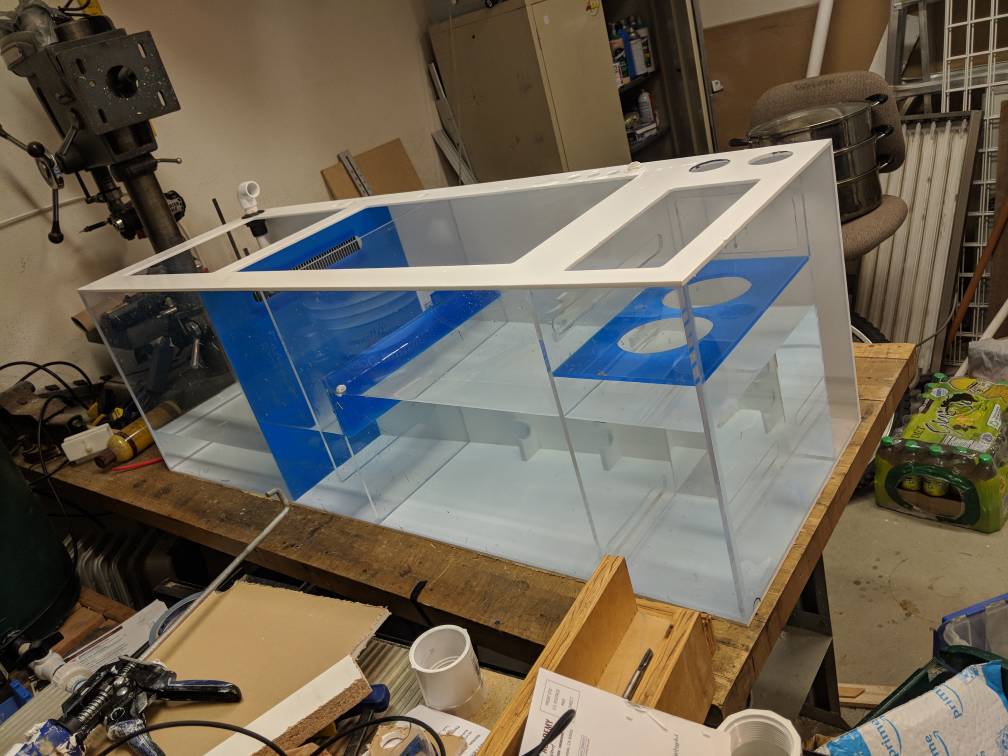
I would go with a 3" strip around the top. Does not have to be 1 solid piece. Since you have baffles you dont need cross bracing. Im assuming the baffles divide the sump into 3 sort of equal chambers?
") )))
)))