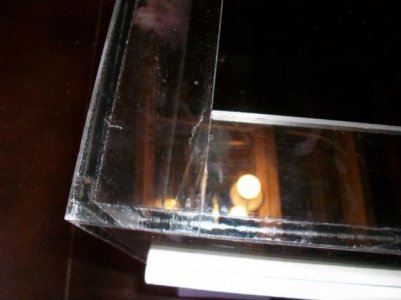
Can you take a look below and confirm my suspicions...
3/8" G Acrylic with routed edges
Shim and pin method using Weld On 4
Acrylic has been sitting in the house at 70 degrees.
I let it soak approximately 40 second before pulling the pins. It was still pretty wet when I pulled the shims. I tend to have issues with edges that aren't surrounded by acrylic, like the ends shown here.
Do I need to let it soak longer before pulling the pins so the Weld On thickens up a bit more? Are these joints usable?
I'm not familiar with "shim & pin method" but it appears the issue is one of two things; either you let it soak too long, or you just needed a shim between the work surface and acrylic.
IMO people let the joint soak too long and the joint begins to set before pulling the pins/wires. Also, when pulling your pins/wires, it's a good idea to release your clamps and allow the vertical piece to fall or squeeze the solution. Squeeze the work to the jig, release the clamp, and push the vertical piece down a little into the joint, thus squeezing the solvent solution a little.
When the work is still wet, gently pull up along the bottom (horizontal) piece with a fingernail, if you see movement, place a shim there. I use thin (.030") pieces of Lexan but a razor blade or anything thin will do.
Looks usable to me, when you glue the top/bottom, the solvent will usually migrate up a mm or 2 and should help.
And FWIW, your joints look better than those of most professional fabricators
")
For a couple of other little tips, visit
this thread
HTH,
James


")