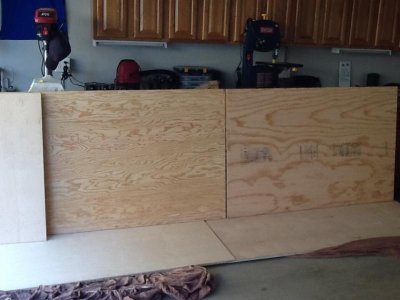
And so it begins...the start of my 800g plywood upgrade

d-man

Active member
first off this is going to be a long build as im doing a lot of this myself. I also have trouble uploading pics, so bare with me as I go.

Next, I want to thank my new(8/8/15) wife for putting up with, encouraging and enjoying my hobby as well.

So I currnetly have an 11x2x2 325g in an alcove of my living/dining room area. This is a great tank and love it....however since we decided not to buy a new place and stay in mine, I have the opportunity to build a larger, and slightly longer tank.
The wall the current tank sits in front of is 152" long and has about 32" of space before it begins to protrude too far into the room. So I've decided to build my new tank to the dimensions of 145"x32"x43". Yes, I know "you'll hate the height, it'll be too tough..." Trust me I'm prepared. I had a 84x48x48 that I built 7yrs ago. Granted that one I was able to climb in to clean, whereas this one I won't. But I don't care. Too me, there is nothing quite like having multiple height zones for the fish to swim. I love seeing anthias on a reef wall, some lower level fish on the sea floor, and tangs and wrasses darting around, through and straight up. It's my tank, I'm cleaning it, and darn it "I WANT a tall tank!"
 
First, can't wait to see this :)

Congrats on the new wife and that tank is going to be too tall and you'll hate dealing with it!
 
So as stated above it'll be made of plywood. 3/4" all the way around with the exception of the back which will be 1". The front will be a2x4"side and bottom frame with the top a 2x6". The glass will be starphire 3/4" the glass will be hidden 2" all the way around to add support and also hide the edges that inevitably will show coralline on the edge.

I was given some carbon fiber matting from a client and every seam will be carbonfibered and epoxy painted with multiple coats of potable, fish safe paint. Once cured this becomes rigid. After full curing I will then use a full 5g bucket of BlueMax rubber sealant to completely cover all plywood, seams and any overlapping exposed wood areas. Not counting the epoxy coating, the 5g bucket should yield 10-12mils of sealant(which is over the recommendation).
The tank will have a beananimal external overflow on one side measuring 25"x4"x8". Return will be on the opposite sides using 2x1" pipes most likely with penducters.
Equipement list includes
Return pump- Fluval sp6
Skimmers-sro 6000 and 5000
Ca RX- korallin 4002
Internal flow-multiple wp60/rw20 and a couple wp40 all set on else and wave mode
Lights-Most likely MARS 32" ledsx 6, plus the existing leds and 8x80wt t5s
Biopellets, GAC used in BRS dual reactors.
Most things will be controlled through apex

Think that's about it. I purchased the wood, paint and sealent already, so build begins now, but recommendations, input and advice always welcome
Thanks
 
Also currently searching for a used 180 or larger to make my sump with or I may just build it with wood and glass front like my DT
 
Love the height but I think the width should match. This would give you more surface area for gas exchange while providing greater depth of field for some stunning rock scaping.

I'd really like to see a tall plywood tank and how it is built (lots of photos - hint, hint). All the ones I've seen so far are too squat!

Dave.M
 
I wish I could Dave, but unfortunately that is the limitations I have to work with. Like I said up top, my 84x48x48 was awesome dimensions ht and width wise, but we sold the house I had set it up in. Here, I can atleast have some awesome length and height.
 
Joining the seems of the back pic
 

Attachments

  • image.jpg
    image.jpg
    43.3 KB · Views: 2
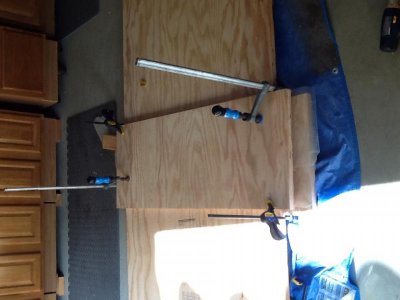
Here's what the back and bottom looks like prior to joining the seems.

It is a lap joint connecting the 2pcs of plywood, since it's 145" long for the bottom and 143.5" for the back

And don't worry, the seems are not that spread apart. It just that way for the pic.
 

Attachments

  • image.jpg
    image.jpg
    46.5 KB · Views: 2
Well, I call 43" tall a tall tank. 24" is too short for my tastes. That's why I am so interested to see how you go about this. Thx.

Dave.M
 
They are actually pretty easy to do. I however like pc of mind and will be overdoing it a tad.
The trouble with one of this size is the length. Getting long sheets of plywood is very costly so joining it is the best cost effective way, but it poses the challenges of the joining and then handling of that long wood...insert joke here:)
 
oh man, yea plywood tanks are interesting, but the thought of putting hundreds of gallons of water, and thousands of dollars of livestock into something I built scares me. Im a good builder, but man, that is just to much for me haha. Very much looking forward to seeing this come together.

Any sites you use as a guide for building?
 
Hence why I overbuild it. Just plain glass tanks scare me more. All that pressure behind all that glass held together with silicone...way too scary.
Originally I used monsterfishkeepers to do my first build. And I refernced that again for this build, but have also added a few more things for pc of mind.

As stated before I will use carbon fiber matting on all seams, then covered in 2part resin just on the CF and seams. Then I will use aquatic ecosystems 2 part paint on those seams as well. I got white so I can see if I missed coverage when I cover with multiple coats of the BlueMax. I also go white cuz I will be sealing the engine bottom with the white, so any sand blown around won't show a bottom other than white, which will look somewhat normal.
 
Very nice. Built a plywood sheet footprint tank many years ago; though 'only' 30" tall. Would love to do one again, but fir now will live vacariously through others.
 
I'm in the planning stages of a sump upgrade out of plywood. I will be using Pond Armor for the waterproofing. I would recommend this stuff over paint. My sump will be 8x4 feet and I will use the glass from a 90 gallon tall tank I have. So + - 35 inches tall. Between 350 and 500 gallons depending on water height. I can take pics if you want Dave.... The thread name will be something about a (house reef upgrade ) in large tank section.

Daniel.
 
Nice dan, I looked into pond armor. But it's very pricey. I'm using both rubber paint and 2 part epoxy, which is the same as the pond armor.
Pond armor is expensive and would cost and arm and a leg on a tank this size.
 
The epoxy is rigid when dry so I will use it on the seams and bottom only. Since there may some slight deflection then the rubber paint is great because it has some give and will seal itself in small pinhole tears. Same as "rubberizeit".
 
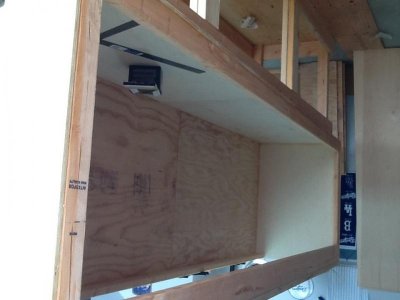
Framing on tank done except cross braces which will be set once glass is installed
 

Attachments

  • image.jpg
    image.jpg
    36.2 KB · Views: 2
Back
Top