Ben’s back at it 20G long

ExitTrauma

New member
Hello all.

This is my journal for my new build. I’ve been keeping reefs for most of my life off and on. I’m sure everyone knows how it goes. My last two tanks ended in total catastrophe so I got fed up and dumped everything into storage.

That was around a decade ago. Now, I’ve decided that i want another build. I’m looking for something simple. I had a RO/di setup but sold that and really just looking to handle everything with store bought water. This build, I’m looking for simplicity. My last tank changed its own water through the apex, and the entire thing was basically a Rube Goldberg device. I’m looking for the opposite of that lol.

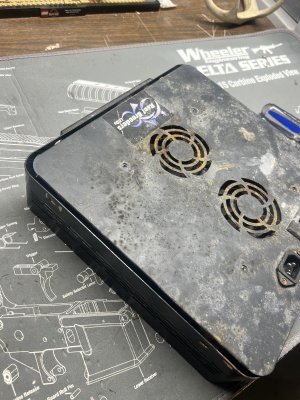
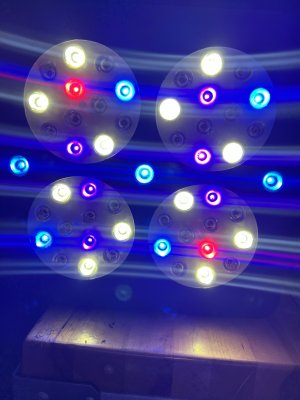
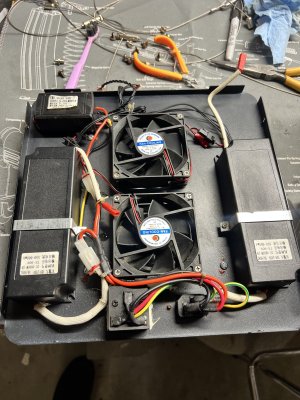
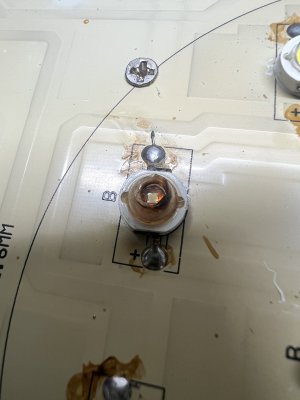
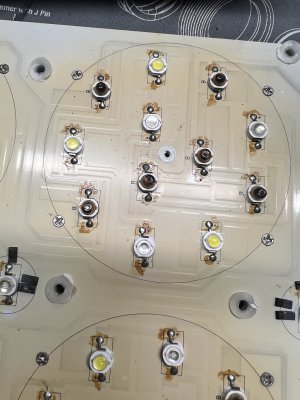
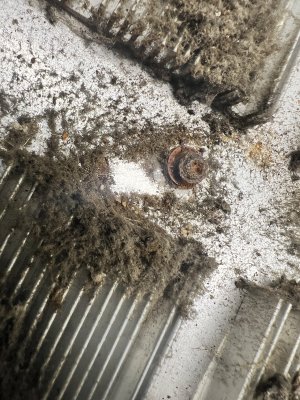
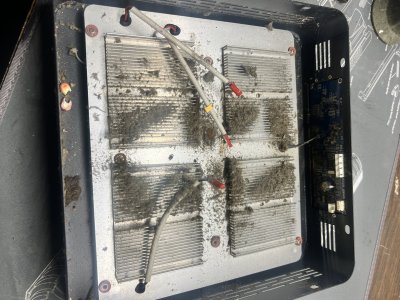
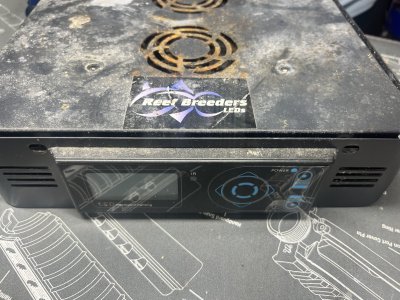
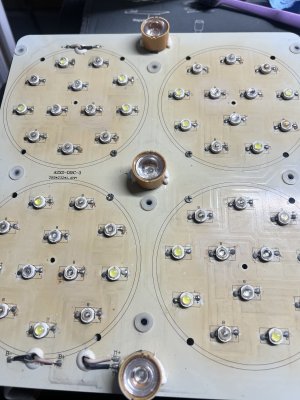
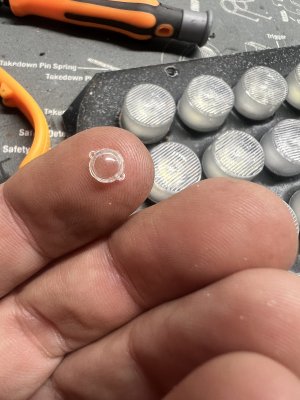
I went through all my old gear and have been cleaning it up. First up is the light, I attached all the pics of the progress pics. Spoiler alert, the light has broken LEDs lol. So basically I wasted a day and a half cleaning it up. I have another one that seems to have all the diodes working but the controller on the front seems to be broken. I’ll tear that one down and clean it and see if I can get it functional.

I know what you’re thinking. “Hey fellow reef enthusiast. Why don’t you just buy new equipment?”
Well, allow me to retort.
“Why, fellow forum goer, would I do that, when I can do 10x the work for half the result? Or even, as we see here, for no result?”

If that makes no sense, then feel free to join my wife with that slow disappointed head shake that she does.

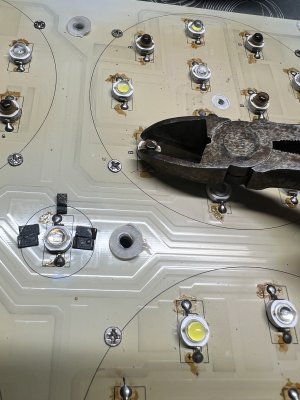
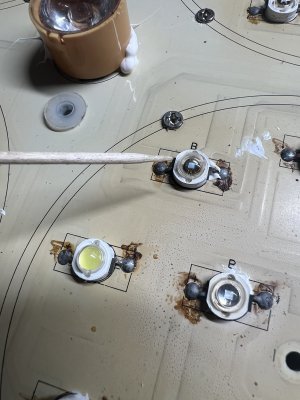
It seems as though the acrylic lens over the diode melted and left the lens brittle. So I pulled the domes off in hopes that the bulbs functioned but were just blocked from the opaque dome. Unfortunately that was not the case.
 

Attachments

  • IMG_3236.jpeg
    IMG_3236.jpeg
    2.2 MB · Views: 18
  • IMG_3276.jpeg
    IMG_3276.jpeg
    1.4 MB · Views: 13
  • IMG_3265.jpeg
    IMG_3265.jpeg
    2.4 MB · Views: 9
  • IMG_3245.jpeg
    IMG_3245.jpeg
    1.5 MB · Views: 9
  • IMG_3242.jpeg
    IMG_3242.jpeg
    1.2 MB · Views: 11
  • IMG_3241.jpeg
    IMG_3241.jpeg
    1.5 MB · Views: 8
  • IMG_3240.jpeg
    IMG_3240.jpeg
    2.5 MB · Views: 10
  • IMG_3239.jpeg
    IMG_3239.jpeg
    2.3 MB · Views: 9
  • IMG_3238.jpeg
    IMG_3238.jpeg
    2.3 MB · Views: 9
  • IMG_3237.jpeg
    IMG_3237.jpeg
    2.2 MB · Views: 17
Definitely in rough shape but if you can get one going that’s worth the savings. If your good at DIY, could likely replace the diodes by soldering new ones in (I’m no good at soldering so take my advice with a grain of salt)

Edit to add: or reach out to reefbreeders and see if they can send a replacement board?

I actually thought about soldering new diodes but I’d need someone to show me which ones to buy.

I may actually reach out to reefbreeders that’s a pretty good idea.
 
So, got some more work done over tha past couple days.

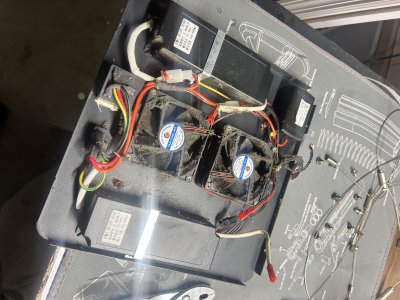
First of all, it seems that there is more going on with the second light than just the bulbs. I emailed Logan at reef breeders and he was super helpful and very nice. Using some of his guidance I deduced that the diodes were fine, but for some reason the circuit itself wasn’t functional. Long story short, that light found the trash. The good news is that I was able to cannibalize parts from the old light to use on the one that was functional. The controller on the functional light had a lcd screen that didn’t work so I swapped it with the non functional light which had a lcd that was ok. I was also able to remove all the old diode domes that were melted or opaque and replace those with clear ones from the dead light. I then scrubbed the contacts with alcohol and a tooth brush to clean them. Pics are viewable below. Light is back together, hung and ready for use.

also a song I sang when I was working:
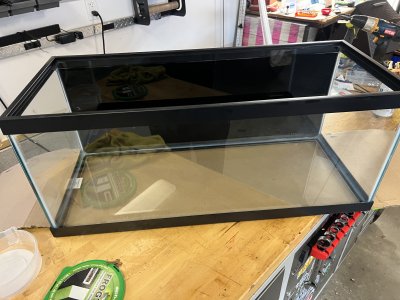
I see a clear fish tank and want it painted black.
No clearness anymore I want it to be black
I see wires hanging down in messy messy rows
I have to turn my head until my nausea goes….

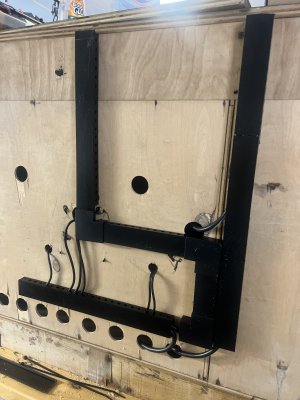
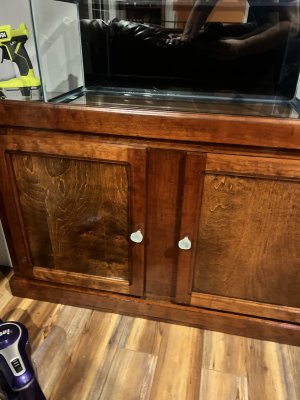
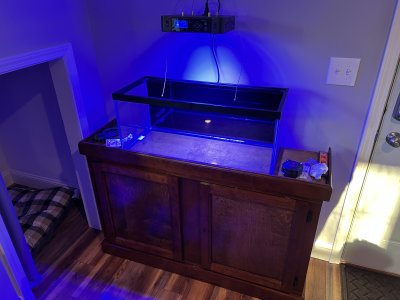
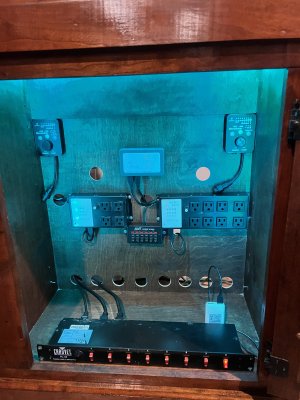
I then did some work mounting the apex and some other hardware neatly in the stand. This stand was as built by me and my father 30 years ago when I was in highschool. I cleaned her up and got her moved into position.

I’ve now run into another issue. I can’t get into the apex. I connected it directly to the router and, though the router gave me an IP address for it, I can’t communicate with it. I’ll work some more on it later. My next plan is to unscrew it, get a new cable, connect it back to my edge router directly again and see if I can get into it.
 

Attachments

  • IMG_3283.jpeg
    IMG_3283.jpeg
    1.7 MB · Views: 9
  • IMG_3277.jpeg
    IMG_3277.jpeg
    1.1 MB · Views: 10
  • IMG_3280.jpeg
    IMG_3280.jpeg
    1.4 MB · Views: 8
  • IMG_3281.jpeg
    IMG_3281.jpeg
    1.4 MB · Views: 9
  • IMG_3300.jpeg
    IMG_3300.jpeg
    1.9 MB · Views: 8
  • IMG_3310.jpeg
    IMG_3310.jpeg
    1.9 MB · Views: 10
  • IMG_3305.jpeg
    IMG_3305.jpeg
    2.5 MB · Views: 9
  • IMG_3307.jpeg
    IMG_3307.jpeg
    2.2 MB · Views: 10
  • IMG_3308.jpeg
    IMG_3308.jpeg
    1.8 MB · Views: 9
Thanks all!

Back to work today so progress will be slower. I have another 4 day weekend coming up but will be in Cleveland to watch the Cavs for 2 of those. Saturday Sunday will be more work.

The plan on Saturday/sunday will be:
-Apex connection diagnosis
-clean, inspect and store unused equipment with silica packs.
-install ATO. Pump, floats, failsafe, storage container.
-install power heads
-wire management
-buy new test kits and replace expired Hannah reagents.

With any luck, after this weekend everything should be ready for rock/sand/water. All will be supplied from TBS.

Edit:
I’m sitting here starting to rethink my decision to use a 5000ML ATO container. I have the room, do you all think that 5k will be big enough to be able to go some time without filling it? Or should I just get a bigger reservoir?
 
Last edited:
I've never used a commercial ATO container, I use a 20 gallon Rubbermaid Brute trashcan.
Yes sir, on my last build that’s what I did as well, RO/DI to trash can and ATO from that.

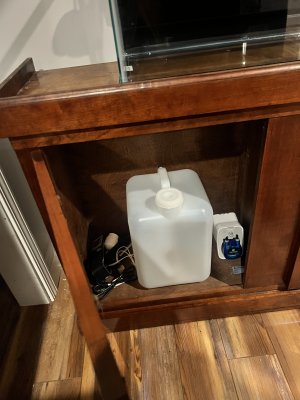
Not going to have the space for something like that. After sitting and thinking about it, I think I’m going to have to find a 5 gallon or more vessel that will fit under the stand so I don’t have to refill the thing so often. I’ll post pics of what I do with it and what I end up with.
 
That’s funny I have that exact same thing in my cart! I was looking hard at it.

How are you running it? Do you have a low level sensor in it?

Edit:
Well, I tried and tried to connect to the apex and it’s just not working.

I went through my leases and there are 35 of them. I typed each IP hoping to find the log in screen but no joy.

It’s probably something with my network. As of now, I can see the green link light, and my network shows some activity on that port. It’s just a matter of finding the correct IP.

If anyone has an old school apex or apex jr, can you do me a favor and read me off the first 6 digits of the MAC address? It’s just the OUI and it’s not specific to the device so it isn’t dangerous information. It’ll help me narrow down what is in the list of leases here.

Also, I’m open to suggestions here. Keep in mind that I have no lcd display, and I don’t own a computer. I’m handling this all through an iPad.

Happy reefing!
 
Last edited:

How are you running it? Do you have a low level sensor in it
I know a guy who was running a jebau ATO with a bucket like that for a much smaller tank. it was a super slick set up but I never did get mine to that level. I always just manually added water to the 40g. Our new tank has a bulb/plunger ATO system. That will be interesting to learn... no low water sensor in the ATO tank currently though, I should probably think about that too.

1733241026252.png
 
I've used float valves in the sump connected to my Brute trashcan for years with no issues. There is risk as I've know people who have had the float valve stick in the open position and flood their sump with freshwater causing a flood and dropping the salinity but, knock on wood, I've never had that happen to me.
 
Thanks for all the replies! It really helps.

I decided to go with a peristaltic pump for the ATO. Going to plumb that into a 5g container I found. Eventually I will add a low water float to it. I don’t want to drill it, so I’ll likely just put one on a pipe and set it in there. We can figure something out at some point.

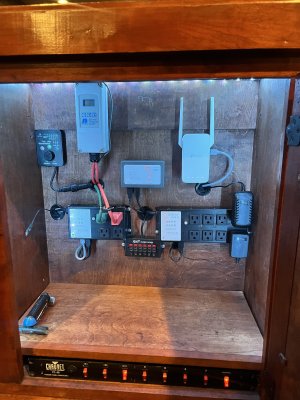
I did more work mounting the ranco and wiring for the heater. Usually I use at least two heater in case of failure, but since this is going to be in the tank, I’m going to stick with one so it’s less intrusive. I’ll use the ranco as the main controller with the apex as a back up.

I also ran the power wire for the light through the wall so it would look neater. STOP, before everyone comes for me with the pitchforks, yes I know it isn’t code….and no, I don’t care. I didn’t want to put an outlet up there. It would have been relatively easy to do, theres an outlet to tie onto right below it. But then I’d have to shorten the power cord and it all of it would have been this whole big thing. So I did it this way. Sue me. I can change it later if it really bugs me.

I had two of these power heads and controllers, but i eliminated one of them out of fear it would just be too much flow for the type of livestock I’m going for.

It’s slow moving, but progress is progress, everything is being labeled and cord managed while I go so I don’t have a ton of finishing touches to go back and do.

My next few tasks will be:

-apex display and print a mount.
-print tube holders
-print float switch holders for ATO
-wire floats
-plumb ATO
-program apex
-print egg crate
-print probe holders
-rock work
-sand


So, still a ways to go but a hell of a lot closer than it was.
 

Attachments

  • IMG_3352.jpeg
    IMG_3352.jpeg
    1.7 MB · Views: 11
  • IMG_3349.jpeg
    IMG_3349.jpeg
    1.9 MB · Views: 14
Today I was working on a couple of things.

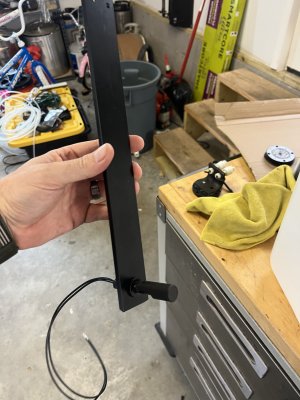
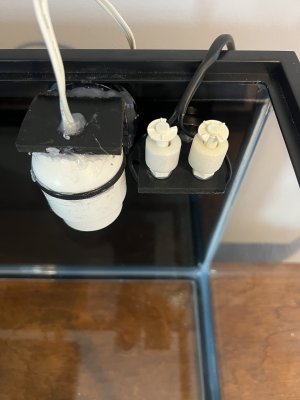
First I was working on magnet mounts for some float switches. I typically use 3-4 switches for the ATO. 2 for the working water level and 2 for the emergency. Just in case one fails. You can do this one of two ways. Either twist together both and run them parallel off the same input on the break out box, or run them in series with each float on its own input. I like running them on different inputs myself, if you have the room. The advantage to this, is that you will know which switch has failed and can replace it. If you run them in parallel off the same input, you won’t know when you have a failure until both have failed.

This build I am using 3. One will be for the working level and two will be for the emergency wired in parallel, to save inputs. The chances both fail will be slim. There will be other safety measures in use. One will be to shut off the ATO if it runs over a set amount of time. The other will be to notify if the ATO hasn’t come on at all in a set amount of time. Both instances will indicate a problem that hasn’t been caught by any of the floats.

I do have two issues with the floats that I need to address. Firstly, the wires on the emergency floats are too close to the floats for my liking. I may solve that by gluing the wires away or running them up through two more small holes drilled behind the floats to get them out of the way. The second issue is that I think I may have to drill a hole or two at the top of the snail guard to allow air to escape so I don’t end up with an air cavern in there and a float switch that doesn’t function because of it.

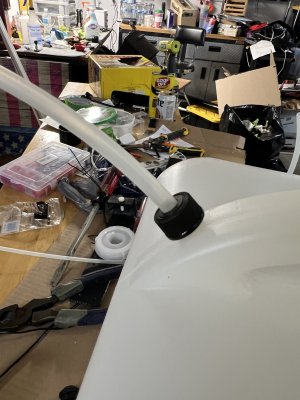
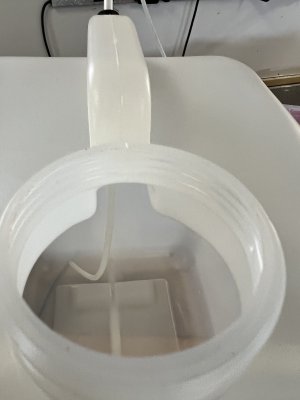
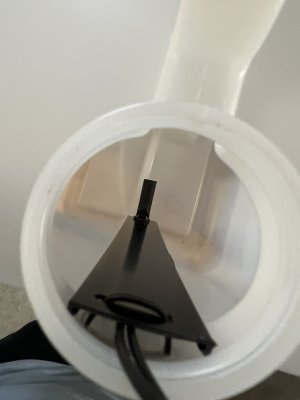
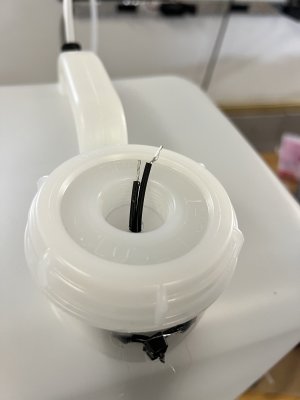
For the reservoir, I wanted a way to alert if the level got too low and I needed to fill it. I didn’t want to drill into the container at the bottom to install a float to prevent leaks. So I used this scrap of plastic I found from god knows what, cleaned it, and used that.

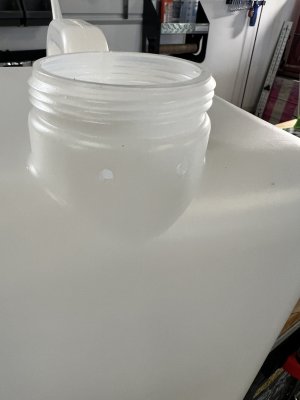
I mounted the float switch to the bottom, and then by drilling a few small holes in the plastic and the container I secured the plastic to the container with zip ties. I then drilled a small hole in the cap to run the switch wires through.

As far as plumbing goes, I ran some rigid tubing through the air valve in the back by drilling a hole in both and sliding the tubing through.


I do have a question. My peristaltic pump has two plastic barbed fittings for the inlet/outlet. What would be the best way to attach this rigid tubing? Can I just press it on there and secure it with zip ties the way I would with soft dosing tubing? Or will that leak?
 

Attachments

  • IMG_3355.jpeg
    IMG_3355.jpeg
    1.5 MB · Views: 7
  • IMG_3356.jpeg
    IMG_3356.jpeg
    1.3 MB · Views: 9
  • IMG_3357.jpeg
    IMG_3357.jpeg
    1.2 MB · Views: 4
  • IMG_3360.jpeg
    IMG_3360.jpeg
    1.7 MB · Views: 4
  • IMG_3362.jpeg
    IMG_3362.jpeg
    1 MB · Views: 8
  • IMG_3364.jpeg
    IMG_3364.jpeg
    1.8 MB · Views: 6
  • IMG_3367.jpeg
    IMG_3367.jpeg
    1.4 MB · Views: 7
There is risk as I've know people who have had the float valve stick in the open position and flood their sump with freshwater causing a flood and dropping the salinity but, knock on wood, I've never had that happen to me.

One will be to shut off the ATO if it runs over a set amount of time.

For the reservoir, I wanted a way to alert if the level got too low and I needed to fill it. I didn’t want to drill into the container at the bottom to install a float to prevent leaks. So I used this scrap of plastic I found from god knows what, cleaned it, and used that.

Your idea makes sense to me. Reminds me of the fresh water tank we had on our boat a few years back, the previous owner had filled it with pingpong balls to help better idenfity the water level, lol. So simple, but so helpful.

I like the idea of redundant back ups. My wife did ask about the feasibility of the float failing because it seems so archaic, but I've seen peoples electric ATO's fail too. I mean, catastrophe happens and having back up plans like you're doing is probably the best solution. I told my wife "You know, it seems simplistic, but it's a $7k setup normally and this is what they default to" lol.

I'd still prefer some redundancy and maybe an electric setup down the road but I need to learn my auto doser next first. baby steps.... I'm not used to these elaborate systems!
 
Back
Top