Black Friday Tank Build

Lilbitreefer

New member
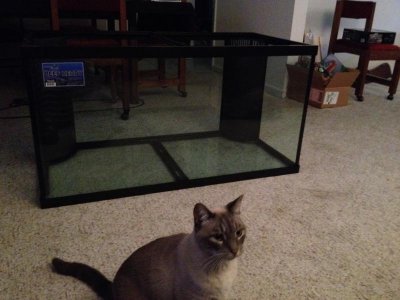
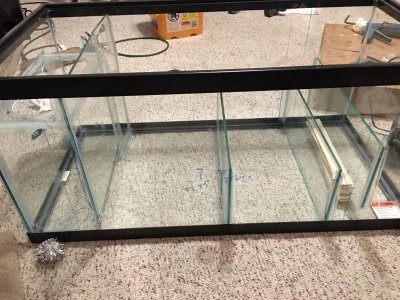
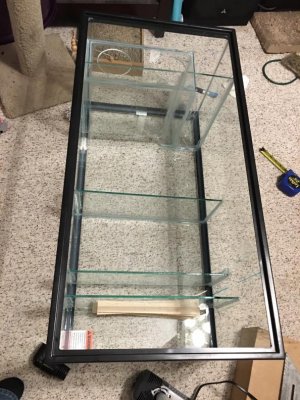
So last year I bought a freshwater tank for a pretty good deal and I told myself if I can care of this then I am going to set up a saltwater next year. Well the year came up and I have been working at getting the stuff for this new tank.

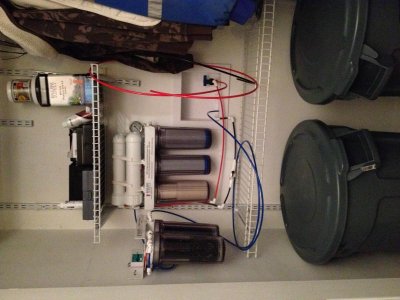
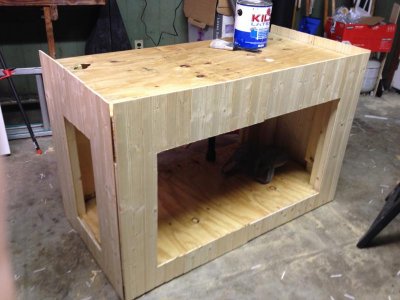
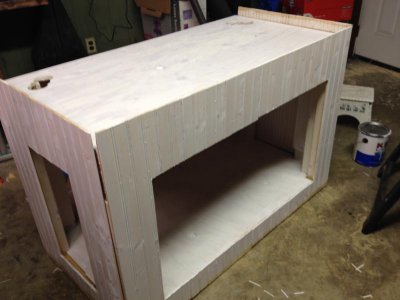
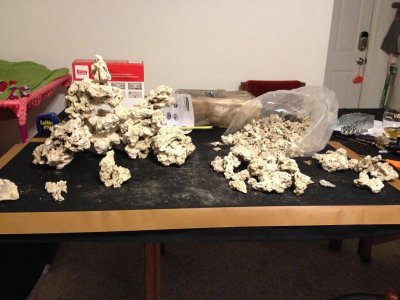
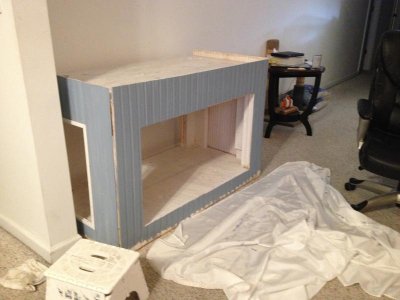
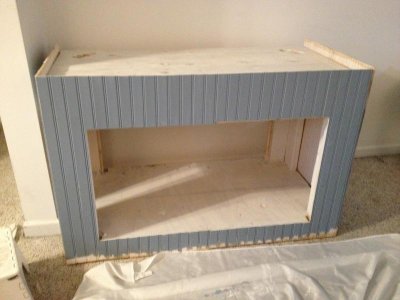
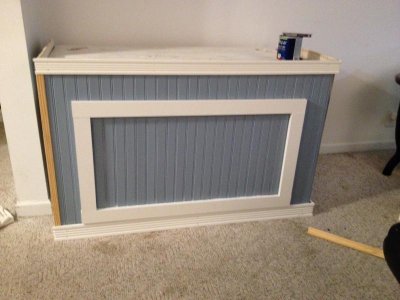
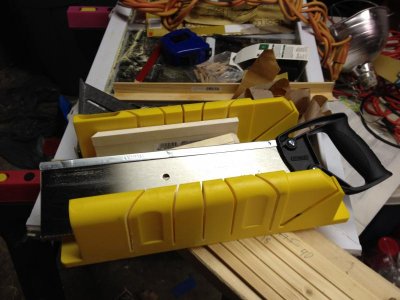
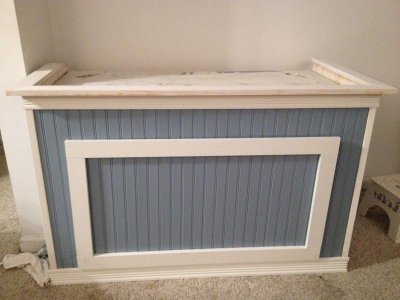
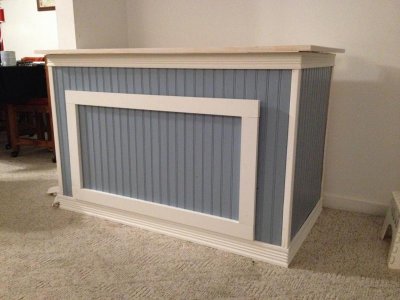
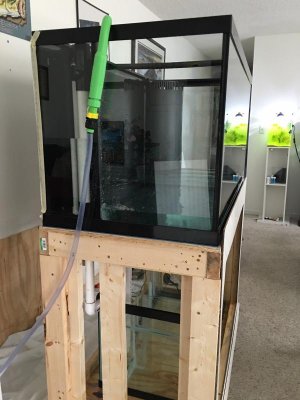
Right now I am building my own stand (still waiting for the tank) and I have set up a RO/DI saltwater mixing station. I kinda went crazy on the BRS website and probably bought about half the site worth of gear and junk...good junk..needed junk....ok I got a little "tim the tool man" syndrome going on. My boyfriend calls me Timmet since I always go for the biggest thing out there. Pictures to follow.
 
Ro/di

Ro/di

Picture of the finished product
 

Attachments

  • IMG_0621.jpg
    IMG_0621.jpg
    62.3 KB · Views: 6
Good to see your thinking things through and preparing well. That is the 150GPD, right? Nice filtration nonetheless. Continue with solid research and building a strong foundation as far as equipment and your set-up will be long-lasting enjoyment. :fish1:
 
Updates

Updates

Winter break came work gave me a week so here is what I have done in the last couple says.
I moved my tank inside the house. Finally got the panelling in and painted. It is almost done. All I have to do get some trim tack it on and then paint it up.

I am looking for some suggestions on paint color. I plan on doing white but was wondering if anyone had any other ideas that would look good.
 

Attachments

  • tank and cat.jpg
    tank and cat.jpg
    56.1 KB · Views: 7
  • unpainted.jpg
    unpainted.jpg
    57 KB · Views: 8
  • paint.jpg
    paint.jpg
    42.6 KB · Views: 7
Here is the rock idea I have made. The rock is curing at this time. Does anyone have any other ideas for the other rock formation. I still have at least another 24" in both directions.
 

Attachments

  • 11220766_10153313753703105_743593455191631191_o.jpg
    11220766_10153313753703105_743593455191631191_o.jpg
    66.5 KB · Views: 7
Major updates

Major updates

So I have been a busy bee these last few days and have some pictures to post. I am 80% done with the tank stand. Some major things I found out is that when painting two different colors, paint the pieces before attaching them together. Paint like pieces together.
 

Attachments

  • Paint tank b1.jpg
    Paint tank b1.jpg
    47.3 KB · Views: 7
  • tank front B.jpg
    tank front B.jpg
    48.3 KB · Views: 8
  • almost done.jpg
    almost done.jpg
    54.7 KB · Views: 7
Major updates

Major updates

So I have been a busy bee these last few days and have some pictures to post. I am 80% done with the tank stand. Some major things I found out is that when painting two different colors, paint the pieces before attaching them together. Paint like pieces together.
 
So since my dad lives in Seattle and me lacking in carpentry tools I had to improvise and save some money by going basic. While this job would have only taken me a day or so tops since everything was by hand It took a bit longer. I used a miter box, saw,power drill, staple gun, hammer, nail punch Some of this was thanks to a buddy and the stapler I found at lowes.
 

Attachments

  • Miter box.jpg
    Miter box.jpg
    56.9 KB · Views: 11
Done!

Done!

So this is basically finished. All I need to do it paint and some touchups. I also need to find a way of keeping the panel up. I was thinking magnets.
 

Attachments

  • IMG_0660.jpg
    IMG_0660.jpg
    62.8 KB · Views: 7
  • IMG_0663.jpg
    IMG_0663.jpg
    53.1 KB · Views: 8
  • IMG_0664.jpg
    IMG_0664.jpg
    56.5 KB · Views: 5
Not sure what is up but the site is not allowing me to upload anymore pictures.
So far I have gotten the tank up on the stand and bought my sump it's 40G breeder I got from the PETCO $/Gallon sale. It's is going on until JAN 23 (at least in NC) It seems I am not the greatest carpenter. The tank barely fits in with a 3" clearance. Needless to say I can get the tank in and out but when it comes to regular maintenance I am in a bit of a pickle.

If the measurements work out I plan on installing drawer rails so that way I can disconnect the pipes and slide the tank in and out with ease.
 
You could take a jigsaw, or circular saw, and cut a larger opening. Then just rebuild the front door.

Sure beats a do over. All I know, is once your sump is fully loaded, it's gonna be a major PITA for maintenance. You're gonna get real sick of pulling the whole tank out just to adjust a pump or something menial.

1 more hour of work vs a lifetime of PITA is an easy choice to me.
 
Updates

Updates

Ok so a lot has happened. I ended up having to completely rebuild my stand because there was just not enough room to fit everything. It was too short like me. I got my sump set up an I had the glass custom cut since I wanted thicker glass and did not trust my glass cutting skills. I ended up having to sand the crap out of it because it was literally 1/16th too wide to make it fit. well I managed to wedge it in and the pictures are the end result.
 

Attachments

  • IMG_0027.jpg
    IMG_0027.jpg
    97.6 KB · Views: 9
  • IMG_0029.jpg
    IMG_0029.jpg
    103.5 KB · Views: 7
Your 2nd try on the stand is the height I SHOULD have done. I have the same 120G and 40B. My space for the 40B is just enough but I'm wishing for another 2" or so!
 
Did you use baking soda to neutralize the acid? It may take a lot.

I would put the rock in a bin, fill with fresh water, add like 2 or 3 boxes of baking soda, let it sit for an hour, then rinse with a hose.

After that, whatever acid was still in the rock, has become inert.

If you have the money to pay for salt, you could now begin the process of letting it cure in heated sw for a month, doing 50% wc a week to be safe. Be sure to have a powerhead running.

Pretty much exactly what I did, and my rock looks pristine even after 3 months, no algae blooms, no smell. Just had to seed with some live rock and bacteria suplement.

Next week I will be doing some parameter testing, and if all checks out, I will be adding my first corals


Also, after you are convinced the rock is clean, you could cure in the DT. Give you something to look at. I hated having my tank empty, and the rock in a dark bin.
 
Water testing

Water testing

Doing my water testing and seeing what is going on and how it works. It seems everything works great but it is loud! Not sure what to so. I was able to silence a lot of it by sealing the overflow that goes to the socks. now I am just dealing with pipe noise under the tank. I was thinking about just insulating the pipes and insulating the tank a bit. It is not terribly loud but I want to make it quieter Any ideas. It is the durst method and that it just because the is how the tank came. Unless someone has any better ideas please chime in.
 

Attachments

  • IMG_0002.jpg
    IMG_0002.jpg
    58 KB · Views: 7
Is it the water that is loud? Or is it vibrations within the system?

I had to sound proof all points of contact with foam tape. 20 different things all vibrating at the same time made for one noisy system.
 
Back
Top