Blurred rim, suggestions welcome!

Me No Nemo

Premium Member
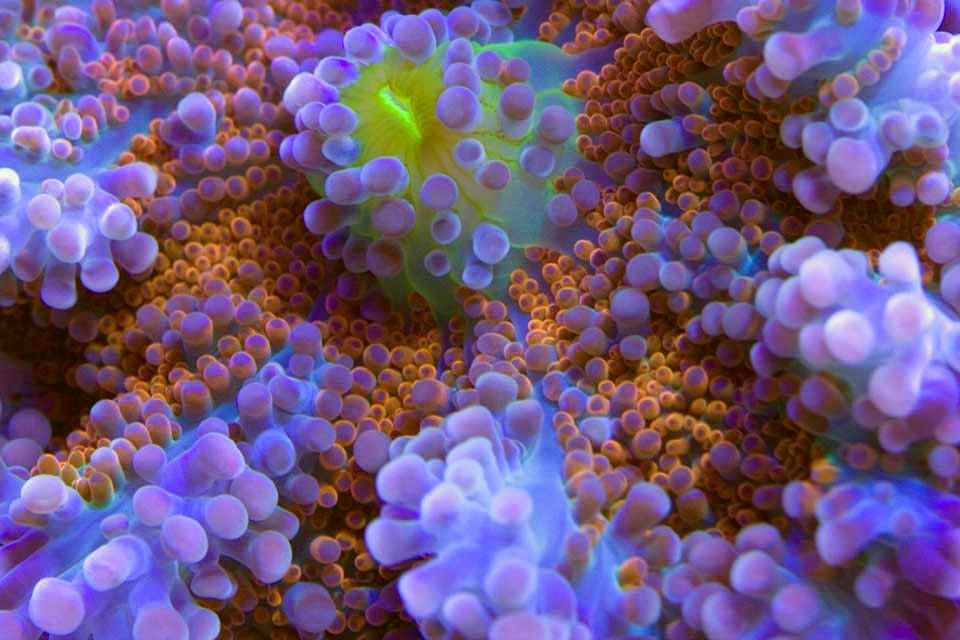
I've had my Canon 40D now for several months and I've yet to nail down the proper settings for shooting under 20K lighting. My photos seem so washed out no matter what I try to do. I have a 100mm Canon Macro lens. Is there a best setting to shoot under to get a more true color or is it all about Photoshop? Also, has anyone here used the A-Dep setting and if so any advice? I continue to get blurry edges. See below. All feedback welcome. Thanks, Marcye
Rainbow-Ricordia.jpg
 
Your best bet is to adjust the white balance, photographing in RAW format and adjusting with a RAW processing software is the most precise way to do it. You can do it in camera too, but I am a Nikon user so I have no clue how to do it in Canons.

Now, that's for the colors. The blurriness is something completely different. What f-stop/shutter speed are you using?
 
Thanks for the feedback.
Is Adobe CS4 Extended a RAW Processing software?
I've tried adjusting with a white board, an ExpoDisc and manually, but 20K is really hard to adjust to. Keep in mind I'm a total newbie. Thanks!
f/10 1/5 ISO 1000
Raw Format
 
Also, may I ask what noise reduction software is? Might the "clarity" setting in Adobe Bridge do the same thing?
 
Marcye,
As others have recommended, shoot in RAW on highest possible size so that you can adjust our white balance in software. Best way to reference white balance is with gray card, not white. I have a WhiBal card (the smallest) and it seems to do a very good job under my LED lights. You take one reference photo with the card on the place of the object you will be shooting (or next to it) and then you shoot all your photos. Then in your RAW software you can use the gray to reference the white balance. Otherwise I've found (for LEDs) the 'Cloudy' WB setting is as close as it can get from the predefined settings.
Photoshop comes with Camera Raw, which will take care of your raw files, however as far as I can tell you are not very familiar with Photoshop, so you might want to take a look at Lightroom instead. It has the same Camera Raw features and it is much easier to adjust white balance/contrast/color accuracy etc in it. It is much cheaper than Photoshop and here is a free trial of it (and the new version 3.0 beta is free for now too).

As for noise reduction, it is not like clarity under Bridge. Probably the best noise reduction software out there is Dfine 2.0. It can be used as a plugin for Photoshop, Lightroom or Aperture. You usually lose some sharpness when you apply noise reduction, but Dfine works pretty well:
http://www.kenrockwell.com/tech/dfine-20.htm

Cheers.
 
We have two separate issues here:

Issue #1: Color balance, you want better color, this can be achieved by changing the white balance in a RAW processing software.

Issue #2: Blurry shots, you used a shutter speed of 1/5, this is way too slow, some of your pictures may be coming out blurry because of camera shaking.
 
Thanks, all for taking the time to help. Terehz, thanks for the tip regarding Lightroom. I'll definitely look into that until I can master Photoshop...will give me an easier alternative until I learn Photoshop which I already have and I'd love to learn to successfully use it as well.

Here's what I've been doing.
I'm shooting in Raw then taking the pics into the computer through Adobe Bridge. There are a lot of options there including a section for adjusting Kelvin...which I'm going to do some research on. Here is the info on the pic that Bridge is giving:
Camera Raw Image
Dimensions: 3888x2592 or 16.2" x 10.8"
Bit Depth 16
Color Mode RGB
Color Profile: Untagged

Exposure Mode: Manual
Focal Length: 100.0 mm
Lens: EF 100mm f/2.8 Macro USM
Max. Aperture Value: f/2.8
Flash: Did not fire, compulsory mode
Metering Mode: Patter
Custom Rendered: Normal Process
White Balance: Manual
Scene Capture Type: Standard

When I'm done in Bridge, I transfer it to Photoshop, make some minor adjustments in either curves or levels, a small slide on tint (to try to neutralize some of the blue) and occasionally adjust the black a bit, adjust the length to 4" proportionally, then Save for Web and Devices. I've worked in Photoshop for years but just recently went to the new version. In the past I've mostly worked on B/W adjustments for newspaper photos, so the color part is really new. I'll read up more on shutter speed so I understand it better and get a grey card instead of white. Has anyone used the Expodisc successfully? Let me know if you see anything in the above I could do differently.
 
Okay, so here's the original then the same pic with temperature adjusted in Bridge to 20,000 K. I think the adjustment brought out more color depth, so that might be something to play with.

Rainbow-Ricordia.jpg


Yuma-with-Kelvin-adjustment.jpg
 
I'm not too familiar with PS, but this is my very quick results with the image just using some of my freeware. I played with the blue channel, contrast, brightness and saturation and got this... hope you dont mind.

Rainbow-Ricordiaedit.jpg


Jesse
 
f-stop

f-stop

Have you tried bracketing several shots at varied f-stops? Sometimes I find issues like this are a depth of field problem
Hope that helps-
T
 
Nice Jesse, yours is more "rich" looking. I'm studying the various elements of PS and will try out the things you did in your program. Thanks!

teesquare...my main goal was to get info on this so I'd know what to study. Thanks for the heads up...I'll be doing some additional reading on f-stops to understand better how to use them. Thanks :)
 
I find that I usually have to underexpose my images to get the saturation right. Either during the shot or using curves or levels in PS. FOr color casts if can't solve the problem in RAW then consider using a "color balance" layer in PS. I forget what compliments what but for example if the shot is too blue you add yellow or vise versa. In the "real darkroom" that is what used to be done. You slip in a colored filter to eliminate a cast. For the 20,000 gallon tank thread I had I used a P&S and didn;t have RAW. I was able to color correct pretty well using a clor balance layer.

Also for noise reduction look at "Neat Image". Last I looked it was free Using a trial version which forces you to save as JPG - but for most purposes that's fine). I always run it first then sharpen afterwards. You can retain some of the sharpness that way and then you are actually not sharpening the artifacts or noise inthe first place.
 
It's hard to tell what's going on (if anything) with IQ at the edges of the photo unless you're shooting at something flat. From this image, it looks like a lot of your subject near the edges is raised beyond the field of focus (you're focussed at the bottom of a cup-shape). I can see points down in the valleys that are fairly sharp.

I don't know anything about that lens--if it has a nice flat plane of focus or whether it's more round. Also, it's not uncommon for sharpess to start taking a dive past a certain point as you stop the lens down.
 
f-stop....................

f-stop....................

This is a depth of field issue. You can solve it simply by bracketing several shots at varied f-stops, by placing the camera in "A" or aperture priority, and then bracket shots ( not famillar with you camera, see the users guide for more on this)..............You can then select which image you want to save, and post -process via Photo Shop or any number of "fix-ers" out there.
But FIRST - you have to get the shot sharp, and in focus. All the "un-sharp mask" in the world can't fix too shallow a depth of field

If you are just using the camera in the "P" (program) mode, then adjust your focus points in the menu to as many sensors as you have available in the camera. That will work to do the same thing, while in P mode.

are you talking about stacking? If so I think shooting in Manual would be better to keep the exposure consistent (when changing your focus point).
 
Sure - another approach may be - stacking, tho that is not one I have used personally. I am not sure what level of experience the OP has with his gear. So - I recommeded one approach to solve the problem that I am familar with. There are others I am sure.

Bear in mind that this is and F-stop ( depth of field ) issue, where the center is focused, and the the further away from the center you go, the image become fuzzy. So - placing the camera in full manual mode gives you one shot, then you must manually make the change to f-stop settings again, and so on.
Again - I am not a Cannon guy, so there may be settings/terminology which varies from users guides among the brands.
I shoot outdoors, any weather with an Oly E-3, and fast sporting or lower light stuff with a Nikon D-300
T
 
AFRICAN%20CICHLIDS


OK - now - somebody teach me how to load an image to this site, and I will show you some examples of what I mean about DOF (depth of field):eek:

T
 
If you click on the "post reply" link on the left under the last post it brings a new window. In the "tool bar" is a tab to insert an image (yellow with a small mtn and moon)...or you can use a host like Photbucket and just copy and paste the image tag.

Yeah, I understand DOF (not sure if the poster does or not). I was implying to use manual if he was going tbe using different focus points for the stacking method. Sure, with a closed down F-stop and using the hyperfocal disatnce he could maximize his DOF in one shot but the shutter peed mat be too slow and/or it is possible that with the macro and magnification even at it's best it may not be totally sharp front to back. I do more landscape and am lazy so i just dabble with Macro...:)
 
Thanks for the help on posting pics here!

I guess I don't understand how the settings you are taking about would work....? Well, I do - but maybe I am thinking about a bit more automation for the user...?
His issue is that the center of the photo is sharp, and very soft focus as you move outward from the center. In a previous post I tried to lay out how to look in the manual, and activate ALL focus sensors, and then set the camera for aperture priority. There should be a button for bracketing shots on the camera body ( sorry - again - I am not a Cannon guy or I could be more specific)
So - the autofocus and bracketing should give one several shots to choose from. No Dig. SLR I have had ths far interprets light exactly the same every shot. So, you should get a varierty of shots at sveral light readings (tough when shooting tanks anyway- ANY water movement near sufaces alter it continuosly) Additionally, if he uses a pop-up or slave flash, then the need for a slower shutter is eliminated.
Make sense? Do you use a Cannon?
T
 
I shoot Canon. On my rig I need to press two buttons at the same time and then I can set the spread for the Exp bracket. I think on my 5D it was one but I don't recall.

I think for automation the bracketing would be nice (bracket a lot even shooting RAW). As for the falling off of sharpness it may actually not be a DOF issue but just the quality of the lens or a result of the fact that most lenses have the best sharpness at the center of the image and fall off towards the edges.

I totally get what you're saying though.
 
Back
Top