captbunzo's 47g tank log

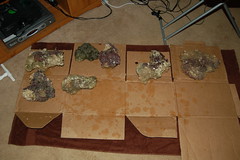
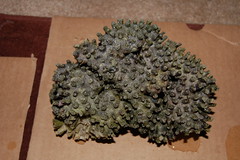
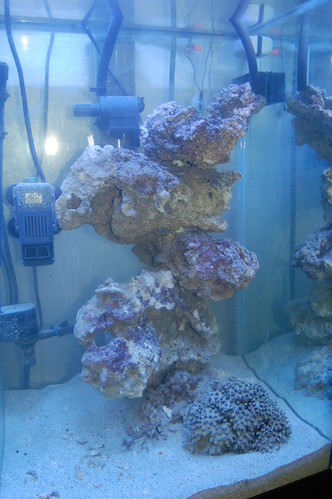
Well, I got an amazing pile of rock from Youngsilver @ Aquatic Design Aquariums in Plano, TX. I got a great deal on it and it is BEAUTIFUL rock! Thanks a million, Jonathan!!!

http://lfs.mycomas.com/index.html?StoreGroup=DFW

If you are ever in the area, check out the store. It was really nice. And the guy in charge of the place was a crackup.

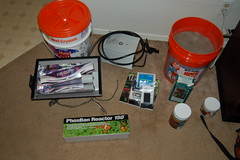
Today I need to aquire a small list of items:

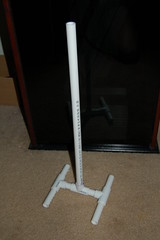
   1. 3 1/2 inch PVC tees
   2. appropriately sized hole saw
   3. 12V transformer to run the fan in the MH pendant
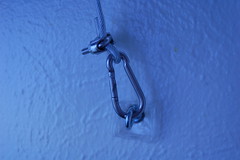
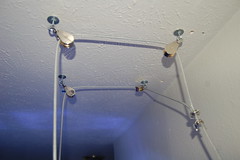
   4. 2 hooks for my pendant hanging contraption
   5. digital & grounded light timer

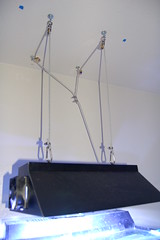
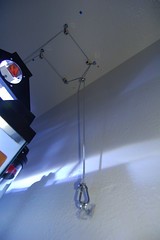
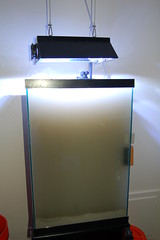
Sunday I picked up a nice pile of supplies for hanging the pendant from the sealing. I am using 3/16" inch coated wire rope and am going to try and work up this pulley setup for raising and lowering the light.

I will post some pics...
 
<a href=showthread.php?s=&postid=8132835#post8132835 target=_blank>Originally posted</a> by MyMonkey
I would run a filter to help clear the silt. You can save the patience for other things. :)
Yeah, I'd go with you on that. But I hate to spend the extra money on one since I have one in Ardmore that would work. Grrr!!! This would be a good time to have a H.O.T. Magnum canister filter. Grrr!!! :)

Ok, I got some work done tonight, but not as much as I hoped due to complications with a cable installer. ANYHOW.... Here are some pics. And as always, click on the pics for bigger versions, and a couple more...

First, from a couple of days ago, here is a pic of newly arrived and unpacked reef goodies. Fun, fun fun!!!


And here are some pics of my lighting setup, setup. I got a nice little pulley system rigged up for raising and lowering it. I AM going to have to put some sort of faux canopy around the top so that I am not blinded by the light when watching TV nearby.


I am going to have 2 eyes in the wall for hooking the light at normal or raised up level.


And lastly, the skeleton for my pillar. By the time I go to bed tomorrow, this sucker will be in the tank and stacked with rock.


And at least I can see the rock a bit through the dust in the water. I am amazed at how adding rock to the tank helped the water clear. I think adding a nice pile of bacteria into the water helped a lot.

Anyhow, I better go to bed now. :D
 
Pillar Construction

Pillar Construction

Worked on the pillar tonight. Of course, after I did so and put it in the tank, the tank was all nasty cloudy again. Anyhow, here are some resulting pics.

Here are some pics of the rock in the tank before I disturbed everything again.


And for my first official coral in the tank, here are some hitchhikers - some big zoanthids, protopalythoa or palythoa of some sort. Travis probably knows the real name. :D


Here is a shot of all the rock right after I pulled it out of the tank, before I started drilling holes, etc.


I ended up using all of the rocks for the pillar except for the second rock in the top row. It is a really nice dead coral specimen. Take a look at a closeup and extreme closeup here.


And here are some pics of the pillar halfway and almost complete. Of course, I forgot to take a pic after it was all the way complete. For the last piece, I only drilled halfway through and then trimmed the PVC so that the last piece can sit nicely on top of the pile. I will get a shot when the tank clears up again.


And lastly, here is the silly cloudy tank. I will bring a power filter back with me over the weekend and stick it on the tank. It might be clear by then. But I am sure that it won't hurt to run it for a month or so.


And in this flickr photo set, check out some more pics of the rock. Live rock is so cool...
http://www.flickr.com/photos/captbunzo/sets/72157594261988730/
 
Looks like everything is coming along. If it were me, I would have a canister filter running on that. I borrowed Slone's once and that thing was great.
So far so good it appears. Keep us updated.

JR
 
Hmmnn... Got a store just down the road, I wonder if they are cool enough to let me borrow something. I will have to check it out tomorrow after work and see what they can do.

Thing is - I hate to buy one just for the occassion. Perhaps I should have a canister filter on hand JUST for these occassions. :) Or perhaps a trip to walmart to pick up the cheapest power filter they have would work too. I could get some extra filter pads and use them in place of the bio media and carbon, since all I am really looking for is small particulate removal.

Grrr.... :)
 
Oh yeah - I should add that I CAN'T WAIT to see how my rock pillar looks without the dust in the way...

And btw, it was really a lot of fun building the pillar. If it turns out as well as I think it will, I may have to do more of this sort of stuff in the future, or similar concepts that is.
 
filter media

filter media

Paul,

I wouldn't let it just sit and settle by itself. I would want to physically remove those particles. If you don't, and you buy any active sand sifting goby, and you'll have that in the water column constantly. Get somthing like this:

filterpad.jpg


I use this between the baffles in my sump. It works great. Go with the larger 100 micron size, the 50 micron clogs faster. I have been buying this from the link above. But, Steve at WetPets has started carrying it as well. Good man Steve!

Ronnie
 
You guys inspired me and I gave me a GREAT idea. I have a phosban reactor here, which is practically a simplistic canister filter. So I went to petsmart, picked up some cheap filter floss, and got it setup in the tank. I wish I had taken the extra time to go to the LFS around here so that I could find some better stuff. For one thing, I have no idea on the grade of this stuff. I suspect that I could be getting more out with something better.

But it's better then nothing. And is definately helping SIGNIGICANTLY. Actually, it's quite impressive.

And, of course, pics! Here first is a picture of my makeshift canister filter...


I got this setup on the tank and then went to Judo class. About 2.5 hours later, I came back. Here are some before and after pics. First of the filter.


And then of a side view of the rock...
 
You guys are my heros - the makeshift powerfilter worked WONDERS overnight.

All I have to say today is: All your pillars are belong to us!


I am VERY pleased with how my pillar has turned out. This technique will probably be seriously used in my big tank that I do someday.... Thank you much for sharing your success, pwhitby, so that I could copy your effects here!
 
Very nice, congrats. Don't know why my link didn't work for you, it still takes me to the page it's s'posed to. That's good thinkin on the improv of the reactor.

Ronnie
 
Crazy stuff - still takes me to the ballast page. Must be some fluke with the MD site... :)

Anyhow, now I just have to be patient for 2-3 weeks and wait to put some critters in there...
 
Something I did to clear my tank up was to put that filter floss stuff in between my baffles in my sump. On the new tank I wrapped the intake of MJ and the return pump with the floss. Both worked well for me.

You are going to have a nice setup there Paul. Keep us informed.
 
Love the pillar idea!! I could see building several pilalrs for a reef wall! Yet another good trick learned here on RC!!

Cool shaped tank. My next tank will be in the 90G range and built into the familyroom bookshelves. Due to the space, it will also be pretty ube shaped.

May have to incorporate this pillar technique...

T
 
Thanks for visiting my tank log! I love the pillar technique as well and plan to use it in many tanks in the future...
 
Hey Paul. Just got done reading through your tank thread and that's awesome. I wish I would have seen that before just redoing my rock on Monday :( 
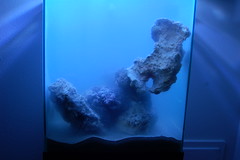
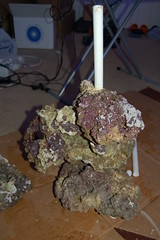
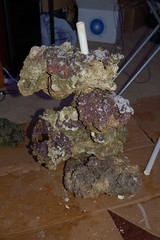
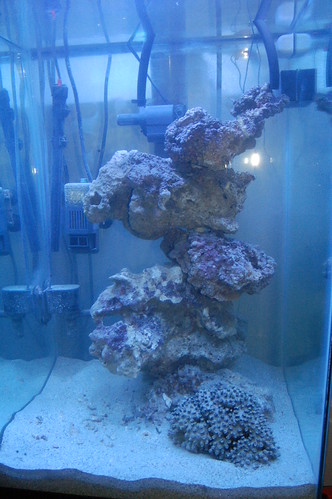
Oh well, that's something that I might look into doing in the future since it's such a great idea to be able to place lower light needing corals at the bottom and more photosynthetic at the top (SPS).

Look forward to seeing it with some critters and coral.

Adam
 
Back
Top