Cilyjr 320 gallon on the central coast

cilyjr

Active member
First, I thought I had lost this account but thanks to the mods I was able to get back in!

In 2018. I packed up and moved from Rhode Island to the Central Coast of California.

I'm all settled in now with a new home and have been up and running with a 320 gallon display. All of my equipment is in a shed connected to the house because it is a very mild climate here. This system has been running since March of 2023. So as of today it is about a year and 4 months old.

eaed6bd4-4ca6-46cd-9cd3-e7584ed5a872-1_all_2157.jpg

Tank
The tank is just shy of 320 gallons 67x36x30.
It is plumbed through the back wall into a 4x8 lean-to style shed that houses all the equipment and connected frag tank. The sump is a standard 75 gallon AGA aquarium that I put baffles into.

Lighting
Display is lit with 6 Reefi uno 2.1 and four 54 watt t5 lamps.
Frag is lit with AI 3 hydra 32 hd.

Flow
Four ecotech mp40qd are all on the back wall and 2 jebao scp-150 on the sides. Jebao dc8000 return.
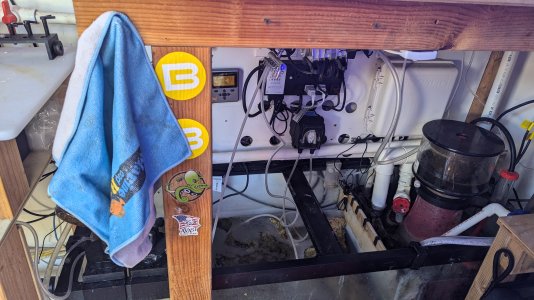
Control
I had been pretty heavily invested into Neptune systems since the aqua controller 3, as a result, I Am familiar with their environment. I stuck with them. I kept a lot of the pieces as I moved across the country and have kind of frankensteined it together.
Apex pro brain
2x eb8
Mxm
Pm1
Trident
2x dos pumps

Filtration
The skimmer is a bubble magus curve 9 elite.
Aqua UV 57 watt
Poly fil jammed between the baffles
And all the rock.

Additive
Avast Marine K2 kalkwasser stirrer
ESV B-ionic 2 part
Both controlled by the apex trident
I had previously used a calcium reactor when I initially set up but have decided the pH benefit from removing it has been positive. When I first set up I was using the kalkwasser reactor and the calcium reactor in tandem. When I remove the calcium reactor I switched to adding two part. I went with the b-ionic over diy as it states it has many other trace elements.
 
The house had been a rental for about 13 years before we bought it. So it definitely needed some TLC. When looking around the floor plan, I was having a hard time finding a place to put the tank and also have the room I wanted. I had recently visited a member of the reefing community in my new city, he had his entire tank and system in a shed. That got me thinking. This corner of the house was big enough to fit and 8 ft by 4 ft shed. The space was kind of unusual anyways so it's solved two problems.
20200413_121442.jpg
20200511_153308.jpg

This is later. Somewhere along we dug a 2000 gallon garden pond in the backyard too.
PXL_20230320_000933252.jpg
 
3 sch 40 PVC pipes connect the display tank to the shed. Two of them are 1.5-in drains and one is a 1-in return.
It is a bit crowded in the shed and I would like it to have been a little bit bigger. 6x8 maybe instead of 4x8 but it's adequate.
Even though our temperature is pretty mild here rarely dropping below 45° and almost never getting above 80°. I did heavily insulate the shed. Then I plumbed in a sink.
20200520_144500.jpg
20200520_144507.jpg


It's gone through a few updates but here's how it is today.
PXL_20240731_234817799.jpg

PXL_20240731_234746072.jpg
PXL_20240731_234813236.jpg
 

Attachments

  • PXL_20240731_234757836.jpg
    PXL_20240731_234757836.jpg
    1.5 MB · Views: 2
Power was another issue. The house was built in 1956 and had the original 100 amp push-O-Matic breaker. Push-O-Matic or notoriously bad for being stuck in the on position. Meaning they can burn down your house.
Although I work at a large HVAC/plumbing outfit, our license only covers basic electrical from the panel to your furnace, air conditioner, heat pump so I had to pay somebody to replace the panel. Fortunately we've got some good relationships with electricians and I got a 200 amp eaton panel installed at a pretty good deal.
The shed has a dedicated 15 amp. The display tank shares the 15 amp for the room that it's in.
I did however run a generator receptacle to the A phase of the panel. I purchased an interlock generator switch. It's a more simple way of doing it safely as opposed to a full transfer switch.
PXL_20230209_005506741.jpg
PXL_20230209_005509343.jpg
 
Wow, just wow. Can't wait to see more.

What did you use to cover your overflow? It looks like some kind of drop in cover????
 
Wow, just wow. Can't wait to see more.

What did you use to cover your overflow? It looks like some kind of drop in cover????
Okay, that was a whole project on its own. I like the back of the glass to be black, which would normally mean scraping the overflow. Unfortunately it is too far back for me to reach comfortably without laying on the tank and I'm 6'1.

I decided to make the overflow look intentionally covered with something. Because if it's just black acrylic covered with coraline algae while the glass itself is scraped, it looks haphazard and unintentional.

At first I had built something out of hydraulic cement to try to look more like rock and it just did not last. I was afraid that that would crumble in my tank and be unable to get out.

I had seen somebody here many years ago use Stone veneer to cover the back of their tank and I thought the look was nice. So I figured I'd try it. Because the tank was already wet I had to assemble them externally and place them in but because the overflow is 3 ft back from the front and almost 3 ft tall I had to build it in sections.

Everything is held in by gravity. Because it's actual granite Rock. It's heavy so it stays in place. And the shape of it fits right around the overflow. I built it in sections that are about 8 inches tall.

I bought these in sheets at Lowe's in the outdoor area. They come pre-glued together with an acrylic style glue. So they are fine to use as is. That said, I had to resize these so I took those sheets apart and removed most of the acrylic glue. I glued them together using RTV 108.

1000001441.jpg
1000001444.jpg
136a0d6c-5b88-4372-9c54-2fd1235e8be0-1_all_1912.jpg
 
Okay, that was a whole project on its own. I like the back of the glass to be black, which would normally mean scraping the overflow. Unfortunately it is too far back for me to reach comfortably without laying on the tank and I'm 6'1.

I decided to make the overflow look intentionally covered with something. Because if it's just black acrylic covered with coraline algae while the glass itself is scraped, it looks haphazard and unintentional.

At first I had built something out of hydraulic cement to try to look more like rock and it just did not last. I was afraid that that would crumble in my tank and be unable to get out.

I had seen somebody here many years ago use Stone veneer to cover the back of their tank and I thought the look was nice. So I figured I'd try it. Because the tank was already wet I had to assemble them externally and place them in but because the overflow is 3 ft back from the front and almost 3 ft tall I had to build it in sections.

Everything is held in by gravity. Because it's actual granite Rock. It's heavy so it stays in place. And the shape of it fits right around the overflow. I built it in sections that are about 8 inches tall.

I bought these in sheets at Lowe's in the outdoor area. They come pre-glued together with an acrylic style glue. So they are fine to use as is. That said, I had to resize these so I took those sheets apart and removed most of the acrylic glue. I glued them together using RTV 108.

View attachment 32404156View attachment 32404155View attachment 32404154
Very cool. Looks great.
 
Very cool. Looks great.
I know it is not to Sam's liking, but I do. when it covers with Coraline algae which it pretty much is at this point, it looks intentional.
I'm kind of particular about that. Hiding all of the cables in the display room was really important to me. I want to see as few mechanical pieces as possible.
The shed is a different story. There are cables all over the place there.
 
Back
Top