DIY LED Lights

Thanks for the write up.

You're welcome.

I figured I would also include all the issues, since they happen.

I configured the Bluefish app so that all of channels now reflect the actual colors I am using for each of the channels. I also added a program to the schedule to test the ramp up/down features. I am doing this with just one light right now.
 
Adding The Fans

Adding The Fans

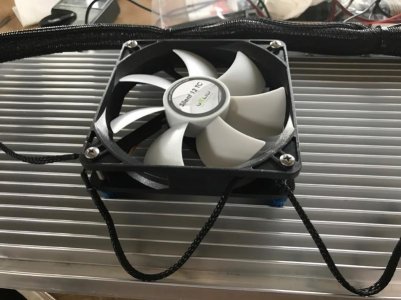
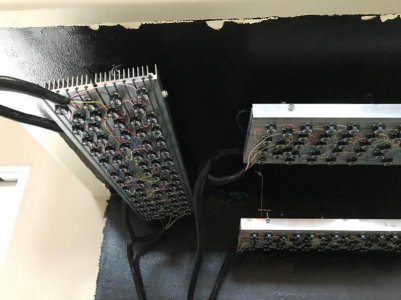
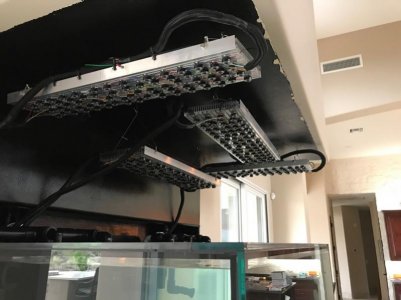
When it comes to quiet fans the Gelid fans can't be beat. You can't hear them running. In addition, I get the temperature controlled fans. These fans when 12Vdc is applied will spin at a slower rate, once the temperature of the heatsink increases the temp probe on the fan will sense the heat increase and spin the fan at a faster rate. As the heatsink cools down, for example during the night ramp down, the fan will slow down again.

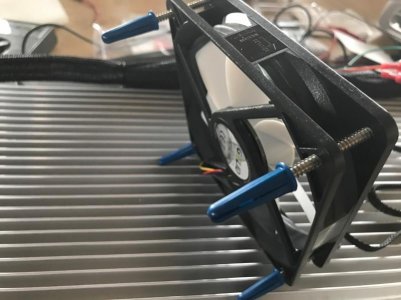
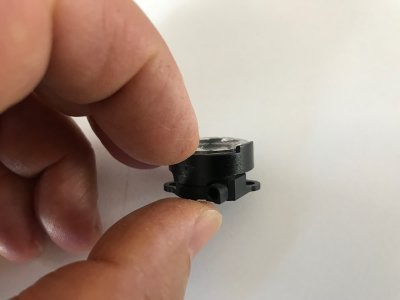
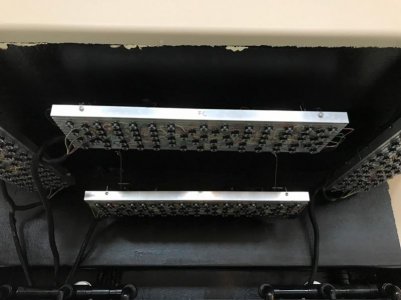
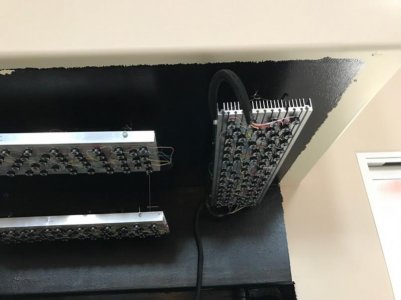
I've always thought about what is the best way to attach the fans to the heatsinks. In the past, I would drill holes through the heatsink and run bolts to hold them in place. This time, I came up with a new idea. Drywall anchors, yep simple and easy, no drilling required. You need the type that have 4 sides to them. The local big box hardware stores didn't have what I needed. I had a couple of them and I used my magnify glasses to read the part number and Amazon to the rescue.

You need the 4 sided drywall anchor because as the anchor expands it needs to expand in all directions. The 2 sided anchors will twist and not lock into the heatsink fins. With the screws tightened down I can actually lift the fan and the heatsink comes up with it. The heatsinks weigh at least 20lbs.

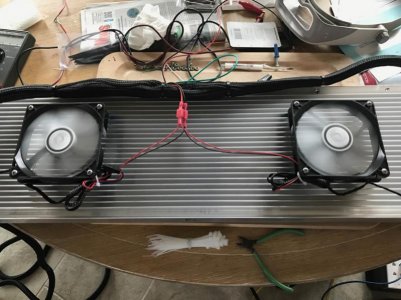
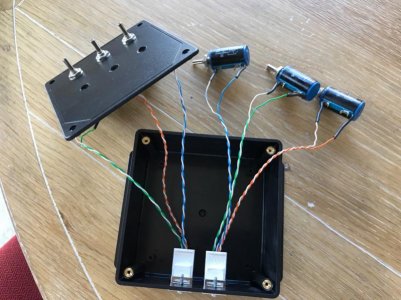
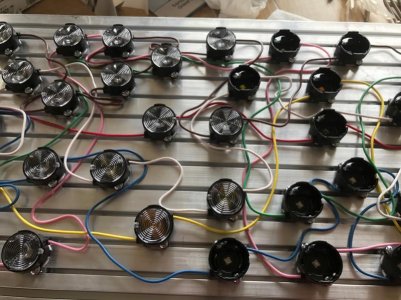
When I run my 12Vdc wires to power the fans, I have the parts and tool to make the connectors that connect to the power connector on the fan. This way when a fan needs replacing in the future, it is an easy swap. No crimp connectors or soldering required, did I mention I hate soldering lol.

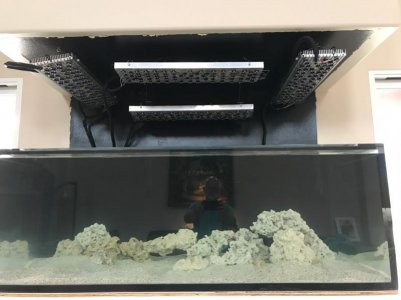
So there you have it a simple and effective way to connect your fans to your heatsinks.
 

Attachments

  • IMG_7833.jpg
    IMG_7833.jpg
    55.9 KB · Views: 1
  • IMG_7834.jpg
    IMG_7834.jpg
    66.3 KB · Views: 1
  • IMG_7836.jpg
    IMG_7836.jpg
    77.7 KB · Views: 1
All 4 Lights Tested

All 4 Lights Tested

Still no resolution on the dimming issue, I haven't heard back from MeanWell yet.

I did connect all 4 lights to the Bluefish dimming controller. I have a schedule running in the Bluefish and all the lights are working great. Once I figured out how to program the various dimming options, I do like the Bluefish controller. It has a fast forward option that runs through the entire program to show you the whole sunrise to sunset and nighttime settings. Nice feature.

On Wednesday the 250 gallon will be installed. I am planning on installing the lights over it after that and then testing the dimming issue over the tank to see how bright the lights are at the low end.

Looking at the overall cost to get another 3 controllers and the stereo to RJ45 connectors, I thought that maybe going the route of changing out the power supplies could be a viable option. I could sell the used supplies on Ebay and recoup some cash. MeanWell has a couple of other series power supplies that will dim to 0, the NPF and PWM series, but unfortunately the lowest power rating is 40Watts and my UV, WW, Red and Green LED's need 25Watt supplies. So that option isn't going to work. Plus getting those supplies would not be a guaranty that the Bluefish controller would work correctly. I could still have the same issue. If the dim to 0 supplies would have been an option I would have only ordered 2 of the same size supply and then tried them on 2 lights to see if it worked. Either way, it doesn't matter.
 
Another Test Idea

Another Test Idea

Since I know my design with all four lights is working, I decided I am going to test my design with the older style controller that I have. All I need to do is to make an interface from the older controller to my current layout. Shouldn't be too hard. I have several lights that work with the older controller. Just need to pop open one the power module boxes and look at the wiring. If I have time today I will give it a try.

What I want to see is if the issue is with the MeanWell supplies or the Bluefish controller. If the older controller works, then I can go back to the owner/designer of the Bluefish controller with the data. If it is MeanWell power supply, then I can go back to them with the data.

I ran all four lights through the schedule yesterday and into last night. The lowest light level that the Bluefish controller goes to is way to bright and instead of having that nice smooth transition through sunset to darkness is not going to work for me.
 
The schematic shows 3 outputs from the Bluefish containing 6 channel signals. Is there a common ground?

Have you tried pwm levels?
 
Never mind, I see the ground in the plug.

The ground in the plug is to ground the heatsink to ground. So if there is an issue I don't get zapped.

The maker of the Bluefish controller, Spencer indicated to me that all the minus signal ports are tied together in the Bluefish controller. I did do a test to measure resistance on the minus signal ports including my wiring and it appears that there is a common minus signal ground.

So I build a connector to make the dimming signals from the older style controller I have work with the wiring setup I made for the Bluefish controller. The good news is that my wiring including the MeanWell LPF supplies is working correctly. With the older controller I can get the individual channels to dim to zero when all four lights are connected together. So the issue is with the Bluefish controller. I sent my results to Spencer asking for help to see if he can do some testing to see why the Bluefish controller is not working correctly. I'm hoping he will respond and have a fix.
 
The schematic shows 3 outputs from the Bluefish containing 6 channel signals. Is there a common ground?

Have you tried pwm levels?

Yes, I tried both the PWM and Analog 0-10Vdc signals. Neither one changes the output voltage level I am seeing when the Bluefish controller should be sending a 0 volt signal. I also tried setting the minimum level to something just above 0 to see if that would make a difference. That didn't help either.
 
Apex Controller

Apex Controller

So MeanWell indicated there isn't anything that they can recommend adding/changing when using the Bluefish controller. The owner Spencer (Bluefish) has not been returning my emails.

So, in doing some further investigation, I'm thinking that an Apex Controller might be my other option. I did some math.

In order to make my current setup work, I would need to get another 3 Bluefish controllers, the cables needed to convert the stereo jacks to RJ-45.

Bluefish - $200/each - $600
Icecap Stereo to RJ-45 (I have 3 already, but I would need 4 per Bluefish controller) - $12/each so I need another 13 - $156
The Bluefish has 3 output ports, because of my setup I would need to split the 3/4 channel output so I need 4 stereo splitters. $6/each $24

Grand total is $780. Plus I would need to program each unit. If I am going to spend that much, I might as well get an Apex Unit ($800) plus the additional VDM module ($100) so I can control the 6 channels. I would also have 2 spare channels I could play with. Maybe make a separate lunar light. I would also need a couple of the 75' USB cables for Apex at $65/each. I would want the VDM modules close to the tank and my fish room where the Apex would reside is 45-50' away from my 250 gallon. So for an extra $250 I can get the Apex with what I need. My plan was to get an Apex at some point. Maybe now is better.

I have been reading up on how to program the Apex unit to control the VDM outputs for DIY lights and it doesn't seem all that difficult. I use to write the service control/support programs when I worked for HP years ago for their Magneto-Optical Library systems. Just need to dust off some brain cells. Worse case, my middle son works for MicroSoft programming the Hololens (augmented reality) product. I was I able to try the Hololens product the last time I was up in Seattle, awesome product. I could get him to help me code the Apex. He wired up a Raspberry PI unit to watch over his vegetable seedlings, controlling the LED lights and measuring moisture etc. He loves to program. I think he would jump at the chance to program an Apex unit.
 
Success!

Success!

So this past Saturday Jimmy (Sisterlimonpot) came by my place with his Apex unit, an oscilloscope and a bunch of ethernet cables. Our intent was to test the Apex variable ports V1/V2 & V3/V4 to see if they would dim and brighten my LED light. The more important aspect of this was at the 0Vdc level, which is where I've been having my issue with the Bluefish controller. We needed the Apex to go to 0Vdc so that the lights would turn off. Now as a reminder, the Bluefish with one light attached would go to 0Vdc and the LED's would glow and some channels were pulsing. With 2+ lights the Bluefish controller would not go to 0Vdc and the LED's would stay on.

In order to make the Apex variable ports to work with my lights, I needed to make an interface cable to make the pin outputslook like the Bluefish controller output, since my dimming circuit is setup to work with the Bluefish outputs. I made a set of interface cables and for some reason the female RJ-45 jacks internally were wired in a non conventional way, so that took us awhile to say the least to figure out what was what with the connectors. Once we got past that hurdle we hooked up the Apex and turned on one light to 100% and then turned it off. Which should have been 0Vdc. Well that didn't happen. The output of the Apex with just one light was hovering around 0.5Vdc. At that level the LED's are on. So the Apex was performing worse than the Bluefish controller. Not good.

So I hooked up the Apollo Reef controller to show Jimmy how that controller works. Now as a reminder that controller will dim the LED's to 0Vdc with one or all 4 of the lights connected. We also hooked up the Bluefish controller to measure the output voltage. Now with the Bluefish controller still connected we decided to hook up the potentiometers to see how the output voltage looked. There was some discussion and testing on how to connect the potentiometers. After a bit of testing we connected them between DIM+ and DIM- of the MeanWell power supplies. We adjusted the resistance of one of the potentiometers and bam the LED's turned off at 0Vdc. We did the same with the other potentiometers and the other channels turned off. We turned the LED's back on full (100%) and looked at the voltage and the output voltage looked good. It was either at 10Vdc or close enough. We also tested the Apex with the potentiometers and we were able to get the output voltage to go to 0Vdc with all lights connected.

We had the solution. Now I had tested the potentiometers with the resistance set to 4.7K ohms as per the instructions from Spencer (Bluefish) but the lights did not turn off. What we found when we measured the resistance of the potentiometers where the lights did turn off was that we were at 1K ohms or less. The potentiometers we were using are 100K ohm potentiometers with a single turn, so the adjustment was really tight. What I really need is a potentiometer that is rated for 1.5K ohms and has 5 or 10 turns to go from 0 ohms to it's maximum rating. The closest I could find was a 10 turn 2.2K ohm potentiometer. I need one for each color channel, so I ordered 6 of them. I should have them late next week.

I am going to make a setup like what you see in the picture below. The unit in the picture I made years ago to test the MeanWell power supplies. Since the supplies will dim and brighten also based on resistance levels (0-100K ohms) I would use it to make sure the different channels were working correctly.

The unit I make will look very similar and the outputs will plug into my light fixture and I can then adjust the resistance on each color channel to get the lights to turn off.

Now I have a choice of either using the Apex or Bluefish controller. Both have their Pros and Cons. I will most likely go with the Bluefish controller for now since it does have more steps when it comes to ramping the LED's up or down, but it is good to know that the Apex will work with my setup.

A BIG Thanks to Jimmy for driving an hour each way to my place and spending his Saturday afternoon helping solve the issue.
 

Attachments

  • IMG_7901.jpg
    IMG_7901.jpg
    61.9 KB · Views: 1
Dimming to OFF Box Finished

Dimming to OFF Box Finished

So I thought I would give a couple of updates on my DIY LED build.

The dimming to off box is finished. Now this box is needed to help pull the the power levels down in order to allow the LED's to turn off or get as close to off. I used 6 - 0 ohm to 2.2K ohm, 10 turn potentiometers. One for each light channel. The UV and Red LED's are still a bit brighter than expected and they are pulsing a bit, so I need to play with the dimming to off box a little more to see if I can get them to dim a bit more. With the way they are it is not a deal breaker. I can raise the power levels to 3-4% to keep them from pulsing. I was also planning on using a Wemo timer to turn off all the LED power supplies at night anyway, so it will work. In testing the Bluefish controller with the sunrise and sunset features, I am pleased with the results.

Here are the pictures of the box. The left RJ-45 connector plugs into the UV, Blue/Royal Blue and Cool White power supplies. The right RJ-45 connector plugs into the Warm White, Red and Green power supplies.
 

Attachments

  • IMG_8015.jpg
    IMG_8015.jpg
    76.1 KB · Views: 1
  • IMG_8016.jpg
    IMG_8016.jpg
    69.1 KB · Views: 1
  • IMG_8018.jpg
    IMG_8018.jpg
    64.6 KB · Views: 1
  • IMG_8019.jpg
    IMG_8019.jpg
    62.6 KB · Views: 1
LED's/Heatsinks Mounted Over 250 Gallon Tank

LED's/Heatsinks Mounted Over 250 Gallon Tank

So I have the LED's/Heatsinks mounted over the tank. I had 4 cable hanging kits in my box of spare parts. One of them was different vs the others, so I used that one to hang the Center Rear light. It hangs about 5" lower vs the other 3 lights, but I think that will be fine.

I recently watched the BRS/WWC videos showing WWC's 2 - SPS dominate tanks and their 1 mixed reef tank. If you haven't watched them, I think it is worth taking the time to watch them. Now based on their data, they hang their LED lights higher up over the tanks and their maximum PAR levels which are pretty consistent across the tanks is only around 350 PAR. So a really high PAR level as per their data is not required. They are running the Radion Gen4 Pro's over their tanks using a modified AB+ schedule. I was thinking I could run a similar schedule over my tank.

So I decided to hang my lights as high up as possible. The Left, Right and Center Front lights are 19" above the water level and the Center Rear light is 14" above the water, because of the different hanging cable.

I do have a PAR meter, and in measuring the PAR levels at about 70% of full power. I was over 700 PAR just below the water's surface and I was measuring over 600 PAR almost at the middle bottom of the tank. I also was seeing a 500+ PAR pretty consistent across the tank. My wife's comment was the tank was hurting her eyes. With the rocks and sand being white, the amount of reflectance was high. I would imagine that I could get 900+ or even 1000 PAR if I have all the channels set to 100%. I will have to test that out one day.

I still need to add the light shields and diffusers, so I will need to up the power some once they are added. I don't think I will have an issue raising the power levels.

Overall I'm really pleased with how the lights came out. Pictures don't really show how the tank really looks. I do have consistent light throughout the tank, which is what I was shooting for. With the addition of the diffusers, I should get rid of the multicolor shimmer and have a more blended shimmer. I will post additional updates once I get the light shields and diffusers added.

I will have to post the pictures in a couple of extra posts since 5 pictures are the limit per post.
 
LED Lenses

LED Lenses

So here are some images of the LED Lenses. There is a lens holder that snaps into the LED mount and the lens snaps into the lens holder. There are different types of lens available. I am using the 80 degree lenses. Light coming off the LED's is usually around 120 degrees. These lenses tighten the angle to 80 degrees. I find using these lenses I can get a tighter beam. The down side is if you don't have enough LED's then you can get spotting. Adding more LED's and raising them higher up over the tank will eliminate that. The lenses I find will also increase the PAR levels since you are tightening the beam angle.
 

Attachments

  • IMG_8029.jpeg
    IMG_8029.jpeg
    64.9 KB · Views: 1
  • IMG_7995.jpg
    IMG_7995.jpg
    77 KB · Views: 1
  • IMG_7997.jpg
    IMG_7997.jpg
    84.6 KB · Views: 1
  • IMG_7998.jpg
    IMG_7998.jpg
    77.5 KB · Views: 1
Lights Over the Tank

Lights Over the Tank

Here are the lights right after I mounted them. Eventually they will be hidden behind the canopy. The black color you see behind them and the tank is a black rubber paint I put on the drywall. With the cables holding the heatsinks, I could tilt the heatsinks, but I found that leaving them level gives me a more consistent light across the tank.
 

Attachments

  • IMG_8009.jpg
    IMG_8009.jpg
    53.5 KB · Views: 1
  • IMG_8010.jpg
    IMG_8010.jpg
    44.2 KB · Views: 1
  • IMG_8011.jpg
    IMG_8011.jpg
    40.7 KB · Views: 1
  • IMG_8012.jpg
    IMG_8012.jpg
    52.9 KB · Views: 1
  • IMG_8013.jpg
    IMG_8013.jpg
    48.7 KB · Views: 1
LED Lights Are On!

LED Lights Are On!

Finally, it's been a long road to get to this point. The LED's are on. I will need to play with the settings. Once I'm done with some testing, I will be turning the lights off during the tank cycling. I put up the cardboard to represent the canopy so I can see what the tank will look like.

The rocks are just in the tank for now during the cycle. I haven't decided on how much rock I want or the layout. I have about 20lbs of LR I received from KP Aquatics back in April in my nano tank and sump on that tank. That rock will eventually make it's way to the two tanks I am cycling right now. Yes, I have a 130 gallon that is also connected with my 250 in the fish room. They share the same in floor sump pit. I am also debating on whether to get another 20-30lbs of LR from KP Aquatics.

iPhone pictures never seem to capture the "real" look of the tank.

I am working with Jimmy (Sisterlimonpot) he will be building my light shields/rails. The design will allow me to sandwich the diffuser material between to sheets of polycarbonate as part of the light shield. Once those are built I will post the info on them and how they are working over the tank. I need to get the materials and then head over to his place to get them made.
 

Attachments

  • IMG_8020.jpg
    IMG_8020.jpg
    59.5 KB · Views: 1
  • IMG_8021.jpg
    IMG_8021.jpg
    47.1 KB · Views: 1
  • IMG_8024.jpg
    IMG_8024.jpg
    46.9 KB · Views: 1
  • IMG_8025.jpg
    IMG_8025.jpg
    41.5 KB · Views: 1
  • IMG_8027.jpg
    IMG_8027.jpg
    45.8 KB · Views: 1
Back
Top