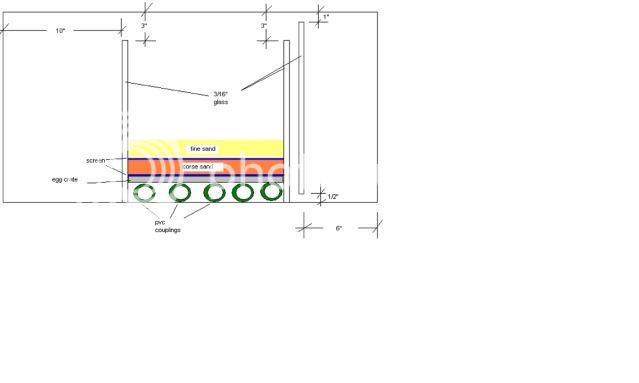
My best advice... think it out first! Get advice and see someone's that's about your size. Think some more. Get some more advice. Think again, and then build. You may think I'm kidding, but I'm not. I feel as if I "got lucky", and I've built the best 29 sump that I could... and it works like a charm! If I had built it on my first round of advice, I know I would've made a mistake.
IMHO you want to look at these key things (where I almost made mistakes):
1) Make sure you can get the darn sump into the stand. I caught this one early, but I was dead-sure I would've fit through the doors... I would've been wrong! I had to go from the top.
2) Get a good calculator (or there's a few volume calculators on the internet... make sure you're on the same page: in inches or centimeters)
3) Calculate how much water will drain if the power goes out... (Here's where I almost made a mistake)... think about your plumbing which will create a gravity drain to as low as the (probably pump) is low. Everyone just thinks about the drain or overflow height, but without power, your pump line will turn into a siphon (unless you have a 1 way valve... but if possible, I wouldn't count on it, so I factored in that as well). This will tell you good info on how high your baffles will be (leaving enough space above to handle what might overflow). If my tank goes I estimated the display to the bottom of the lowest "head" and I know that my sump will pretty much be to the top edge... or if there's a spill it should be less than a gallon.
3) Calculate how much water will be behind the final baffle of your return pump area. Let's say a snail clogs your drain (especially if you have a ball valve... for cleaning or noise reduction/control), will the return pump overflow your display? (This I wasn't even thinking about until the 2nd advice person). This told me how much area I could have in my last chamber of the sump. If a clog happens, the final return pump chamber will run dry (spitting air) before an overflow happens. Very important!
4) Spacing and footprint, need to be taken into account, and then seen. Place all toys (seems like you have a few) in the sump (assuming they have homes. Make sure water levels are to the manufacturers specs. (To make higher baffles (more water)... I had to put my in-sump-skimmer on egg-crate and pipe (legs). (I almost made the mistake of not giving myself about 1/4 of an inch for the pump of the skimmer, had I not actually put the equipment inside (looked right on paper... would've been disaster if not actually laid in... I have carefully laid mine out for more "future" equipment, so I was putting everything in tight... 1/4 of an inch almost killed the entire project)
5) When drawing the lines on the outside of the (glass) tank with a sharpie (or acrylic use a grease pen) so you know exactly where to glue the baffles, draw the line the ENTIRE length of the glass... just having a few "points" is too much room for error... you can now see if the line is straight vertical.
6) Now that you have the lines, put the equipment back in and make sure you have enough room and account for the thickness of the baffle glass.
7) Measure twice.... Cut baffles once. Oh, and my glass baffles... they had edges... I took 120 sandpaper to the edges for about :30s each side just to keep splinters off.
8) Stand your tank on a side end on carpet... get some thick books and stack them up so your baffle glass is right on with your lines. Silicone (I forget which one is okay... the one that does NOT have antibacterial... or just use aquarium silicone).
8.5) Buy more than enough adhesive... keep the receipt... nothing more frustrating than running out... return unused. Oh, and don't forget to "clean" the tank especially where you're going to adhere. 1Tbs Vinegar and 1c water are perfect for this- Not windex!
9) Glue bottom baffles first (if doing more than one at a time... not necessarily recommended, but I think its fine if you're careful)... but do not attempt to adhere the underside. (Did I mention to use "more surface area" books... like phone books... rather than narrow paperback?) You can use an old deck of cards (just throw away cards as you use them to make a "clean edge", or I've seen a popsicle stick, or they also sell a grout squeegee too.
10) After at least 6 hours, turn it over, build the book tower again, and NOW adhere the other side. Wait at least 24 hours.
11) Cut and scrape with a razor to make it pretty...
12) Water test it!
P.S.- (Probably about 6.5 of directions) Think about cleaning in-between the baffles... I've seen some that were really tight together (like 1")... but someone had good advice is 2" apart so a scraper can get in-between easily. After my first cleaning... I'm glad I went with 2.25... so much easier!
Wow... you'd think I know what I'm talking about?!? Anyway... I've learned a lot after I actually did it... there were a lot of "little" things I wouldn't have done/wouldn't have known. I watched like 20 videos on YouTube. Asked owners of a couple of stores. And then I took all the info and held my breath. It wasn't hard... but if I built it right off the bat... I'd probably be selling it right now to build a better one that didn't have mistakes.

