JBJ 28 Gallon Nano Owners Club

I set up my 28g jbj nano cube last month and am still trying to figure out what to do with it. It looks cool with sand and water......
 
anybody have an opinion on a decent HOB skimmer for one of these? I am about to take the stock one out back and drop a quarter stick into it!
 
I took mine out and hung a big aqua clear 110 on the back. I think I am going to try to go skimmer free and compare it to my other setup once its got a reef in it. I will be growing cheato in the aqua clear though. The light off an old cpr refuge sits on top just right.

We will see what happens.....???
 
drd, Do you know the price for the 75h? I did not see any pricing on their web sight. I may not have looked hard enough.....
 
iFisch: The previous ballast was the STOCK JBJ Magnetic ballast which is rated at 150watts as printed on the top of the ballast. I checked with other fellow UK reefkeepers, a few of us have now changed out our mag ballasts for electronic versions because natural gas, electricity and petrol costs much more than it typically costs you guys in the USA so it is a concern here in the UK.

There are many UK reefkeepers with largers sytems that have measured thier twin 250 watt halide running more than 800 watts!!! :crazy1:

All I care is that my new ballast setup runs my phoenix 14K bulb like a true 14K bulb and gives a very very nice blue tinted colour :bounce1: instead of being very white with no blue tint and almost perhaps a tint of yellowness appearing. I am also saving 80watts each hour that I run the halide. :D

ddawson: The full identification for the ballast is: Tridonic PC1 0150 B021
But, it wont help you as I think this ballast is for UK/EU voltage specs only. What you need is a ballast that will physically fit inside the JBJ ballast housing. You then take out all the parts that formed the old manetic ballast and simply insert the new balast inside hte old JBJ ballast housing and wire everything INTERNALLY onto the terminal block as I have done (see my third photo). Obviously Nanotuners wouldnt do a fitting guide that asks one to open up a ballast and mess around with wiring etc which is something a qualified sparky should only attempt, s thats why they have provided the guide which asks you to cut the wires etc.
 
Has anyone here drilled their nano? I want to drill mine on the black section but I don't know if it is tempered glass.

I do know of a local who did, but it said the glass is real thin and hard to work with. He said he wouldn't recommend it, or be paid to do it. So...
 
Thanks for the quick response, I really want to drill it for my fuge because right now it's piped to syphon the water to the fuge and it's a pain.
 
Thanks for the quick response, I really want to drill it for my fuge because right now it's piped to syphon the water to the fuge and it's a pain.


I would locate a used one locally, JUST IN CASE something were to happen. (ie skill, drillbit, patience, etc.). It's not filled with anything is it?
 
The tank is fully stocked right now, I figured on drilling it when I do a water change and the level is down. Also I plan on getting a new drill bit. As far as skill and patience, I drill very expensive plumbing fixtures so IM used to the stress factor that comes with drilling right the first time. And I have a back up tank god forbide.
 
The tank is fully stocked right now, I figured on drilling it when I do a water change and the level is down. Also I plan on getting a new drill bit. As far as skill and patience, I drill very expensive plumbing fixtures so IM used to the stress factor that comes with drilling right the first time. And I have a back up tank god forbide.


I'd say give it a shot. :bounce3:
 
Hey Slvr I was just about to send you a message asking how you like the upgrades you've done because I was planning on getting all of those products soon. Back to your question, I thought about it but I wanted to make it look cleaner and not make it a big ordeal every time I need to lift the hood.
 
Hey Slvr I was just about to send you a message asking how you like the upgrades you've done because I was planning on getting all of those products soon. Back to your question, I thought about it but I wanted to make it look cleaner and not make it a big ordeal every time I need to lift the hood.
might cost you a little more $$, but the Sapphire Aquatics overflow box is a clean solution that shouldn't require any changes to lift the hood:
http://www.youtube.com/watch?v=-xspjNZeQg8
 
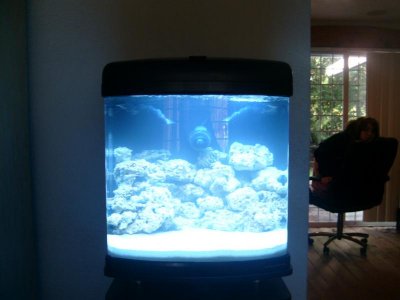
For those with the D&D/JBJ Nanocube HQI 28G, heat issue is quite a common thing. My living room where the tank is located is always a very warm room...good for the cold winters, but not so good due for having a tank with a halide light.

I carried out various tests to see what the average temp the tank runs after the halides have been on for 8 hours.

Typically, the tank will heat up an additional 10'F after the halides have run.

I bought an Azoo twin fan and duly placed this over the rear "sump" area as everyone does. This does help, but, is limited to reducing the effect of the halide heating by about 5-6'F. So the tank still heats up an additional 4-5'F with the halides on. I wanted to improve on this without buying a chiller or adding additional fans.

For I while I pondered with the idea of taking apart the Azoo fans and locating them inside the hood. This will also free up some space at the back...

So, aftertaking apart the Azoo fans, I fixed the fans on either side of the front of the nanocube hood and wired the fans up as well as routing out the wire out one of the side vent:
Fans.jpg


This provides the best placement of the fans for the cooling effect. Note that I have removed the feeding lid. This is required so that fresh air can enter and water vapour can flow out etc...

I then cut a long strip of paper in a very thin slice and placed at the two side vents and notice that air was being forced out the vents! I also tested and found that air was also flowing to the back of the hood past the halide glass and coming out the two cut outs for the hinge mechanism! Wow, pretty good I thought.

Airflow:
Fans2.jpg


My stand is very high and I dont mind having the feeding lid missing. Anyway, how much better is the cooling?

Well, now with this mod, the fans can COOL the tank to a temp LOWER than what the temp was before the halide starts! They are that good now with this mod. I think it is a combination of evaporative cooling, but also, due to having the the airflow, some of the heat from the halide bulb that otherwise would heat up the water is routed out the vents!

I can now keep my tank at a rock steady 79'F ALL the time (they are on a controller). The fans used to run around 14 hours per day if the halides were on for 8 hours as it would run for 8 hours whilst the halides were on, and then another 6 hours to bring the temp back to 79'F from 84'F.

Now the when the halides comes on, the temp goes upto 80'F at which point the controller turns the fans on...they run for about 4 hours and bring the temp down to 79'F and so on... net effect is they run about 6 hours less = a few pennies saved heehee.

No need to raise hood, buy chiller or go open top. The fans are very near the feeding opening and so water vapour does not build up in this area so I am not worried about them rusting etc. Even if they get damaged, I can easily replace them with same size PC fans which are much cheaper than the Azoo fan. If you are worried, replace them evr six months. Should cost you no more than a few £'s for each fan.

Temp stats for this tank in my living room:

1. Heating due to halide = 1.1'F Per Hour
2. Cooling by Azoo fans (before mod) with halide OFF = 0.8'F Per Hour
3. Cooling b Azoo fans (before mod) with halide ON = 0.5'F Per hour
4. Cooling by Azoo FAN MOD with halide ON = 1.3'F Per Hour

So you can easily see how even with the halides on, you can cool the tank. Phew...long write up...
 
new tank

new tank

my tank showed up and I began to mod everything I changed out the pumps with mj 1200 added a koralia 1, put lock line y's and split the out put from the pumps now I want to do the refug to it my question is where do I find the light that go on the back of the tank
 

Attachments

  • Picture 220.jpg
    Picture 220.jpg
    39.3 KB · Views: 3
Back
Top