You are using an out of date browser. It may not display this or other websites correctly.
You should upgrade or use an alternative browser.
You should upgrade or use an alternative browser.
KCFITZ78's 65 Gallon Hexagon Build / Reef Start-Up
- Thread starter KCFITZ78
- Start date
fscmocsaj
New member
Anyways make sure you place those powerheads at good angles, you don't want a cyclone in your tank. I would almost place both 600's right across of each other (shooting directly at each other) And the 400 placed higher up, shooting directly at the top of the water for surface agitation and good gas exchange.
KCFITZ78
Top Prospect
Anyways make sure you place those powerheads at good angles, you don't want a cyclone in your tank. I would almost place both 600's right across of each other (shooting directly at each other) And the 400 placed higher up, shooting directly at the top of the water for surface agitation and good gas exchange.
Yeah... I know to well about the cyclone effect :fun5: I previously had discus in this tank and one must have hit the return for the canister filter hard because the flow was right to one side. I noticed the discus swimming in circles around the perimeter of the tank. I was like... thats different... wait a minute... how does that happen.... ok whatever. :spin3:
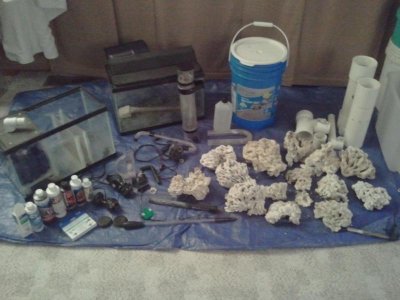
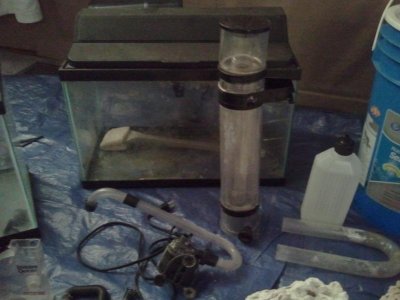
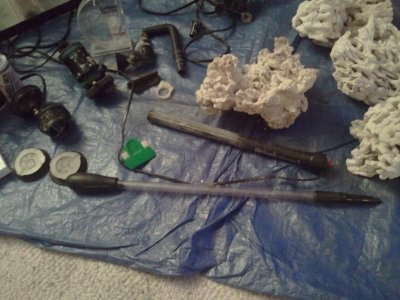
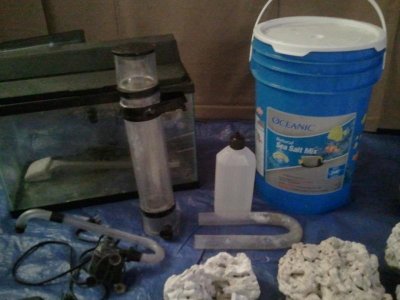
Not to sure how I will setup the current pattern and I need to do some trial and error with the Hydor Koralia circulation pumps. Basicly they will be less than 2ft from each other and flowing 600 GPH (10 GPM)... just might be to much turbulence. I bought them both together for only $25 total, used. The 400 GPH circulation pump came with a used lot of saltwater stuff that I paid $60 for... (1 circulation pump, 10 gal sump, 10 gal tank with hood & light, bio wheel hang on back filter, 200w heater, 50w heater, skimmer, salt, U-tube, 30lb dry rock, 1 cheap power head, hydrometer, coral feeder tube/prong and some chemicals).
Attachments
Last edited:
KCFITZ78
Top Prospect
If that is essential elements by kent get rid of it! It will through off the balance of your tank. If you need to dose later on get 2 part.
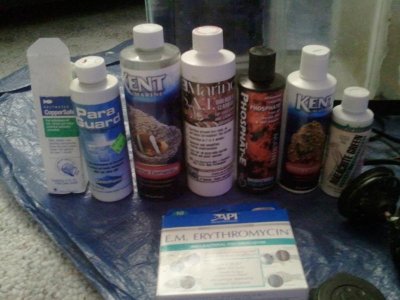
I know nothing about the chemicals and if I did, I didn't know how old they were so I pitched them. Thats why I did not show this pic.
Attachments
KCFITZ78
Top Prospect
I am actually in the process of setting up 2 tanks! I just acquired a mantis shrimp from my LFS who was going to feed it to their massive mantis shrimp. I purchased an Aqueon evolve 8 online for the little bugger. He's already destroyed a snail that hitched hiked on a piece of live rock that I took from my display tank to place In his temporary home.
That mantis tank will be placed in my office. Nice center piece for conversations.
Very cool! :thumbsup:
KCFITZ78
Top Prospect
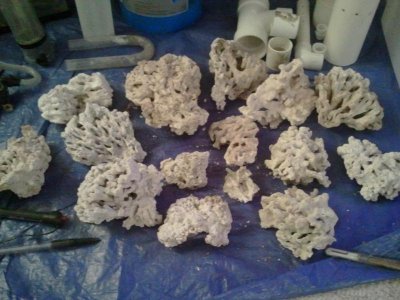
you could crush those rocks cure it, cycle it and use it as rubble in your sump
why?
KCFITZ78
Top Prospect
Live rock and live sand is your main source of filtration. By adding live sand and live rock rubble to your sump you are increasing your biological filtration in turn better water quality, ability to stock more fish, etc.
I plan on using aragonite sand or live sand.... not sure yet which one. I have all my dry rock curing now and after that cycles, I will put it in the main display with 15%-30% Live Rock and then let that cycle in the main display with daily feedings. No fish untill display tank cycles and can hold correct levels. I am a long ways from that right now.
KCFITZ78
Top Prospect
I am still working on the piping design. I moved the "PVC Tee" up to the same height as my "desired water level in the overflow box". With both overflow pipes running, everything looks good and works how it should ") The overflow box looks good while running, when I turn off the pump the tank drains properly to the bottom of overflow box slots, with the pump off the overflow box level stops at the same level of the PVC tee, and the overflow pipes do not suck air.
The overflow box looks good while running, when I turn off the pump the tank drains properly to the bottom of overflow box slots, with the pump off the overflow box level stops at the same level of the PVC tee, and the overflow pipes do not suck air.
Reworked piping (FYI... PVC couplings make for a lot of water noise)

The bottom of the PVC Tee is above the end of the PVC intake in the overflow box. This will slow the flow and stop siphoning when the level in the overflow box reachs the level with the PVC Tee (balanced levels in the overflow box and in the piping). This does not break the siphon.


Here are the water levels with the pump running and both overflows siphoning.


This is the shutdown level in the sump. Sump is off and Display tank draining has stopped.

:angryfire: ............ BUT.... as I went through everything that could go wrong, I checked to see what would happen if one overflow stopped working. I shut off the ball valve on one overflow and with just one running overflow, it will not handle the pump flow in the display tank. I have two overflows for protection in case one gets blocked for whatever reason. I am not sure if I just need to remove pipe from the "PVC loop" as there may be too much friction or what :facepalm:
The overflow box looks good while running, when I turn off the pump the tank drains properly to the bottom of overflow box slots, with the pump off the overflow box level stops at the same level of the PVC tee, and the overflow pipes do not suck air.Reworked piping (FYI... PVC couplings make for a lot of water noise)

The bottom of the PVC Tee is above the end of the PVC intake in the overflow box. This will slow the flow and stop siphoning when the level in the overflow box reachs the level with the PVC Tee (balanced levels in the overflow box and in the piping). This does not break the siphon.


Here are the water levels with the pump running and both overflows siphoning.


This is the shutdown level in the sump. Sump is off and Display tank draining has stopped.

:angryfire: ............ BUT.... as I went through everything that could go wrong, I checked to see what would happen if one overflow stopped working. I shut off the ball valve on one overflow and with just one running overflow, it will not handle the pump flow in the display tank. I have two overflows for protection in case one gets blocked for whatever reason. I am not sure if I just need to remove pipe from the "PVC loop" as there may be too much friction or what :facepalm:

KCFITZ78
Top Prospect
I am now finished with the piping design. I moved the "PVC Tee" down 1/4” , which is a little lower than my "desired water level in the overflow box". I did this to try and gain head pressure. I also changed the design to remove some of the PVC pipe loop so that there would be less friction for the flow. With both overflow pipes running, everything looks good and works how it should now. If one overflow gets clogged/blocked, this design can now support all the flow with only one overflow siphoning. Also I used clear PVC tubing for the rest of the piping run to the sump, as this has less water flow noise than ridged PVC.
Finally got this design to work :thumbsup:
The bottom of the PVC Tee is above the end of the PVC intake in the overflow box. This will slow the flow and stop siphoning when the level in the overflow box reaches the level with the PVC Tee (balanced levels in the overflow box and in the piping). This does not break the siphon. I have 1/4” differential before the overflow sucks air.


Here are the water levels with the pump running and both overflows siphoning.


Here are the water levels with the pump off and both overflows have stoped draining. The bottom of the PVC Tee is above the end of the PVC intake in the overflow box. This will slow the flow and stop siphoning when the level in the overflow box reaches the level with the PVC Tee (balanced levels in the overflow box and in the piping). This does not break the siphon. I have 1/4” differential before the overflow sucks air.


This is the operating level in the sump. Sump pump is on.


Similar threads
- Replies
- 0
- Views
- 166
- Replies
- 0
- Views
- 116
- Replies
- 24
- Views
- 3K
- Replies
- 6
- Views
- 2K