lastlight's 225 reef build

lastlight

Premium Member
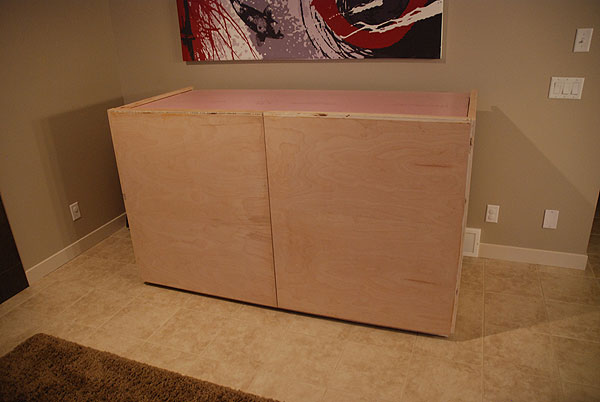
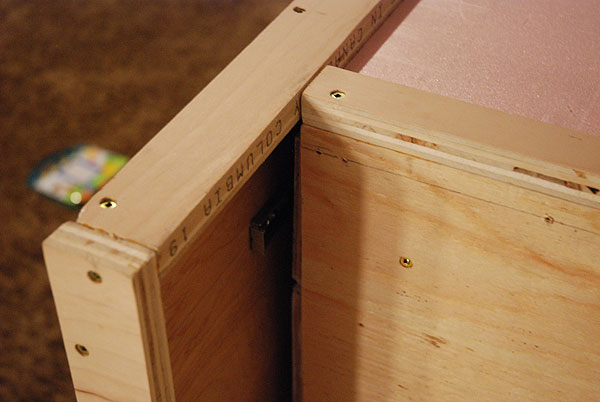
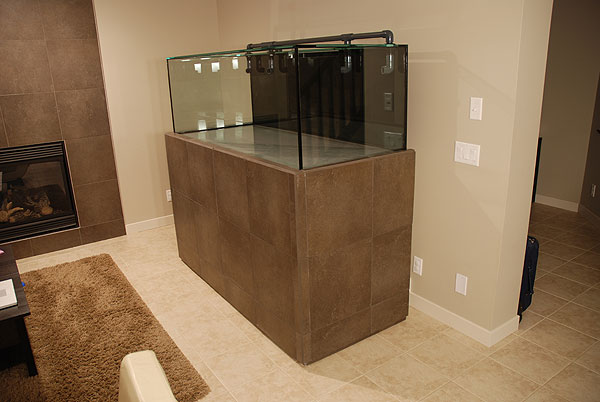
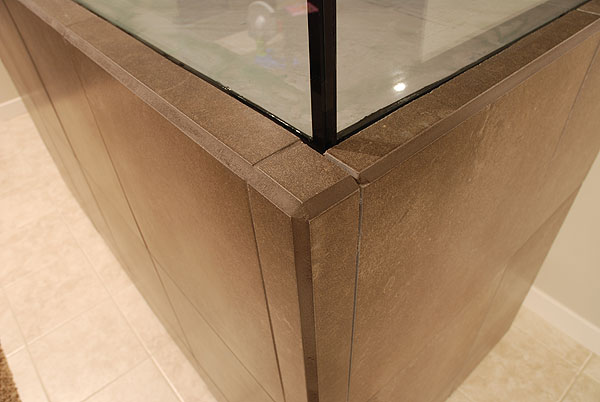
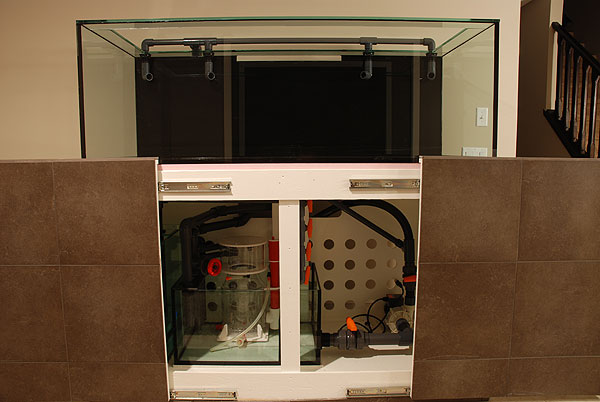
This is a slow build which I started a while ago. Wanted to also document here as well so here I go. This is being copy/pasted so you can see the build in high-speed up until me hanging the light fixture this weekend. Anything after that is real-time...aka SLOW.
 
Last edited:
Sunday was my first bit of progress on the build. I went and picked up a bunch of 2x4's, wood glue, 3/4" plywood for the top and bottom, 5/8" plywood for the sides and a whole schwack of screws.

First step was to build the bottom. I assembled the basic bottom frame and then attached it to the 72x30 3/4" bottom to square it up. Every part of the stand is glued and screwed.

2008-04-27-at-02-46-53.jpg


Next I attached the verticals bits that help align the top frame.


2008-04-27-at-05-00-53.jpg


Here you can see the top frame which is the same as the bottom one.

2008-04-27-at-05-01-08.jpg
 
I temporarily pegged the top frame up before I cut and installed the other vertical 2x4's.

2008-04-27-at-05-50-37.jpg


There are 2 additional 2x4's pinned around each of the corners. These are the ones actually bearing all the weight. No screws are under load. The weight is on the top frame, then onto the 8 2x4's and then onto the bottom framework. The first 4 2x4's merely serve to help me get the load-bearing ones on straight etc. Things are leveled up by adjusting the height of each corner individually on the 4 guide posts. My floor was not totally level so this fixed that nicely.

2008-04-27-at-09-27-21.jpg


2008-04-27-at-09-29-05.jpg


2008-04-27-at-09-29-22.jpg
 
Next I cut and put in the floor of the stand.

2008-04-27-at-10-44-25.jpg


After the floor was in I added extra vertical bracing. Two in the front and one in back. The front ones are spaced as close as possible to allow a 4 foot sump to be pushed in straight.

2008-04-27-at-11-15-46.jpg


The 3/4" top goes on.

2008-04-27-at-11-52-02.jpg


And here's two views of where I finished at tonight. The 5/8" sides have been put on. These prevent the stand from moving from front to back. A front will also be put on to prevent shifting in the other direction. I can run at this thing and it budges not a hair.

2008-04-27-at-13-07-26.jpg


2008-04-27-at-13-08-27.jpg


Well that's a wrap. Not bad for a 'lazy' Sunday afternoon!
 
So I decided to play it safe and moved the support to the middle. I also added a bit of support to both middles. I should still be able to fit a 72 gallon inside I think.

DSC_0001.jpg


DSC_0002.jpg
 
Not a whole lot different as far as my build goes. I've been busy getting the stand ready for the tank which should be in my hands sometime next week.

This is the completed stand with 3 coats of melamine and all cracks and bottom joints sealed with silicone. You can barely see the 1" drain opening in the back right. The idea is that any mishaps drain directly to the basement thus avoiding the wife's wrath. The stand can hold around 2" of water itself. I will perform water changes by opening a valve that feed a 1/2" pipe hovering just over the 1" drain hole.

DSC_0382.jpg


Better look at the swissboard backing. The smaller holes are for letting heat out of the back while keeping my cats out of the stand. The large openings are to allow the drain lines to feed the sump. I imagine I might end up using a few of the vent holes as well for running pipes.

DSC_0383.jpg


A look behind the stand which is set to allow for 6" deep external overflow. I'm not exactly sure what size the overflow will be but I can slide the stand to give me anywhere between 4" and 10" so I have my bases covered.

DSC_0385.jpg
 
Cut my foam for the top and I'm told I'll have the tank this friday! The foam isn't tacked down...what do people typically do? I want to avoid gluing it due to hardened glue spots maybe making pressure points but I'm guessing when we try and get the tank on there they'll move and cause us grief...

Mounted the 3/4" sliding doors tonight. There is a bit of warp in the left side but I'm going to attach a vertical piece of plywood near the inner end of each door to pull the panels a bit flatter. Since the doors don't open 100% this extra plywood brace inside the door won't quite hit the stand's 2x4's. These are 22" sliders and are safe to 100lbs. I did some mods to the safety stops to give me a few extra inches of slide and after comparing the wobble at full extension to the original configuration it is the same. They wobble a touch when fully extended but are rock-solid when fully closed. A 5/8" plywood lip will be attached to the tops and sides of the doors to receive tile as well, then the sides will have an additional layer of 5/8" plywood to flush them to the door ends.

DSC_0394.jpg


DSC_0396.jpg


DSC_0397.jpg
 
I've finished the structure that will receive the tile now. I replaced the plywood doors with maple veneered plywood since it was a much straighter/flatter product. Shame to tile over it as it's a nice board but oh well.

The doors have a lip screwed and glued onto their tops and ends. The sides of the stand were built-out 3/4" to flush with the new door lips and these ends also now have a lip on top so the tile strip for the stand's top is level around the 3 sides.

When the doors are shut the stand is a perfectly flush box so hopefully the tile plays nice and will do the same. The plywood trim for the tile is about 1 cm away from the foam's edge so it won't interfere. I'll tile once the tank is on the stand and filled so I can tile close to the tank's glass with all deflections observable. I had tiled around my 400 gallon before filling it and it bowed so the glass touched tile in a few spots which was scary...

Next I'll be removing the doors and painting their insides.

Here's some pics:

tilebox1.jpg


tilebox2.jpg


tilebox3.jpg


tilebox4.jpg


tilebox5.jpg
 
Well some progress again. This time I have the tank itself to show. I opted for no starphire and looking through it now I honestly think I'll be happier with regular glass. I hear starphire scratches easier, this isn't too green at all and I had weird distortions with my last starphire tank.

I had *removed* build this for me and they did an awesome job. Ground and polished edges, black silicone and eurobraced with a few holes. Getting the tank into the livingroom was pretty easy but to get it up on my high stand (44") we hauled my kitchen table over. We got it on the table first and from there onto the stand. Extra thanks to *removed* for delivering this beast to my door at no extra charge.

tank1.jpg


tank2.jpg


tank3.jpg
 
Since this build is slow I will tend to update for ANY progress lol.

This won't see any electricity for months unfortunately. It's a BK SM250 and the thing oozes quality. The lid is a WEAPON. Hopefully it can skim too =)

bk1.jpg


bk2.jpg


Next item will be a Dart Gold that I have on order. I really hope the new (original) Baldor motors are as quiet as I've heard.
 
A bit more progress to report...

I've got most of my plumbing parts now and I began connecting it all. This pic shows the 4 1" returns into the tank. These will tee to 1.5" flex pvc that will snake behind the tank to the pump. The 90s are slipped on right now because there isn't enough clearance to rotate them all the way around and I don't want to commit at this point. I may use some 45s for the middle two returns to get some flow between my planned rock islands/piles.

returns.jpg


These next two pics show the two tanks I tried my hand at building. I picked up 3/8" glass and went to town and I'm really happy with the result. I water tested successfully and then added the first baffle. I may not add anymore actually. Will do a wet run and see how the bubbles are. Space was at a premium so I don't have a large return area so more baffles might actually increase noise. I'll see...

The tall tank is basically an extra 20 gallons of system volume I will have in circulation. To do a water change I'll shut it's feed valve, flip a switch to run a little eheim that always sits in it...draining it into the basement drain (via the safety drain in the bottom of my stand). Then I'll turn a valve on my mixing tank hidden in my office (other side of the wall, in a cabinet) to top up the tank and open it's feed valve back up to bring it 'online'.

sump1.jpg


sump2.jpg


Once my flex pvc arrives and the baffle cures I'll get these into the stand and hook it all up! Really excited to be able to fire my Dart up. My fuge will be a 15 gallon tank on a shelf inside the stand but I likely won't build it. Just need to plumb everything to make sure a stock 15 (24x12x12) will fit. Cheaper than custom and I'm nearly out of black silicone anyways.
 
I moved the tanks into position. Nearly broke my back and hit my head not once but twice on the opening. Hopefully not an indication of what maintenance is going to be like lol.

I found a new use for an interlocking playmat my wife wasn't using in her dayhome anymore as well! I placed the 'nice' side down since it's disney princesses =)

sump3.jpg


sump4.jpg
 
So the stand is officially completed. I was happy to get this done before the tile we used on the fireplace got discontinued or something! These photos show the finished exterior and the plumbing I did inside. 2 inputs into the sump that wrap behind the skimmer are for the refugium drains. That will be a 20 gallon on a shelf somewhere in there. Thanks for lookin'!

tiled1.jpg


tiled2.jpg


tiled3.jpg


tiled4.jpg


tiled5.jpg


tiled6.jpg
 
Just snapped some shots of the new light after I got it mounted to the ceiling. It is a 12x80w Sfiligoi Stealth T5. Has some nice features such as true individual reflectors per bulb, 6-fan active cooling and a 3-piece glass shield that spans the entire bottom of the fixture. I left it out for the shots.

I'd love to show some pics of it firing bulbs. The hilarious part is that bulbs are not in my budget for a while it seems.

Interesting fact: I was precariously straddling the sink on top of the kitchen island with my camera nearly touching the ceiling for shot number two. Since the top view is my favorite of the light and nobody is ever going to see it I thought it deserved some sweet lovin'.

sfiligoi-stealth-1.jpg


sfiligoi-stealth-2.jpg


sfiligoi-stealth-3.jpg


sfiligoi-stealth-4.jpg


sfiligoi-stealth-5.jpg
 
So far, this whole build has been first rate - but that stand! That is something really special! Love the fact that it matches the fireplace. You've got some definite talent there - and good taste.

Excellent!
 
Back
Top