Long Way To Go 260g Mini Ocean

Nachträglich alles Gute zum Geburtstag.

Also congratulations on the new tank dimensions and as we call over here in the U.S., "The Man Cave" for your reef setup. Cant wait for pics to follow.

Thanks a lot Wayne:)
Yeah they really surprised me with this offer, but now
I see all the advantages and possibilities!

Pictures will come, but in the moment I'm online with my iPhone.
I got technicians from the telecom company to repair some
storm damage we had since yesterday night.

Greetings
Mathias
 
Ok, I just want to clarify that the overflow box itself is still outside the tank. It is a glass box that is siliconed to the outside of the main aquarium. If you have the space do it this way. The only good reason to put an overflow box inside the tank is due to space constraints around the tank.

This is what I mean by an external overflow box. Water flows into it from a cut in the glass. Inside of this box is where you put your durso/Hoffman/Herbie style stand pipes. It doesn't rely on a siphon to bring water into the box.

i-jr2Tts4-L.jpg


See how the glass is "notched" down where the overflow box is? This is to allow water to gravity flow into the box.

external%20weir%20box%20take%20three%20001.jpg


This is the kind I'd avoid. That tube requires a siphon at all times to work.

overflow_box.jpg


Congrats on the build! Take it nice and slow and research everything before it goes into the tank!

Cheers,
Scott


Thanks for the clarification Scott, that was what I tried to describe:)
Yeah this is gonna be a slow built, like my last one was.
I want to do it right and accurate :)

Greetings
Mathias
 
Thanks a lot Wayne:)
Yeah they really surprised me with this offer, but now
I see all the advantages and possibilities!

Pictures will come, but in the moment I'm online with my iPhone.
I got technicians from the telecom company to repair some
storm damage we had since yesterday night.

Greetings
Mathias

Ahhhhhhhh the good ole days in Deutschland.
 
:) wow that has been a long time!
So you are partly German :)

I love Stuttgart the zoo (Wilhelma) has one
of the greatest public aquariums in Germany.
Also two of the best LFS are situated around
Stuttgart:)

Greetings
Mathias
 
:) wow that has been a long time!
So you are partly German :)

I love Stuttgart the zoo (Wilhelma) has one
of the greatest public aquariums in Germany.
Also two of the best LFS are situated around
Stuttgart:)

Greetings
Mathias

No I'm 100% African American. During my two tours there we were required to learn the language so we wouldn't be outcasts. I just know the basics to keep things real.
 
A little update:

Today I got to talk to the aquarium manufacturer and we discussed
how I want my new tank to be.
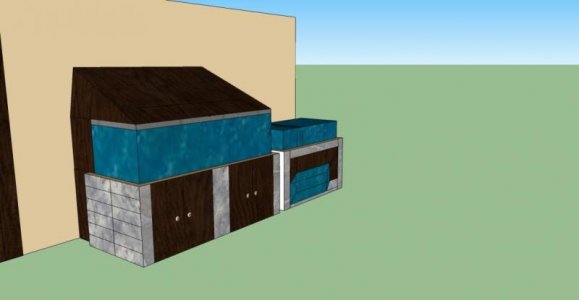
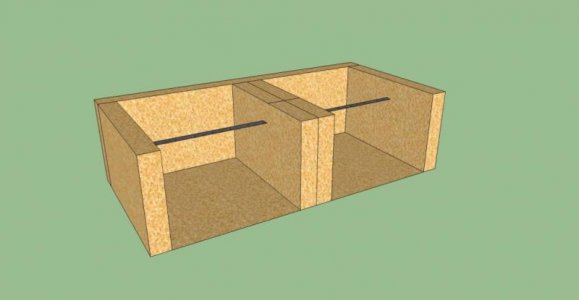
So the display tank will be:
200cm long, 70cm deep and 60 cm high.
The glass will be 10mm thick.
The overflowbox will be in the center of the left side(thanks
again for the tip Scott)
Because of the large amount of tank builds they have to do,
the tank will be ready around march till may.

Also I decided to go with dry rock rather than LR.
It's true that you have some advantages using LR,
but I don't want to have all the bad things and hitchhikers
they might bring.
So I'm gonna seed the dry rock with some of the LR out of
my current tank, of which I know is "clean".
That way at least the biology gets a kickstart.

Also there will be some LR in the fuge.

Today I ordered some livestock which I will collect in my current
tank and then transfer to the new one next year:)
Some awesome SPS frags, made it into my shopping card.

I'll post pics as soon as those horrible phone company technicians
fix the problem with the Internet I got.

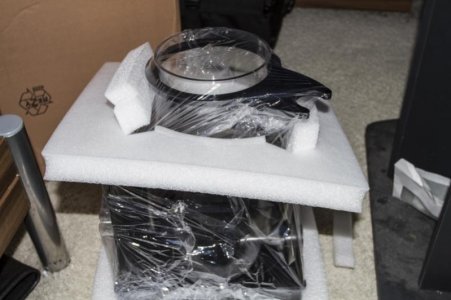
I also found a skimmer that sounds very promising and
seems to fit my needs.

It's this bad boy: http://www.whitecorals.com/shop/de/Technik-und-Zubehoer/Abschaeumer/ZEN-COMPACT-CONE-160.html

Sorry but they don't have an english description for this product.
It is suitable for tanks up to 1200l and made for external and
internal use.
Christmas comes soon:)

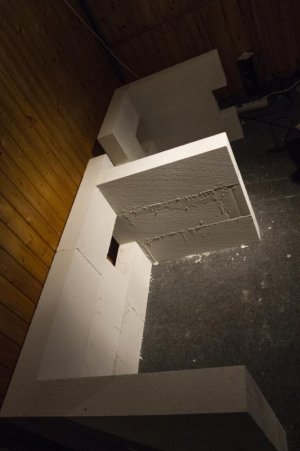
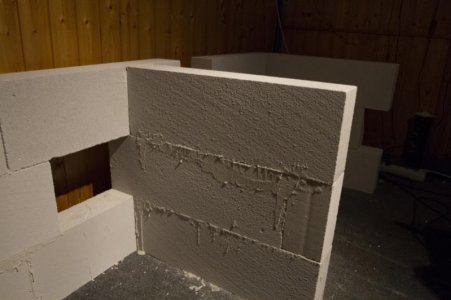
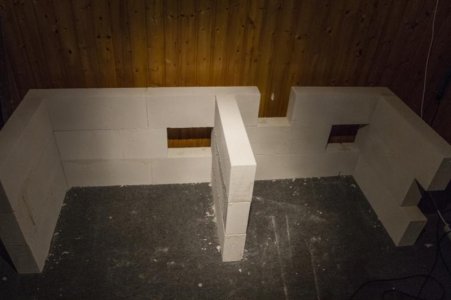
Next Friday there will be a holiday so I asked my godfather
to come over to my house to start work in the basement,
to make it a fish room.
I'm getting excited:)

Do you guys think I will need a dehumidifier in the room to
fight humidity or should I be fine concerning the
amount of evaporating water from the tanks?

Best wishes
Mathias
 
Finally I learned how to post pictures out of SketchUp :dance:

So here are the drawings I linked earlier.
It´s just wood optic, because I was to lazy to change the
filling method.


Yesterday I got the first answers for inquieries I wrote for crafting the
stand.

So basically I have got 3 options now:

1. V4A Stainless Steel ca. 350$
2. Wood ca. 180-220$
3. Soap stone (I hope google translator did that one right) a white lightweighted stone, often used for insulation purposes. ca. 100$

The good thing about steel would be, I can attach new moduls easily whenever I wanted.

Wood needs extra painting, which will be an additional 100$.
Pro I could built it myself.

Soap stone seems the best way for me, because it is cheap, sturdy and
I could built it myself.
It will need some special cement to protect it of any saltwater damage.

What are your guys thougths on this?

Greetings
Mathias
 

Attachments

  • fullshot.jpg
    fullshot.jpg
    20.4 KB · Views: 5
  • standmaindisplay.jpg
    standmaindisplay.jpg
    21.8 KB · Views: 7
  • standsump&fragtank.jpg
    standsump&fragtank.jpg
    20.7 KB · Views: 5
Hello guys,

well it's been a long time since I wrote the last time.
There were some mayor changes in my life, so that reef keeping had to step back for a while. Now everything has settled and I'm back in the game :) The plan to upgrade my reef tank is still there, but due to financial short pass I will lay it on ice.

Good to be back, reading and talking to you all:)
Best wishes
Mathias
 
This week work goes on :)

My best friend and me will go shopping,
to get all the materials needed for the stand.
The top of the stand will be some wooden material, which I don't know the english name of.

Here I got a question: What is the best thing to use, to protect the wood? A boat coating maybe?

Best wishes
Mathias
 
Usually a urethane resin is applied in multiple coats to preserve the look of the wood but to keep the wood protected from the saltwater at the same time. However, there may be off-gassing issues if you are using hot metal halide lighting. Some people coat the inside of the canopy with bright white enamel paint to reflect more light back into the aquarium.

Dave.M
 
Thanks for the info Dave.

I will be using the ATI Hybrid fixture. So there won't be that much heat. I did use MH for some time, but didn't like the light at all.

Is this urethane resin the same stuff, that is used for painting boats?
 
It is used for furniture - polyurethane. I don't know brand names in your country. Popular brands here are Verathane and Minwax.

Dave.M
 
UPDATE: Stand and first piece of equipment

UPDATE: Stand and first piece of equipment

So finally I had enough spare time, to start building my tang stand.

It is made of gas concrete stones, which are 10cm wide and 60cm large.
For the beginning I will paint it white, but later my buddy who is a carpenter will build nice covers =)

In the right side of the stand I will fit my frag tank thats why there is a small gap, to fit in the plumbing. All in all I paid 90€ so far, including the mdf board which I didn´t install so far.

Well stupid me fell over one of the stones yesterday and I broke two of my toes. So after spending the morning in the hospital to get a plaster...
I went to ATI Aquaristic in Hamm to pick up my new skimmer.

It´s an ATI Powercone 250IS. Talked a long time to Oliver the owner and can´t say it to often, he is one of the most knowledgeable guys I ever met in the reefing world. I saw a lot of cool things there and did some decisions concerning my new aquarium.

I will use just dry reefrocks to avoid all kinds of pests and problems. Also ATI offers now NSW in Germany, so I will use a mix up of 30% NSW and 70% artificial saltwater to start. That way I hope to get loads of beneficial bacteria for the start.

But now some pics of the stand and unboxing the skimmer.

Best wishes
Mathias
 

Attachments

  • _MG_8453.jpg
    _MG_8453.jpg
    40.9 KB · Views: 5
  • _MG_8454.jpg
    _MG_8454.jpg
    43.4 KB · Views: 5
  • _MG_8455.jpg
    _MG_8455.jpg
    35 KB · Views: 5
  • _MG_8457.jpg
    _MG_8457.jpg
    34.5 KB · Views: 5
  • _MG_8461.jpg
    _MG_8461.jpg
    52.6 KB · Views: 5
More pics.
 

Attachments

  • _MG_8463.jpg
    _MG_8463.jpg
    62.2 KB · Views: 5
  • _MG_8464.jpg
    _MG_8464.jpg
    49 KB · Views: 7
  • _MG_8465.jpg
    _MG_8465.jpg
    46.8 KB · Views: 5
  • _MG_8466.jpg
    _MG_8466.jpg
    56.1 KB · Views: 6
  • _MG_8467.jpg
    _MG_8467.jpg
    44.8 KB · Views: 5
Back
Top