Matt's (Post) 150G Cube Build Thread

The sump"¦

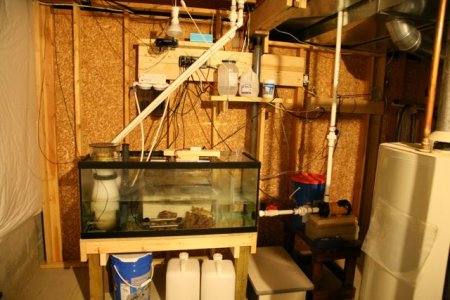
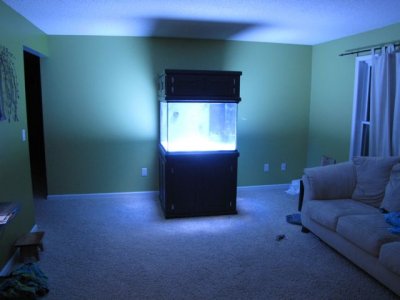
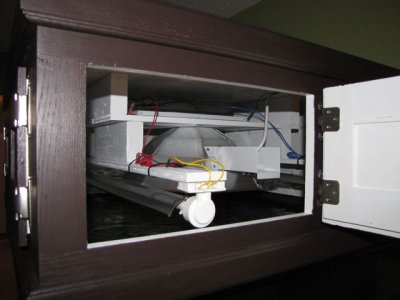
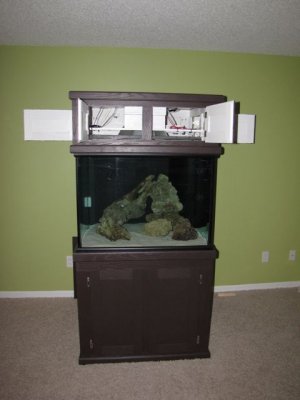
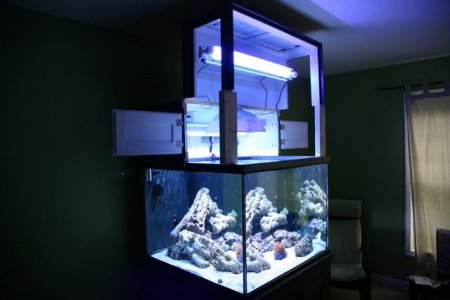
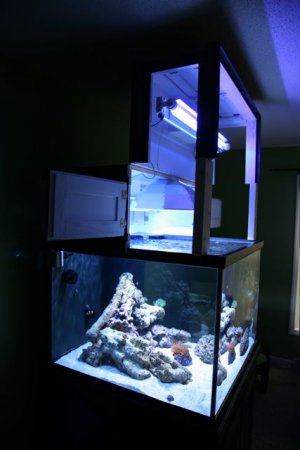
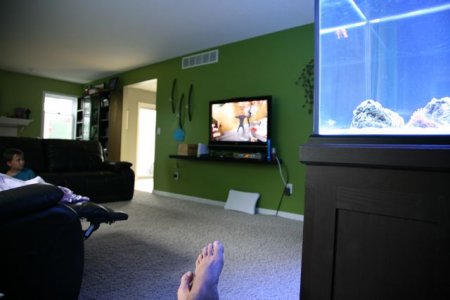
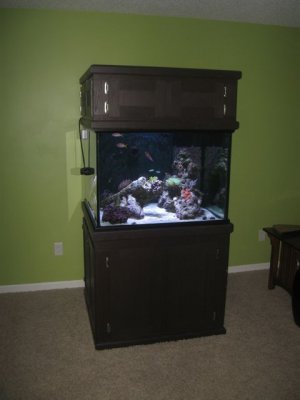
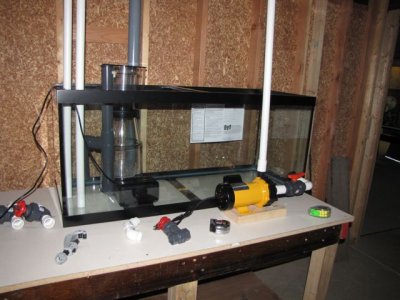
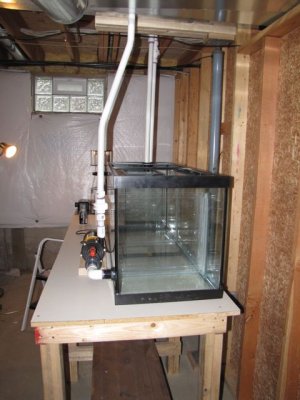
I had a 55 G tank laying around for years, I figured I could save a couple bucks and use it as the sump. I attempted to drill the return myself. I got about half way though.. It was tempered"¦ It was loud.

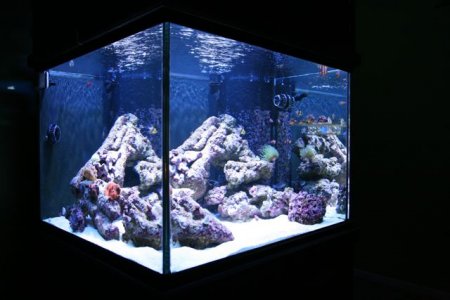
The boys at ARC happened to have a sale running on tanks and I grabbed a 75G and had them drill the return in the shop. (I've since then drilled another hole in it and on a couple other tanks, and strangely enjoy drilling tanks.)

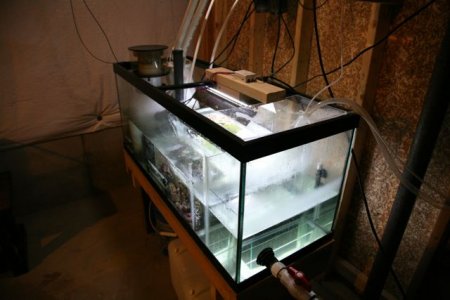
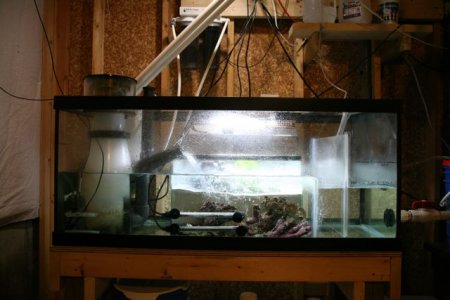
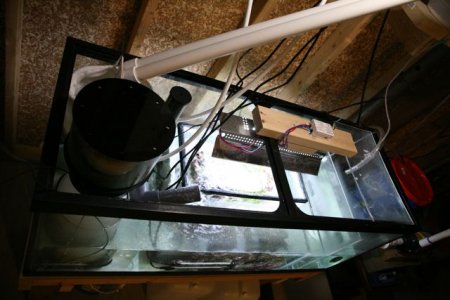
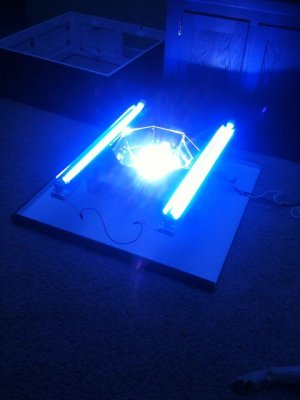
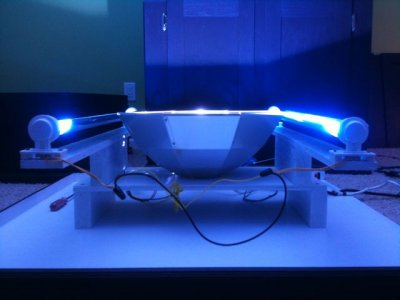
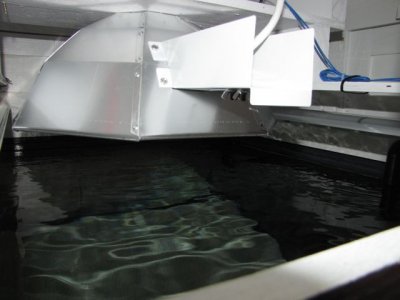
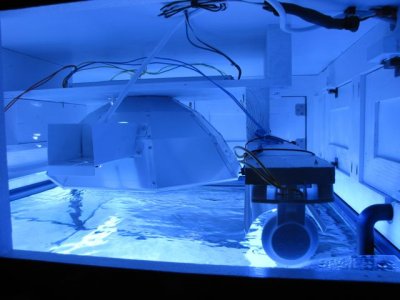
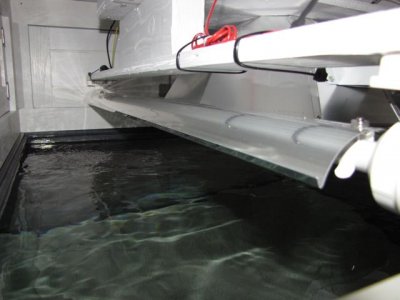
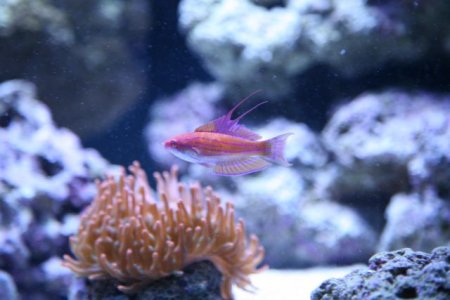
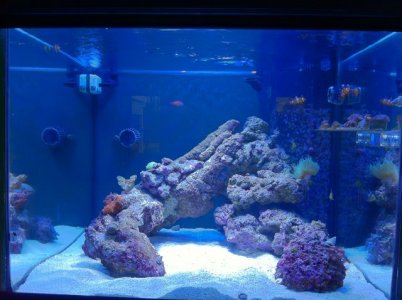
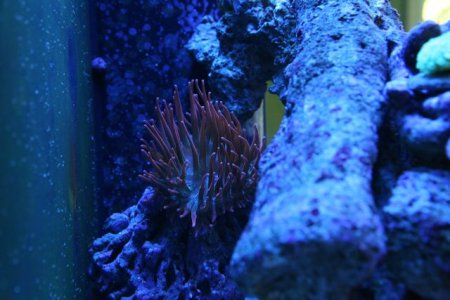
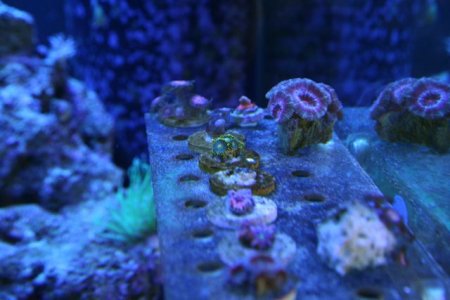
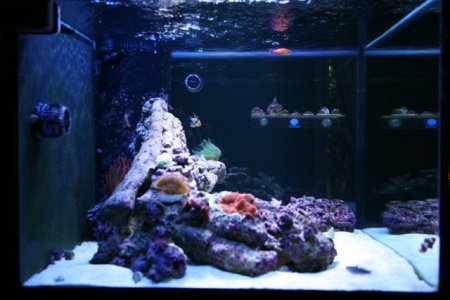
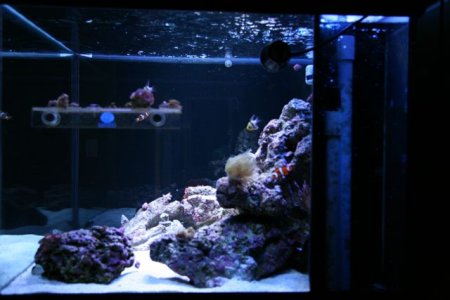
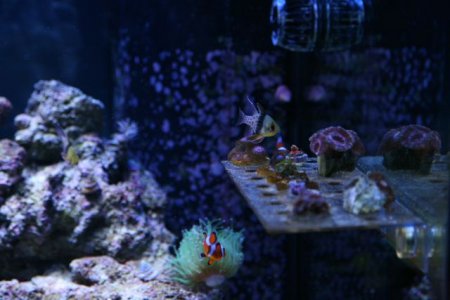
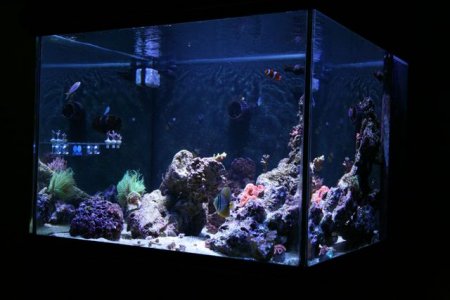
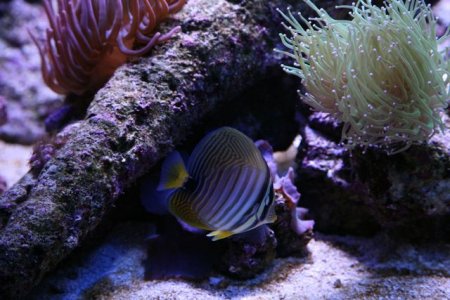
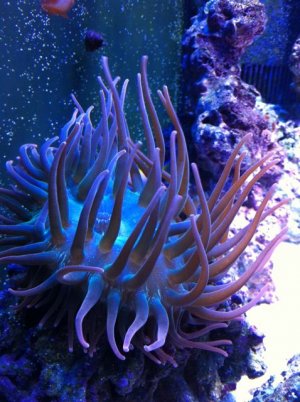
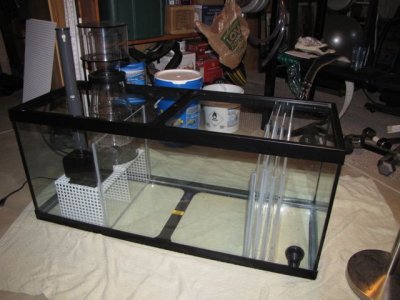
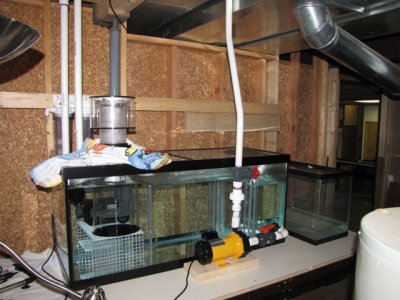
All the different mechanics of this hobby fascinate me as much, sometimes more than the actual coral or fish. The chemistry, flow mechanics, lighting, and especially the refugium. Initially I got a little over zealous and tried to make as big of a fuge in the sump as I could, hence the high baffles. Later that would be the cause of the 1st time I took down the sump and revamped it. It had enough room to take the over flow water from the DT when the return was off, but there wasn't any room for error"¦
 

Attachments

  • IMG_1727.jpg
    IMG_1727.jpg
    59.3 KB · Views: 6
  • IMG_1739.jpg
    IMG_1739.jpg
    53.8 KB · Views: 6
  • IMG_1787.jpg
    IMG_1787.jpg
    54.4 KB · Views: 6
  • IMG_1814.jpg
    IMG_1814.jpg
    64.2 KB · Views: 6
I ended up revamping the sump again because the sand in the fuge and seized up. Probably do to the way I was dosing my Alk and Calc directly into the return section of the sump and not more than a minute in-between. In the new sump, I removed the 90 before the return, lowered the table, moved the table 4 feet, removed 2 baffles, and added a remote 10G DSB/fuge with plenum. DSB's interest me, but I didn't want to add one with out being able to remove it easily if I had to.

Sump hardware:
2010 Reef Octopus NW 200
Neptune Apex Aqua Controller with Temp, pH, EB8
BRS GFO & Carbon reactor
Tsunami AT1 ATO (6G bucket of RO)
X2 250w Titanium Blueline heaters
10G BSD - Plenum - fed by skimmer (props to Gary M)
20LBS of LR in fuge/sump
10/6.5K Sunpaq 32w CF (Cheato)

(Haven't straightened the wiring out since the last revamp)
 

Attachments

  • IMG_2119.jpg
    IMG_2119.jpg
    64.4 KB · Views: 7
  • IMG_2123.jpg
    IMG_2123.jpg
    45.6 KB · Views: 5
  • IMG_2126.jpg
    IMG_2126.jpg
    49.2 KB · Views: 9
  • IMG_2125.jpg
    IMG_2125.jpg
    53 KB · Views: 7
Very nice! Looks like a tight squeeze through the ductwork!

What kind of stain is that on the oak? ...and is that white oak?

It looks like you can take the panels off the stand all the way around? That's awesome!

Red Oak and we like this "Black Bean Soup" pearl finish paint we've been using on a lot of our furniture. I think we got it at Ace...

One big panel on the overflow side, two panels on the back and two doors on the other two sides...

The stand is perfect... The canopy we would have done different in hindsight.
 
I understood the lighting the least of all before upgrading the tank.

We went with:
X1 250w 12k Reef Flux MH (Coralvue ballast)
X1 39w Giesemann Pure Actinic T5
X1 39w Giesemann Actinic T5 (Started out with x2 then changed one to a Pure Actinic.)
X2 IceCap Blue LED Moonlights

Ice Caps were on back order when I took the pictures.
 

Attachments

  • IMG_0883.jpg
    IMG_0883.jpg
    34.3 KB · Views: 6
  • IMG_0886.jpg
    IMG_0886.jpg
    33.1 KB · Views: 7
  • IMG_0902.jpg
    IMG_0902.jpg
    35.6 KB · Views: 6
Then we realized the problem we would have with the canopy.. There was no way to really get into the tank with the small doors, much less with the light fixtures; and it was too heavy for one person to take off and on as often as we need to.

There was also condensation from the evaporation, which was easily fixed with cutting out the two back doors, replacing it with egg crate, and adding two small computer low wattage fans..
 

Attachments

  • IMG_1834.jpg
    IMG_1834.jpg
    38 KB · Views: 7
  • IMG_1836.jpg
    IMG_1836.jpg
    35.8 KB · Views: 5
  • IMG_1845.jpg
    IMG_1845.jpg
    44 KB · Views: 6
  • IMG_1835.jpg
    IMG_1835.jpg
    38.2 KB · Views: 7
Awesome build, I am starting my 150g build pretty soon and will definitely be using this thread for reference. Looking forward to seeing the rest.
 
We added about 80-90lbs already cured live rock and 2 or 3 inches of live sand, and set up our original aqua-scapeing... Since then added another 20 or so in the sump from the old 24g. We liked the aqua-scapeing for a while because it was pretty different from what we've seen in other tanks. But when we started adding coral, it really wasn't conducive for how we (I may be over speaking for my wife on this one :) ) wanted it to fill out. I believe we were trying to get a Dragon Goby out and ended up taking all the rock down.

(There most be a better way to post pics then what I'm doing... Whats the trick?)
 

Attachments

  • IMG_1847.jpg
    IMG_1847.jpg
    54.5 KB · Views: 9
  • IMG_1849.jpg
    IMG_1849.jpg
    53.6 KB · Views: 5
  • IMG_1855.jpg
    IMG_1855.jpg
    44.1 KB · Views: 5
  • IMG_1856.jpg
    IMG_1856.jpg
    49 KB · Views: 7
  • IMG_1862.jpg
    IMG_1862.jpg
    33.9 KB · Views: 6
So we I ended up cutting the canopy in half, almost dead center and putting a hinge on the top. It would have worked perfect if the tank stand was an inch shorter... The top of the canopy just misses clearing the ceiling on its arc swinging back... Drat!
 
Pics would help...
 

Attachments

  • IMG_1862.jpg
    IMG_1862.jpg
    33.9 KB · Views: 7
  • Picture 876.jpg
    Picture 876.jpg
    36.1 KB · Views: 6
  • Picture 877.jpg
    Picture 877.jpg
    36.4 KB · Views: 8
A couple of early pics... Notice the color of the BTA in the first couple pictures compared to the recent pictures...
 

Attachments

  • Picture 678.jpg
    Picture 678.jpg
    29.4 KB · Views: 5
  • Picture 690.jpg
    Picture 690.jpg
    61.4 KB · Views: 6
  • Picture 714.jpg
    Picture 714.jpg
    40.5 KB · Views: 5
Old Aqua-scapeing pics...
 

Attachments

  • IMG_2546.jpg
    IMG_2546.jpg
    59 KB · Views: 7
  • IMG_1676.jpg
    IMG_1676.jpg
    53.7 KB · Views: 5
  • IMG_1679.jpg
    IMG_1679.jpg
    45.8 KB · Views: 6
  • IMG_1720.jpg
    IMG_1720.jpg
    47.5 KB · Views: 6
  • IMG_1721.jpg
    IMG_1721.jpg
    42.7 KB · Views: 7
With the new aqua-scapeing the idea was set up the rock so that that you would have to look at the tank from all 3 angles to see all the coral, really push the cube... It took a while, but I really like the set up now. I'm looking to score a large boulder to place in the back right of the tank...
 

Attachments

  • IMG_2048.jpg
    IMG_2048.jpg
    43.9 KB · Views: 10
  • IMG_1036.jpg
    IMG_1036.jpg
    31.5 KB · Views: 6
  • IMG_1994.jpg
    IMG_1994.jpg
    64.1 KB · Views: 9
  • IMG_2912.jpg
    IMG_2912.jpg
    75.4 KB · Views: 7
  • IMG_2921.jpg
    IMG_2921.jpg
    61.1 KB · Views: 6
More Pics...
 

Attachments

  • IMG_2012.jpg
    IMG_2012.jpg
    44.4 KB · Views: 5
  • IMG_2016.jpg
    IMG_2016.jpg
    52.1 KB · Views: 5
  • IMG_2018.jpg
    IMG_2018.jpg
    49.2 KB · Views: 6
  • IMG_2024.jpg
    IMG_2024.jpg
    33.4 KB · Views: 7
  • IMG_2026.jpg
    IMG_2026.jpg
    27.9 KB · Views: 8
Back
Top